Roman Coin Replica
thingiverse
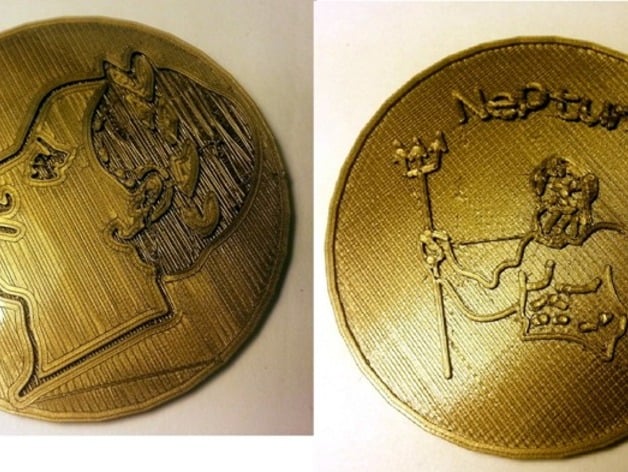
Roman coins usually depicted the Emperor on one side. This helped to spread the Emperor's name and power throughout the empire. The reverse side often showed a God or Goddess. This was a 4th grade project used at the end of a social studies unit on Ancient Rome. Students will engrave their profile on one side of the coin and choose an image for the reverse side. The coins are much larger than real coins. Two sample coins are included here, one is based on a drawing of Julius Caesar, the other shows the profile of the teacher. A simple base that can hold the coin upright is included as an option. Standards NGSS Overview and Background Roman coins usually depicted the Emperor on one side. This helped to spread the Emperor's name and power throughout the empire. The reverse side often showed a God or Goddess. This is a 4th grade project that will be used at the end of a social studies unit on Ancient Rome. Students will engrave their profile on one side of the coin and choose an image for the reverse side. The coins are much larger than real coins. Two sample coins are included here, one is based on a drawing of Julius Caesar, the other shows the profile of the teacher. A simple base that can hold the coin upright is included as an option. Lesson Plan and Activity Introduce the project: Congratulations! You've just become Emperor of Rome. One of your first acts Emperor will be to mint coins to celebrate the start of your reign. One side of the coin will of course show your face in profile. For the reverse side you will choose an image that you think symbolize the qualities of the Roman Empire or the values you will promote during your reign. Take a picture of each student in profile and upload to Google Drive Students will create a Google Drawing and insert their picture Students will trace the outlines of their profile using the Line tools, such as Scribble. Lines should be thicken to a weight of 8 pixels. Shade in dark areas, like hair. Delete the original picture and finish off your drawing. Your drawing should be black and white. You can add a text box with your name or other legend if you want. Download your profile drawing as a JPG and use an online image converter to convert it to SVG Create an image for the reverse side of the coin. You can draw it from scratch or trace an image you find on the Internet. Download the reverse image and convert it to SVG Go to Tinkercad.com and create a new design Import the blank coin Import your drawing, try a size of about 10% Make the profile drawing 1 mm high and make it a hole (negative space). Center it on the coin, it will be engraved on the bottom Make the reverse image 2 mm high and raise it to the top of the coin so it is embedded in the top and sticks out 1 mm above the top surface Download and print your coin Show your coin to your classmates and explain why you chose the image you use Project: Design a Roman Coin Objective Students will create and print a coin in the style of ancient Rome. Audience This project will be used with a 5th grade class that has some experience with 3D printing and the Tinkercad.com Preparation This project will be completed at the end of a social studies unit on ancient Rome. Students will have already completed one 3D printing project so they will have limited experience and skill with Tinkercad. Steps Introduce the project: Congratulations! You've just become Emperor of Rome. One of your first acts Emperor will be to mint coins to celebrate the start of your reign. One side of the coin will of course show your face in profile. For the reverse side you will choose an image that you think symbolize the qualities of the Roman Empire or the values you will promote during your reign. Take a picture of each student in profile and upload to Google Drive Students will create a Google Drawing and insert their picture Students will trace the outlines of their profile using the Line tools, such as Scribble. Lines should be thicken to a weight of 8 pixels. Shade in dark areas, like hair. Delete the original picture and finish off your drawing. Your drawing should be black and white. You can add a text box with your name or other legend if you want. Download your profile drawing as a JPG and use an online image converter to convert it to SVG Create an image for the reverse side of the coin. You can draw it from scratch or trace an image you find on the Internet. Download the reverse image and convert it to SVG Go to Tinkercad.com and create a new design Import the blank coin Import your drawing, try a size of about 10% Make the profile drawing 1 mm high and make it a hole (negative space). Center it on the coin, it will be engraved on the bottom Make the reverse image 2 mm high and raise it to the top of the coin so it is embedded in the top and sticks out 1 mm above the top surface Download and print your coin Show your coin to your classmates and explain why you chose the image you used Results This project was successfully completed with a 4th grade class.
With this file you will be able to print Roman Coin Replica with your 3D printer. Click on the button and save the file on your computer to work, edit or customize your design. You can also find more 3D designs for printers on Roman Coin Replica.