Roofrack TRX4M Bronco
thingiverse
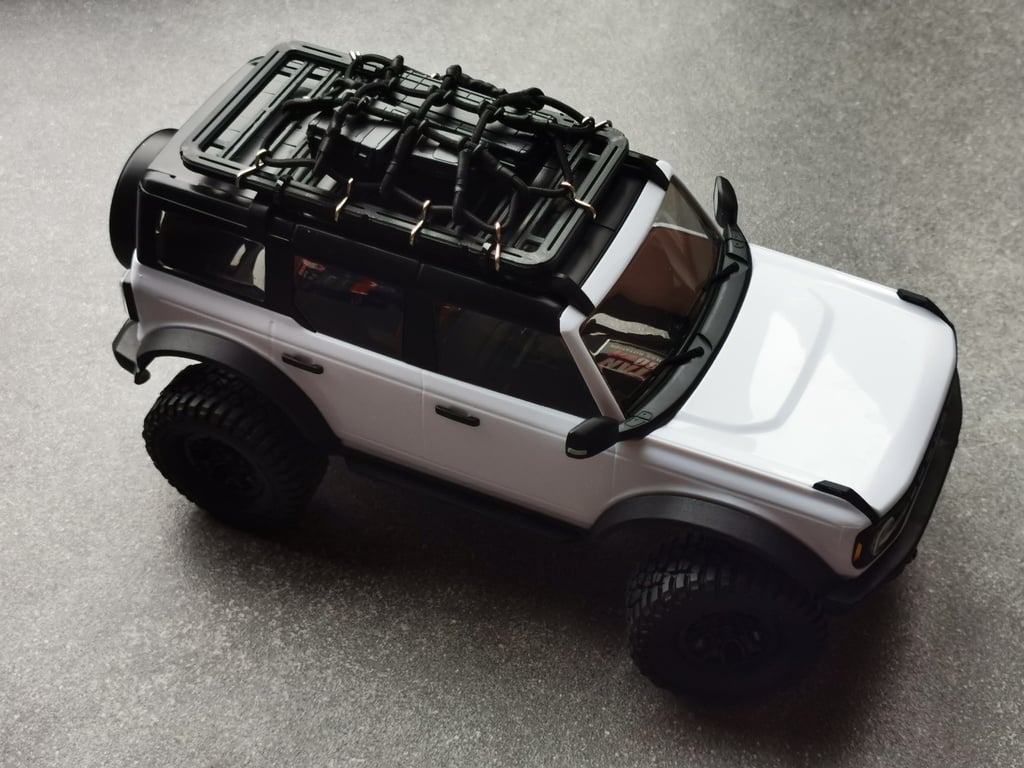
Roofrack for the TRX4M. Use 4 spacers, place the rack on top and use a small ziptie to tie it to the rails on the roof. There are two kinds of spacers. A "detailed" one which has a shape that fits snug over the rails, they stay in place, making the placement of the roofrack easier. It's a bit tricky to print, you should print it sideways as pictured. The "simple" one is just easier to print but won't stay in place, making the placement of the roofrack finicky. You should print this on its back as pictured. Place the zipties on the same spot as the spacers, this way you can tie them tight without bending anything. Try to place the spacers as far away from each other as possible, this makes it less likely to bend under stress when you use a net. You can place the roofrack where you want it, more towards the back or more towards the front.
With this file you will be able to print Roofrack TRX4M Bronco with your 3D printer. Click on the button and save the file on your computer to work, edit or customize your design. You can also find more 3D designs for printers on Roofrack TRX4M Bronco.