Root 3 Anti Sag Slide
thingiverse
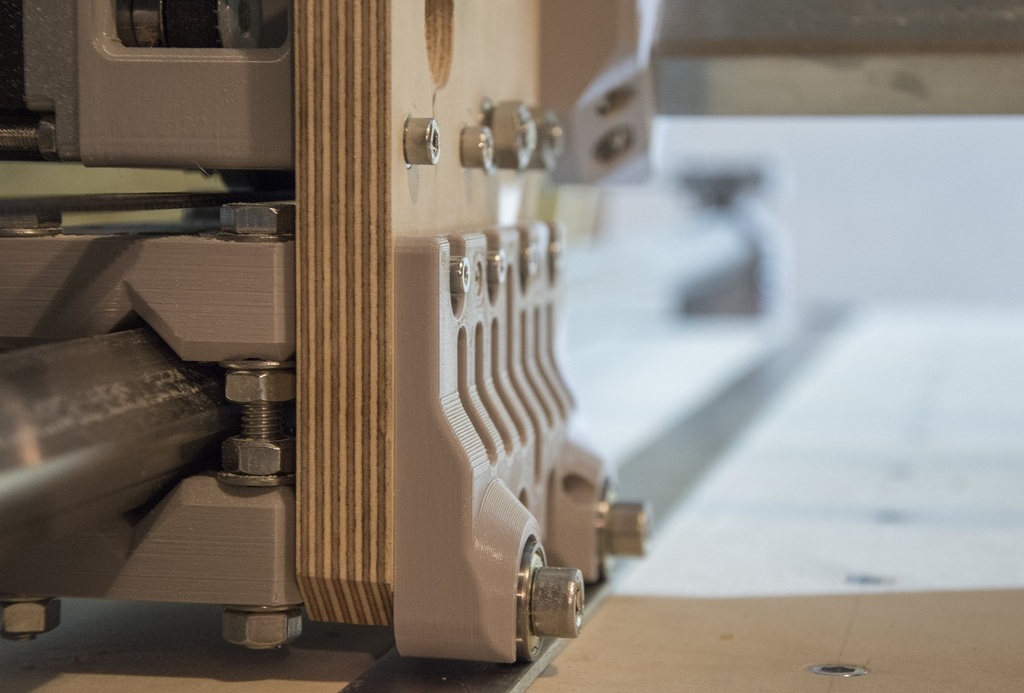
Anti-Sag slides for Root 3 CNC to counter sagging Y-axis. The slides can be mounted to your existing Root 3 without major disassembly required. This mod should allow you to increase the Y-Axis length of your Root 3 without sag occuring when travelling from Y-max to Y-min ----------------------------- UPDATE ----------------------------- There's now four versions for the anti-sag slide available: If you're worried about chips blocking or lifting your slide, you can go for the version with a brush that will keep your rails clean. Also you can wether you want to use threaded inserts or not. However, I highly recommend to use the inserts! Anti-Sag/Brush/No_inserts - Version with brush and plastic thread Anti-Sag/Brush/Threaded_inserts - Version with brush for threaded inserts Anti-Sag/Plain/No_inserts - Version without brush and plastic threads Anti-Sag/Plain/Threaded_inserts - Version without brush for threaded inserts You'll need (Always): - Root 3 CNC machine - 2x Anti sag slide - 4x M4x40 countersunk screws - 4x M8x20 hex or allen screw - 8x M8 washer - 8x 3x20 wood screws - 4x 608 bearing - 12x M4 x 40 allen screws (you should already have them) - 12x M4 washers (you should already have them) - 2x 30x3mm flat iron (adjust length to your machine constraints; different bar dimensions should be possible as well) You'll need (optional): - 1x Flexible brush strip with a width of ~5mm and a length of ~250mm (brush length: 70mm) for all brush versions - 4x M8 threaded inserts (ruthex or similar) for all versions with threaded inserts - 3x M3 threaded inserts (ruthex or similar) for versions with brush and threaded inserts - 1x M3 x 16 allen screw for all brush versions - 2x M3 x 8 allen screw for all brush versions These are the required steps to mount the slide: 1.) Assemble the slides with M8 threaded inserts using a soldering iron 2.) Assemble the slide using M8x20 screws and 608 bearings. Don't forget to use washers. 3.) Replace the lower left and right allen screws on the wooden Y-axis gantry with M4x40 countersunk screws (see image) 4.) Remove the remaining allen screws 4.1.) (Only for Brush versions) Assemble the three M3 threaded inserts in your slide 4.2.) Screw the brush holder to your slide using 2x M3 x 8 and 1x M3 x 16 4.3.) Glue the brush inside the brush mount 4.4.) Precisely (!!) cut your brush to length 5.) Mount the slide to the Y-axis gantry using M4x40 allen screws and washers. Don't tighten the screws yet 6.) Mount flat irons on your machine base; align them carefully with your slides 7.) Move the Y-gantry all the way to the front/back of your machine 8.) Press the bearings of the slide on your flat iron rails, then tighten the screws 9.) Check the position of your slide by moving the Y-gantry all the way to the back and front of the machine. The bearings should stay on the rails at all times 10.) If your slide is positioned correctly, use 3x20 (four per slide) wood screws to fixate it Feel free to use the step file to change the slide according to your needs or contact me if you need minor changes for your machine. Feedback if this solution works for you and recommendations are highly appreciated. ----------------------------- ATTENTION ----------------------------- The version with brushes has not been tested! I designed it per request and I'm not using it myself. No guarantees, that this solution works. If you print it, please give Feedback to me and the community (by commenting or posting a make) if the brush works. ----------------------------- ATTENTION -----------------------------
With this file you will be able to print Root 3 Anti Sag Slide with your 3D printer. Click on the button and save the file on your computer to work, edit or customize your design. You can also find more 3D designs for printers on Root 3 Anti Sag Slide.