Root 3 CNC Improvements and Additions
thingiverse
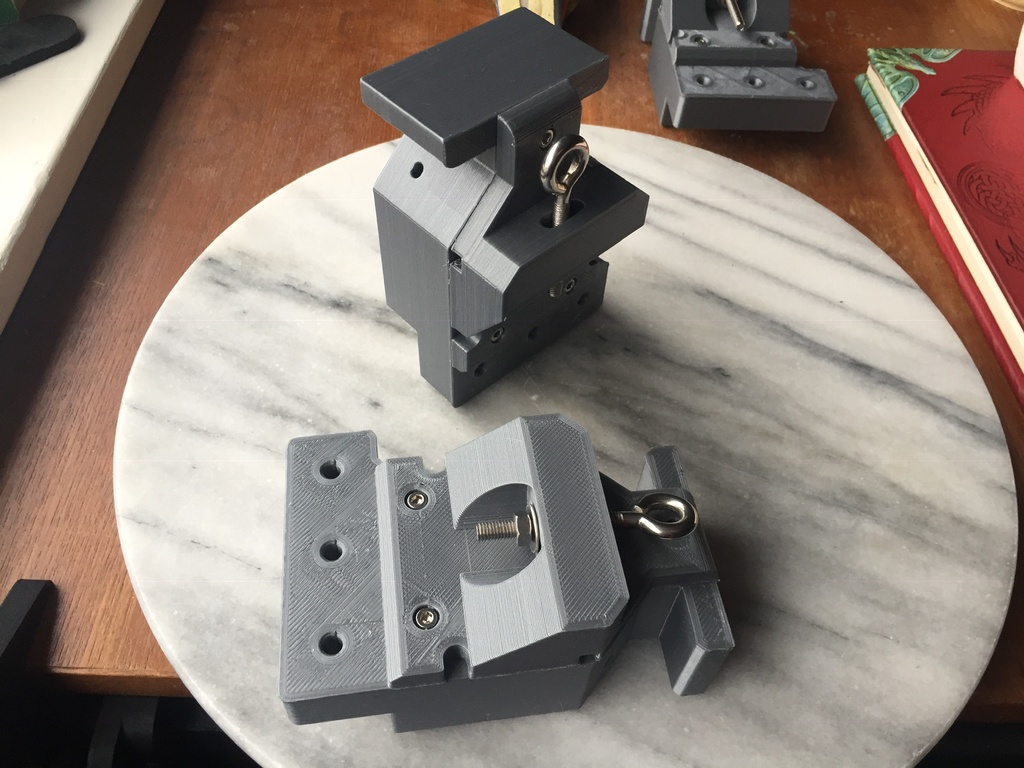
This is a collection of things I've done to my Root 3 CNC to make it more bearable to assemble and use. Because honestly, I had a love-hate relationship with this thing from the start. The basic design theory was great (that's why I chose it) but there were so many suboptimal parts and poor design choices, like using carriage bolts but not having enough room for the heads so they dug into the plywood. And the BOM was a nightmare. As such, this collection should be taken as a WIP appendix of parts and improvements that you may find useful. **THE MOST IMPORTANT: Improved BOM** Now, it's not perfect because I've been working on this thing on and off for over a year when I've had the chance. In fact, I completely neglected to document the Z assembly. And it's not a replacement for the original BOM, but it should help make things a bit clearer. I've broken down the parts needed into sections relating to the axes they belong to. Where necessary, I've pointed out which bolts go through the machined plywood panels, and how thick the plywood panels are so you can adjust the lengths if you use a different thickness (the original BOM didn't do this and was a pain to work with). I've also tried to help specify extra details that I would have found useful when I assembled it. **Improved Spindle Mount:** After a while of using it, I came across a few issues: - The mount had started to break at the stress point where the clamping screws are. - The holes for the leadscrew nut bolts weren't actually doing anything useful and the bolts would start to work their way loose and fall out, breaking a few of my bits. - There were clearly holes for mounting endstops on it, but then if you looked at the images, they're actually mounted on the base plate. These are stress raisers. - Actually using two of these mounts meant my spindle couldn't move down far enough to cut anything so I needed up using just one. So what I've done is modify it to have a much beefier design where necessary, remove unused holes and I've made the leadscrew nut fitting much better. You can put screws right through (though it's a nice tight fit) and add nuts on the other side. This does mean you can't use an M8 bolt and threaded rod, but you can actually get those flanged nuts for M8 rods too. **Other Parts:** These exist because of a few reasons: - The original belt clamps started to degrade on my machine, quite quickly. - The X belt got quite loose quite quickly. I don't like that. - I think the way the rail runners clamp onto the plywood sides is poor and could be vastly improved, which would make it less fiddly and the carriage bolt heads wouldn't dig into the plywood. So what I've done is make a simple set of printable upgrades for proper belt tensioners, which use M5 eyelet screws as the belt tensioning device. The screws go through the mounts (print off Y Rail Mount A and B twice and bolt C onto the back of each) and the belt is zip tied to this. My tests show good hold and adjustability. There are also some for the X rail but they involve a new design for the plywood side panel, which I've attached as a STEP file. This allows the belt to run through the part instead of the awkward 90º turn that's quite hard to clamp properly. You'll also notice at the bottom of the panel there are just 4 M8 holes in the corners. These are so that you can mount the runner halves directly onto it. So the carriage bolts go through the plywood sides, through runner half A, then a nut, then another nut, runner half B and to the final two nuts. This assembly then slides onto the rails. **PLEASE NOTE:** The Y rail mounts in this collection have also been modified so that they bolt onto an aluminum frame instead. This was part of an ongoing upgrade plan I had, but if you really want it to bolt to a sheet of material, I can work that out too. I do think an aluminum base would be a good improvement though. **Please let me know if you have any issues and if you want to contribute, I'd appreciate it.**
With this file you will be able to print Root 3 CNC Improvements and Additions with your 3D printer. Click on the button and save the file on your computer to work, edit or customize your design. You can also find more 3D designs for printers on Root 3 CNC Improvements and Additions.