Rope making machine
thingiverse
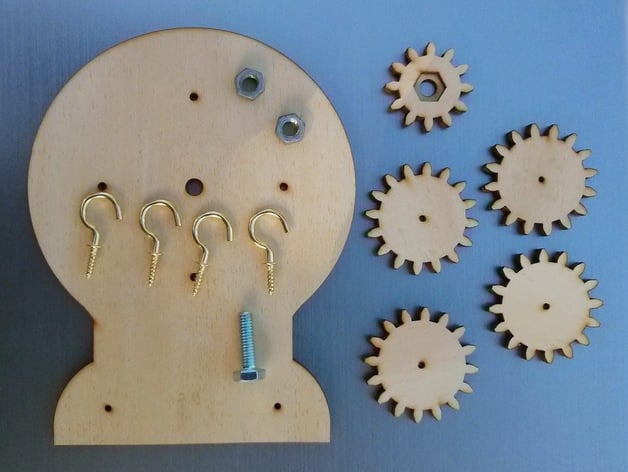
A laser cut rope/string making machine. It is designed to attach onto a drill to make fine twisted ropes or string. In addition to the laser cut parts you will need 4 screw in hooks, an M6 bolt and two nuts from the hardware store. Instructions Cut the laser cut parts out of 3mm plywood or bamboo. Glue the 8 large gear pieces together in pairs, one with a hole one without, to make the 4 outer gears. Glue the two smaller gear pieces together to make the central gear. Glue the two frame pieces together (this is just to make thicker and give greater strength). Push a a screw in hook through each of the 4 holes in the base and screw into the hole in the outer gear on the otherside. Push the bolt through the central hole (from the side with the hooks on it). Place the central gear over the bolt and do up the nuts. The first nut should pull down into the inset in the central gear so that when the nut is turned the gear also turns. Screw the second nut down over the first - this provides something for your drill to grip on. Get a nut/wrench attachment for you powerdrill. Place it over the central gear and gently run it until the gears turn smoothly. Now your machine is ready to make rope. See for example: http://www.youtube.com/watch?v=NUHN3q6k24s
With this file you will be able to print Rope making machine with your 3D printer. Click on the button and save the file on your computer to work, edit or customize your design. You can also find more 3D designs for printers on Rope making machine.