Rostock Max Dual Extruder Mount
thingiverse
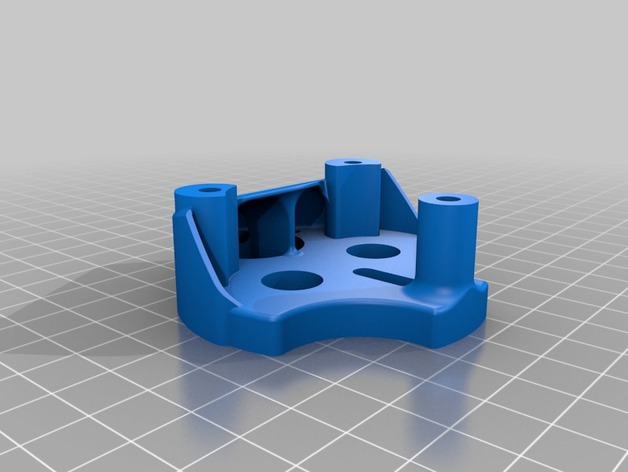
Measurements have been slightly modified to compensate shrinking of ABS after printing. Nozzle delta is X+/- 14mm relative to X0/Y0 of original extruder mounting plate. Version "V2_mod" aka "old Skully" has X +/- 13mm and greater notches for the heater- and thermistor wires. Version "V3" aka "crimson hun" has also X +/- 13mm. It includes a cooling solution for the PEEK. I tried it successfully with one single 25x20mm high-power fan. With 25x10mm models, you should use two of them. This version is quiet good to print. I printet it with a .35mm nozzle at .15mm layer height using black ABS. "V3" requires the "Spacer_New_V3". Edit: .STL File updated - Slic3r had some issues with the old version. Version "V4" aka "why-didn't-I-think-about-this-earlier" has the spacers included. This is the Version I actually use here (with two 25x20mm fans). Note: I had to make some changes to the Repetier FW (0.83) in order to use one fan output (FAN2) for cooling the PEEKs, wether heater 1 or heater 2 (or both) is in use. One issue that will occure is the "swiveling" of the effector plate while moving from the center of the bed to the outer areas. This is no problem with one extruder (centric mounted). With two extruders and the relative delta-x, it is a real challange to get rid of the ever changing Z-alingnment. I minimized this effect by tweaking the "END_EFFECTOR_HORIZONTAL_OFFSET" definition in Repetier's configuration. Just play around with it and watch what happens. Maybe a "V5" with a 40mm fan mount/duct for cooling PLA prints will follow soon. :-) Instructions I recommend printing with ABS. I print at .15 layer height and with reduced speed. After the printing you may have to sand the spacers a little bit in order to make them the same height. The amount of sanding depends much on your printer's calibration and on the material you have used. The holes for the Extruders should be tight fitting. If there is play, wrap aluminIum foil arround the extruders. Sand the main hole of the effector plate in order to gain some space between the extruder hot end and the effector material. Else you may just burn it away. About 4 mm of space is ok. I used a 10 mm hobbing cutter and a dremel. Plug in the hot ends in the mount you had carefully sanded before. Adjust the vertical alignment with shims of aliminium foil. Then put the ends out again. Now assemble the fans to the mount. I did this using M2 x 30 mm screws and self-locking nuts. Screw the mount to the effector, dont tighten the srcrews at this time, then (!) put in the hot ends and don't forget your shims. You see, there's not much space for getting the hot ends in. The cables of the thermistors and the heating cartridges should be fixed with zip ties on the elongated hole in the middle. Same for the wires of the fan(s). Another method for vertical aligning the hot ends is using heat resistant rubber-made edge protectors. Put them between the hot end stop-plate and the mount. The squeeze together when you tighten the screws of the hot ends, yet they are stiff enough to provide a stable hold. If you have found a better way (and surely there are better ways :-) ) for installing the SmCNC hot ends, let me know.
With this file you will be able to print Rostock Max Dual Extruder Mount with your 3D printer. Click on the button and save the file on your computer to work, edit or customize your design. You can also find more 3D designs for printers on Rostock Max Dual Extruder Mount.