Rostock MAX v2 Piezo Probe Effector
thingiverse
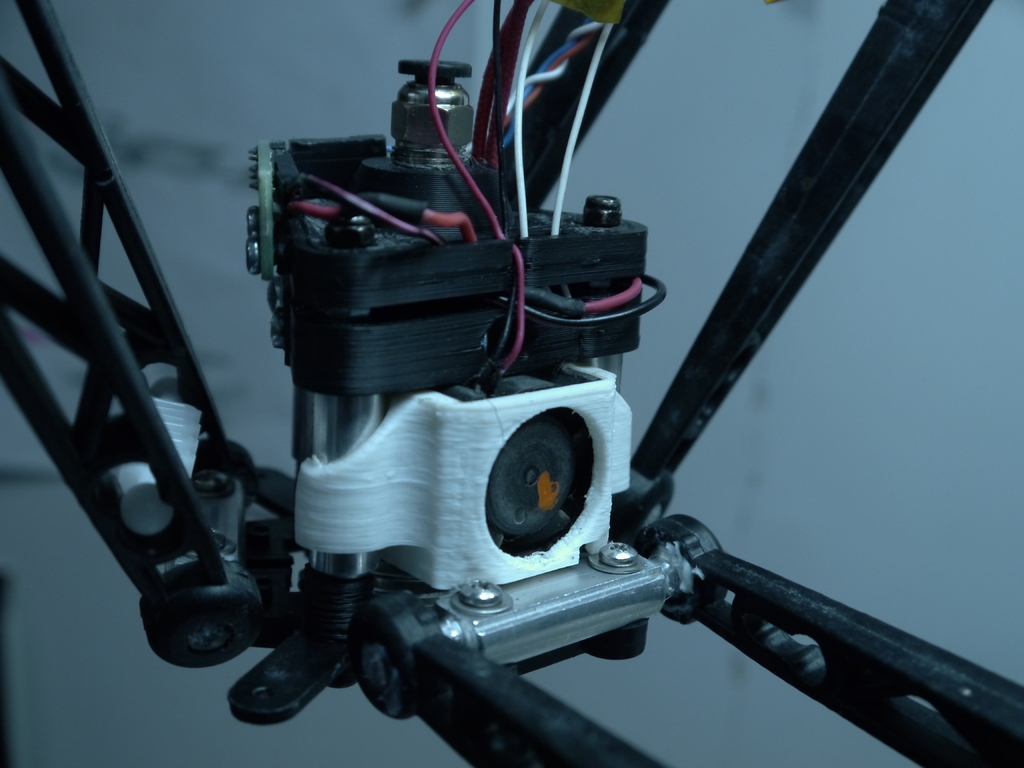
I wanted to bring the Catskill Maker Syndicate's Rostock Max v2 out of the stone-age. I was already adjusting the firmware for level with escher3d.com I went looking for the cheapest and hardest way to DIY implement dc42's least squares calibration algorithm. This is what I came up with, and learned how to use Fusion 360 along the way. This should work with most iterations of the Rostock Max v1/v2, including the lasercut trucks and u-joint arms but I have had no testers. instructions.pdf is provided for help with assembly, bill of materials, all the foibles and pitfalls I noticed are contained therein. For ease here is the BOM: • Piezo20 PCB v 1.4 • e3d v6 genuine or clone • plenty of 25mm piezo buzzers • spade drill bit with ~4mm start section • Dupont 2.54mm crimps • 3 meters of wire (spare ethernet cable) • 20cm of 16 gauge enameled magnet winding wire • new longer bowden tube (probably) • Piezo effector printed parts ◦ Main body ◦ Top body ◦ Piezo shim ◦ Groovemount pusher ◦ 3 x printed standoff • 3 x 60mm M3 screws (or 60mm #6-32) • 2 x 35mm M3 pan head/socket head screws • 2 x 8mm M3 pan head screws • 5 x M3 Nut • 3 x M3 Nylock Nut ( or very slim 3 x #6-32 ) • #30 drill bit • Letter P drill bit (may vary) • 2 punches (green handles) • 7/16ths Nut driver/socket (may vary) • SeeMeCNC aluminum standoffs • SeeMeCNC effector and ball joints • Modified SeeMeCNC fan shroud (repables e3d)
With this file you will be able to print Rostock MAX v2 Piezo Probe Effector with your 3D printer. Click on the button and save the file on your computer to work, edit or customize your design. You can also find more 3D designs for printers on Rostock MAX v2 Piezo Probe Effector.