Rotary Display Table - Variable Speed
thingiverse
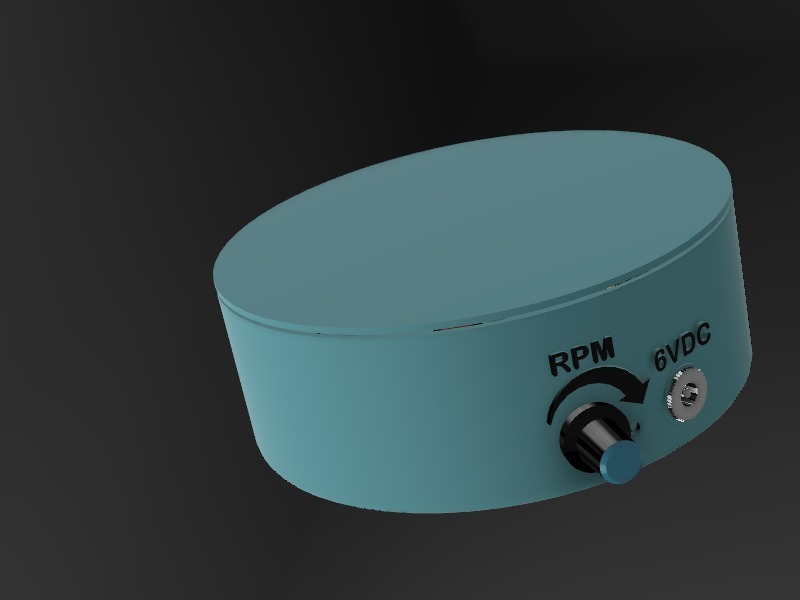
Variable-speed, motorized display table or photography turntable - a work in progress. The smoothness is variable and not as quiet as hoped, so it remains unfinished. Parts: [6V N20 gearhead motor - 30RPM as-built, 15RPM recommended](https://www.aliexpress.com/item/10RPM-15RPM-20RPM-30RPM-1-1000-DC-6V-Gear-Motor-High-Torque-Electric-Gear-Box-Motor/32900923481.html?spm=2114.search0204.3.122.50d1bd56tWrdhX&ws_ab_test=searchweb0_0,searchweb201602_3_10065_10068_10059_10884_5726811_10887_10696_100031_10084_10083_10103_10618_5726911_10307,searchweb201603_60,ppcSwitch_0_ppcChannel&algo_expid=d9467555-978d-4c54-91e8-55cf7ff20591-17&algo_pvid=d9467555-978d-4c54-91e8-55cf7ff20591&priceBeautifyAB=0) [DC motor speed controller board](https://www.aliexpress.com/item/4-5-35V-90W-PWM-DC-Motor-Speed-Controller-Control-Regulator-Module-5A-Switch-Function-LED/32887666027.html?spm=a2g0s.9042311.0.0.27424c4dEw5kw9) [DC jack DC099](https://www.aliexpress.com/item/5PCS-LOT-DC099-5-5-x-2-1mm-5-5-x-2-5mm-DC-Power-Jack/32847955712.html?spm=a2g0s.9042311.0.0.7a034c4dFm5EvH) 8 O-rings - 12MM OD / 7mm ID / 2.5mm ring thickness (bought locally) Build Instructions: Print all the parts: one base, one top, one pinion, and 16 roller halves. The table top is printed upside-down, so glass or PEI sticker may be needed for a presentable finish (?). I'm not using the "pinion support" part; it shouldn't be necessary. Check your Z-offset before printing the rollers ... the finished rollers need to be 4mm thick. Assemble the rollers by inserting an O-ring and gluing the roller halves together. It's essential that they are aligned well. Pop the rollers into the finger bracket deals and check that they spin freely. Solder wires to the DC jack and gearhead motor. Insert the gearhead motor and push the wires down to the bottom of the slot. Install M3x10 screw to hold the motor firmly. Install the DC jack nut. Install the wires into the terminal block of the motor driver board. Install the motor driver board with M2x5 screws (bosses should be effectively self-tapping). Install the pinion and table-top. https://youtu.be/pljGm35hbMQ
With this file you will be able to print Rotary Display Table - Variable Speed with your 3D printer. Click on the button and save the file on your computer to work, edit or customize your design. You can also find more 3D designs for printers on Rotary Display Table - Variable Speed.