Round Corner Templates in a Full Range of Radius Sizes
prusaprinters
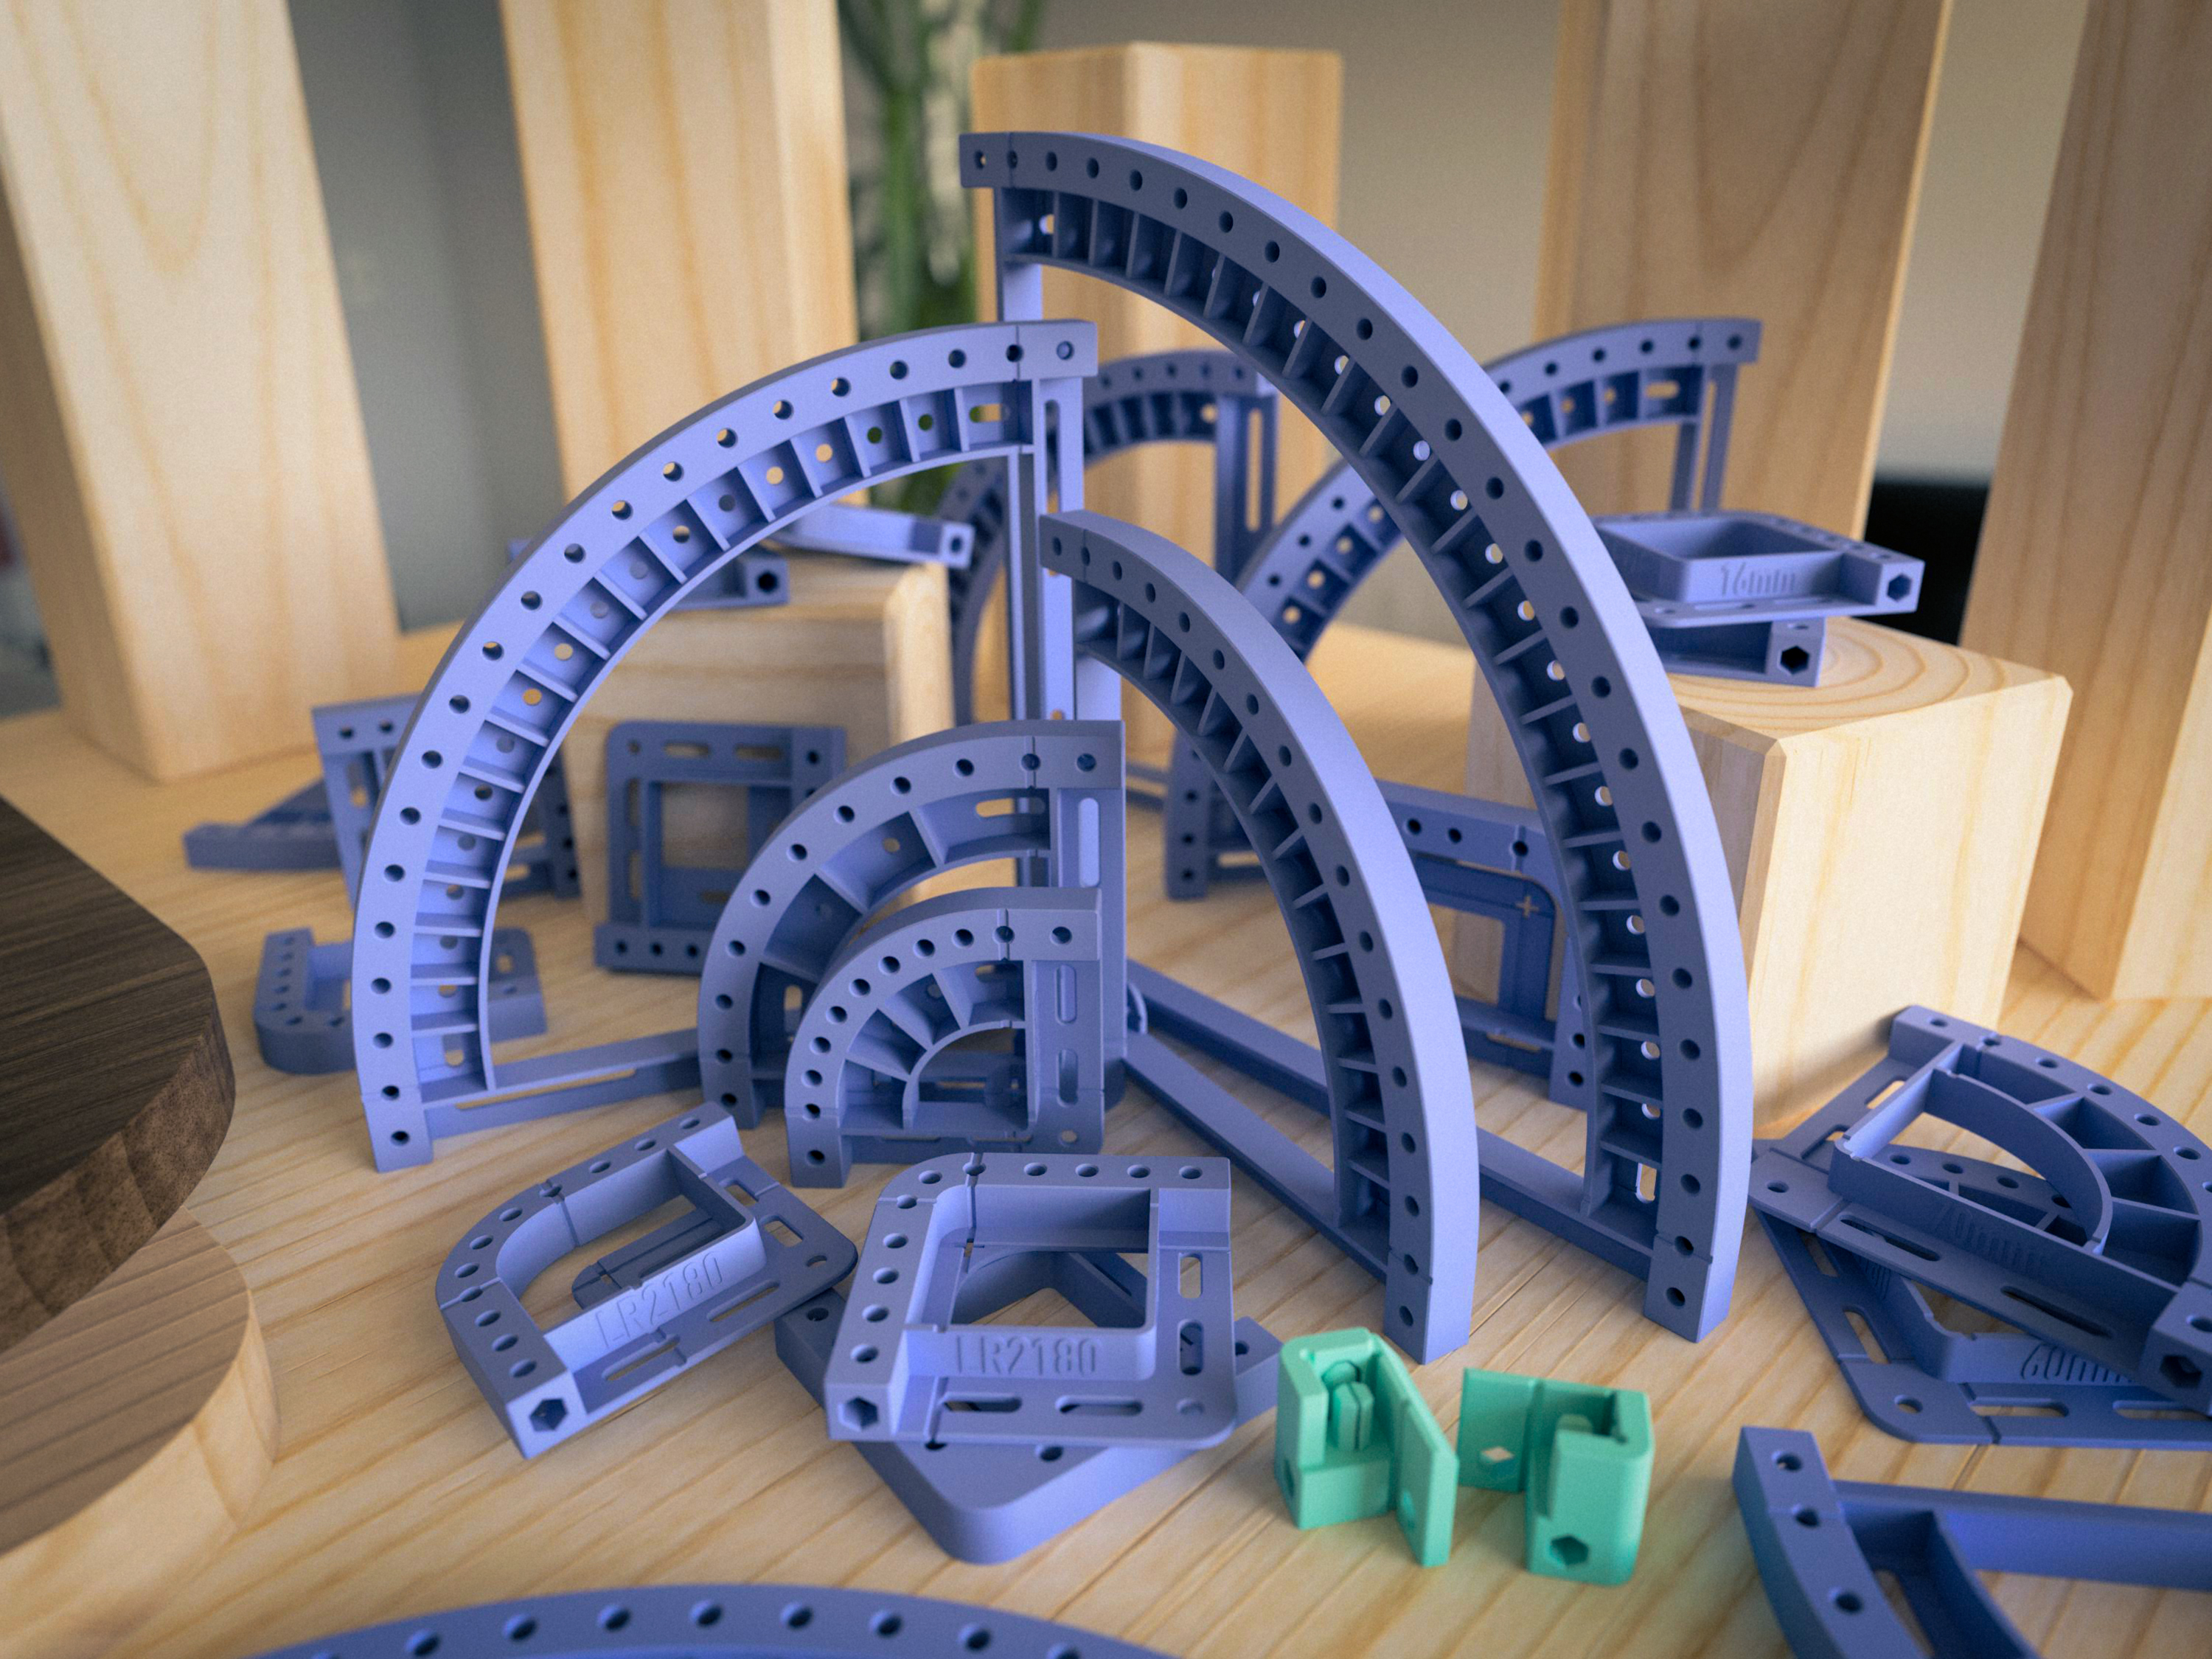
<p>I designed an extensive set of round corner templates for woodworking. They can either be used to mark corners with a pencil or as a template with a flush-trim bit. There is a wide range of radius sizes from 5mm up to 200mm and 0.5" to 8", all carefully optimized for best usage.</p><h4>About the Design</h4><p>I designed all templates from the ground up, specifically to be printed on a 3d-printer. The design is optimized to make use of all the strengths of this manufacturing method.</p><p>The templates have a height of 12mm (or 0.5"), to give a flush-trim bit a good surface area. Well placed ribs give the template the required stability for an exact cut.</p><p>There are plenty of slots and holes to fasten the template with woodscrews on the workpiece. All holes and slots have a diameter of 4mm and are designed to be used with 3mm or 3.5mm screws with a flat head.</p><p>If you use the slots, there is plenty of room for adjustments to place the template flush at the edge of your workpiece. The holes directly at the radius will provide the best stability.</p><p>The hexagonal hole in the side of the radius has an inner diameter of 6mm and is meant for extensions that can be aligned using a dowel or bolt of that diameter.</p><p>At the moment there are guides to attach to these extension holes (see “The Snap-in Guide Attachments”), to align the templates at the corner of the workpiece without screws.</p><h4>The Centre Mark</h4><p>Most larger templates have a centre mark with a cross and line marks up to the endpoints of the radius.</p><figure class="image"><img src="https://media.prusaprinters.org/media/prints/83629/rich_content/528948a6-f352-4058-b445-e4d651467ac4/img_7032.jpg#%7B%22uuid%22%3A%22c6c9d1dd-afeb-41f5-b921-78a6e697a452%22%2C%22w%22%3A4032%2C%22h%22%3A3024%7D"></figure><p>If you draw two straight lines to the centre of the corner radius, it is easy to use the marks to verify the correct dimensions and location of the template.</p><figure class="image"><img src="https://media.prusaprinters.org/media/prints/83629/rich_content/891d4ea0-1670-41ed-b41a-cd955c21bd75/img_7033.jpg#%7B%22uuid%22%3A%224e744064-6e22-4750-8a8a-3b73e1d262e2%22%2C%22w%22%3A4032%2C%22h%22%3A3024%7D"></figure><h4>Dimensions and Sizes</h4><p>There is a wide range of metric corner sizes. You will find all available measurements in the following drawing:</p><figure class="image"><img src="https://media.prusaprinters.org/media/prints/83629/rich_content/b46ba29b-bd02-452a-bd9b-5d42440c0e75/lr2180-xx-round-corner-template-drawing-v3.jpg#%7B%22uuid%22%3A%22cb92cff1-8090-4da3-8d49-90b517779edd%22%2C%22w%22%3A1754%2C%22h%22%3A1239%7D"></figure><p>I created also an alternative set of templates for people in the US who are working with imperial units. Not only the corner radius is in inches, but also most dimensions are adapted to this system. Only the screw and extension holes have the regular 4mm and 6mm diameter.</p><p>You will find all available imperial sizes in the next diagram:</p><figure class="image"><img src="https://media.prusaprinters.org/media/prints/83629/rich_content/2cd06796-bb48-4a50-9008-4b827de550d4/lr2180-yyin-round-corner-template-drawing-v2.jpg#%7B%22uuid%22%3A%22c1ab3b65-bd95-4c40-8af3-fa86f8b5f88a%22%2C%22w%22%3A1754%2C%22h%22%3A1239%7D"></figure><h4>How to Print the Templates</h4><p>If you are using a Prusa Printer, there is an example project for PrusaSlicer ("LR2180-50 Print.3mf").</p><ul><li>Print the template with <strong>PLA</strong> (or PETG).</li><li>Select <strong>0.2mm layer</strong> height.</li><li>Use the <strong>quality</strong> setting.</li><li>Print with <strong>3 perimeters</strong> to get better rigidity (especially if you use PETG).</li><li>The flat side of the model goes to the printer bed.</li><li><i>Do not scale the model!</i></li></ul><h4>The Snap-in Guide Attachments</h4><p>You can fasten the template to the workpiece with clamps or screws, or alternatively print two guides you can attach to the (metric) templates.</p><figure class="image"><img src="https://media.prusaprinters.org/media/prints/83629/rich_content/93c7b037-4701-48a1-aa8d-8e4441cd18d1/img_7042.jpg#%7B%22uuid%22%3A%22d510f4fa-cfbf-44bd-97e1-71af68fcba0c%22%2C%22w%22%3A4032%2C%22h%22%3A3024%7D"></figure><p>The snap-in mechanism lets you quickly add and remove these guides to all templates. So you only have to print two you can use for all sizes.</p><figure class="image"><img src="https://media.prusaprinters.org/media/prints/83629/rich_content/fb251238-0a84-4b5a-b7b7-7c96ee30522c/lr2180-assembly-v2.png#%7B%22uuid%22%3A%2247a498a5-1e0e-4b09-b8ec-1c8ae4f0e8df%22%2C%22w%22%3A2000%2C%22h%22%3A1196%7D"></figure><h4>How to Print the Snap-in Guides</h4><p>The snap-in guides have really tight tolerances (0.05) for a perfect fit. Therefore you have to print them as precise as possible. If you are using a Prusa Printer, there is an example project for PrusaSlicer ("LR2180-ST-M Print.3mf").</p><ul><li>Print the template with <strong>PLA</strong> (or PETG).</li><li>Select <strong>0.2mm layer</strong> height.</li><li>Use the <strong>quality</strong> setting.</li><li>Print with <strong>3 perimeters</strong> to get better rigidity (especially if you use PETG).</li><li>The flat side of the model goes to the printer bed.</li><li><i>Make sure there are no seams on the inner flat surfaces of the object!</i></li><li><i>Do not scale the model!</i></li></ul><p>You will find more details about my design on <a href="https://luckyresistor.me/2021/10/29/round-corner-template-set-for-woodworking/">this page</a>.</p><p>If you like the models, please rate them and leave a comment below.</p>
With this file you will be able to print Round Corner Templates in a Full Range of Radius Sizes with your 3D printer. Click on the button and save the file on your computer to work, edit or customize your design. You can also find more 3D designs for printers on Round Corner Templates in a Full Range of Radius Sizes.