Rover Tracks v2
prusaprinters
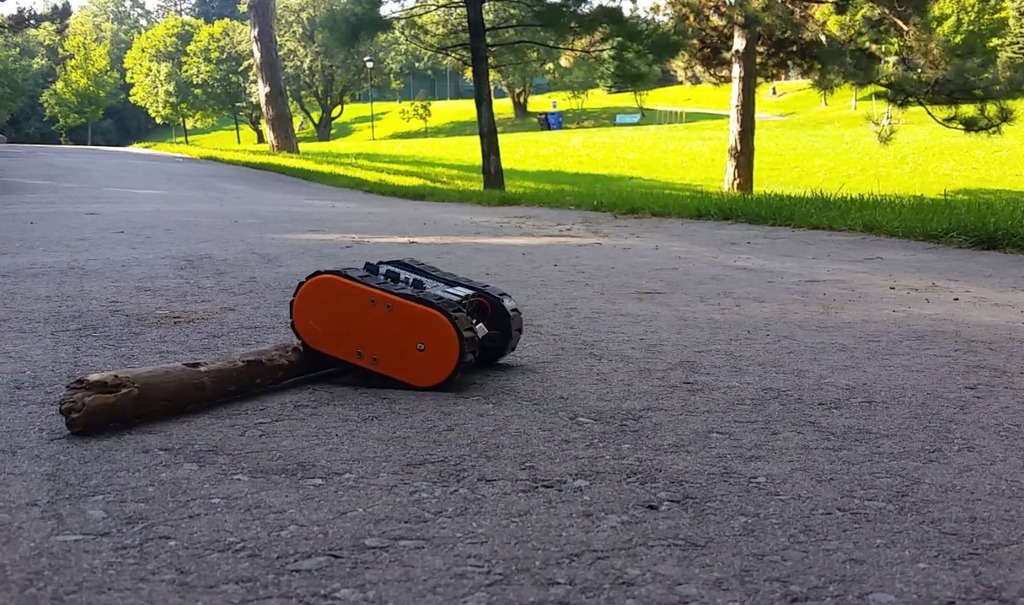
<p>This is the second version of my <a href="https://www.thingiverse.com/thing:2804287">Rover Tracks</a> design.</p> <p>Many small issues were solved following the recommendations of the people that already built the first version of it. (Thank you guys!)</p> <p>The main idea of this project is to create tracks you can put on any rover you design.</p> <p>As you can see in the video, it is pretty powerful for just having one super cheap motor per track. It was able to tackle every type of terrain I put it on!</p> <p>Check bellow for the list of things you'll need to print and buy and more details on the build.</p> <p>Source code can be downloaded from <a href="https://github.com/nahueltaibo/rovertracksv2">github here</a>.</p> <p>Here you'll find the design files for the rover tracks: <a href="https://a360.co/2P65qvP">https://a360.co/2P65qvP</a> <a href="https://a360.co/2vh9BbR">https://a360.co/2vh9BbR</a></p> <p>One contains the tracks and the other the platform that connects them together.</p> <p>I'd love to see the make!</p> <p>I spent a lot of time designing this. If you like it and want to say thanks by giving me a tip and help me continue to make amazing Things!</p> <p>Good luck!</p> <h3>Post-Printing</h3> <p><strong>Track assembly</strong></p> <div><p>To test the tracks I made a base that connect both tracks and has holes for a Raspberry-pi. The Pi is controlled by generic a bluetooth gamepad like <a href="http://savagemakers.com/bluetooth-gamepad" rel="nofollow">this one</a></p> To power the raspberry pi I used a DC-DC step down converter, and soldered the output of it to the pins of the RPi's usb power connector. (There was no space for a real USB connector) <p>Follow <a href="https://youtu.be/B2RbTeVpFMk">this video</a> to see how to assemble each track of the robot.</p> <h3>What you'll need...</h3> <p><strong>... To Print</strong></p> <p>For each side (you need two sides per rover)</p> <ul> <li>1 MotorMount_A_v2.stl</li> <li>1 MotorMount_B_v2.stl</li> <li>2 WheelDrive_v2.stl</li> <li>2 WheelSlave_v2.stl</li> <li>1 Enclosure_A_v1.stl</li> <li>1 MRTConnector.stl (This replaces the Enclosure_B_v1.stl)</li> <li>2 Enclosure_C_v1.stl</li> <li>22 Track_v1.stl</li> </ul> <p>To connect both sides:</p> <p>1 - plate.stl</p> <p><strong>...To Buy</strong></p> <p>If you just want to make the tracks...</p> <ul> <li>2 <a href="http://savagemakers.com/yellowdcgearmotor">Generic DC Geared Motor</a></li> </ul> <p>If you want to make the rover as seen in the pictures...</p> <ul> <li>1 <a href="http://savagemakers.com/raspberry-pi-3">Raspberry Pi 3</a></li> <li>1 <a href="http://savagemakers.com/bluetooth-gamepad">Bluetooth Gamepad</a></li> <li>1 <a href="http://savagemakers.com/2s-lipo-battery">2s battery</a> (It really does'n matter which)</li> <li>1 <a href="http://savagemakers.com/dc-dc-step-down">DC-DC Step Down module</a> (To power the Raspberry pi from the 7.4v battery)</li> <li>1 <a href="http://savagemakers.com/mini-slide-switch">Mini slide switch</a></li> <li>1 <a href="https://learn.adafruit.com/adafruit-motor-shield-v2-for-arduino">Adafruit Motor Hat</a></li> </ul> <p><strong>Special thanks for all of you that support my work</strong></p> <p>Thanks for the tip guys!!!</p> <ul> <li><a href="/grayed_8119/about">grayed_8119</a></li> <li><a href="/charleybot/about">charleybot</a></li> <li><a href="/BomanXIX/about">BomanXIX</a></li> </ul> <p><strong>Don't forget to check the designs based on this tracks to get inspired!</strong></p> <ul> <li><a href="https://www.thingiverse.com/thing:3671909">Edwardchew 's EdRover</a>: He made a beautiful chassis for this tracks)</li> <li><a href="/make:588708">HicWic's make</a>: He modified it to use 28BYJ-48 stepper motors</li> </ul> </div> Category: Robotics
With this file you will be able to print Rover Tracks v2 with your 3D printer. Click on the button and save the file on your computer to work, edit or customize your design. You can also find more 3D designs for printers on Rover Tracks v2.