RPi Zero W Enclosure for Klipper on Creality ender, Anycubic Vyper, Voxelab Aquila printers
thingiverse
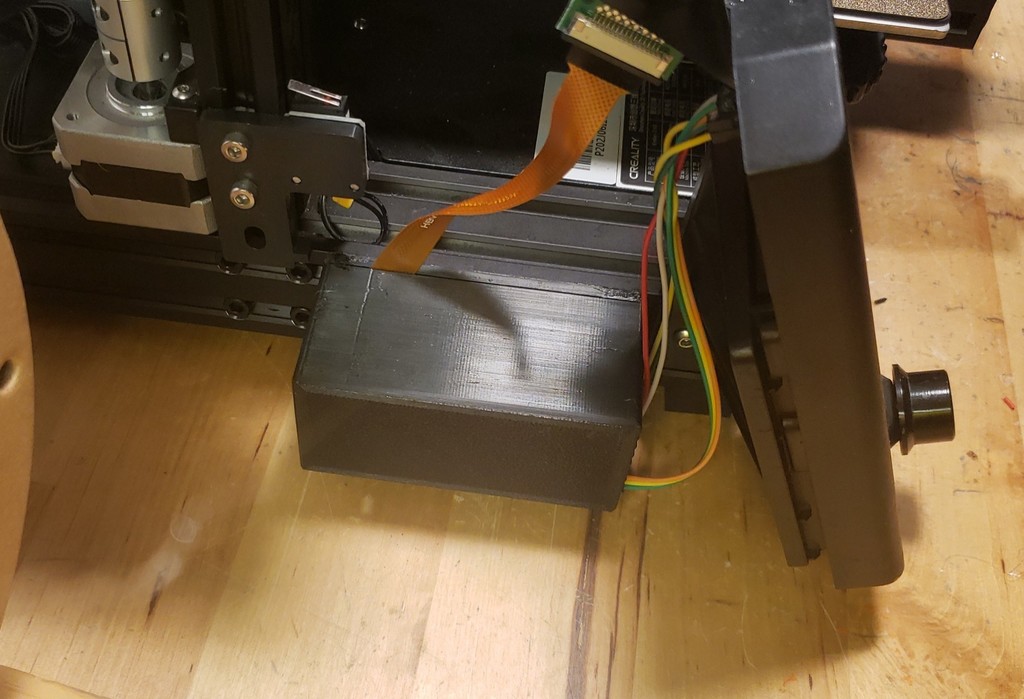
Fits on printers like Ender 3, ANYCUBIC Vyper, Voxelab Aquila. Using on Ender 3 v2 for klipper, mounted on left next to electronics box. Snap fit enclosure for Pi zero to slide onto the side of 4040 extrusion. Has intake vent and space for 40mm fan, also spot for LM2596 buck/stepdown converter needs two M3 screws. No supports needed except for the lid's bottom and wire opening on box. View model here https://a360.co/3T9d85y Components: -pi zero w -40x10mm fan -LM2596 board -two m3 screws I can make changes if anyone needs :) -jrpwit Edit: Added PICTURES of my printer with the enclosure. To avoid bulky USB cable, use the uart pins on the rpi when setting up your printer board firmware. Steps for this: "Enable extra low-level configuration options" and select serial (on USART3 PB11/PB10). These pins are the data pins used for the stock LCD screen, use two dupont wires. If you want to use your stock screen like myself, use https://github.com/bustedlogic/DWIN_T5UIC1_LCD . Note, the linked code requires the rpi's uart gpios so for your connection between the printer board and the pi for klipper, use the rpi's USB not uart gpio like I explained above. To avoid a USB cable, I soldered to data pins on the underside of the pi. No need for the screen though, as mailsail exists.
With this file you will be able to print RPi Zero W Enclosure for Klipper on Creality ender, Anycubic Vyper, Voxelab Aquila printers with your 3D printer. Click on the button and save the file on your computer to work, edit or customize your design. You can also find more 3D designs for printers on RPi Zero W Enclosure for Klipper on Creality ender, Anycubic Vyper, Voxelab Aquila printers.