Rubber Band Car
thingiverse
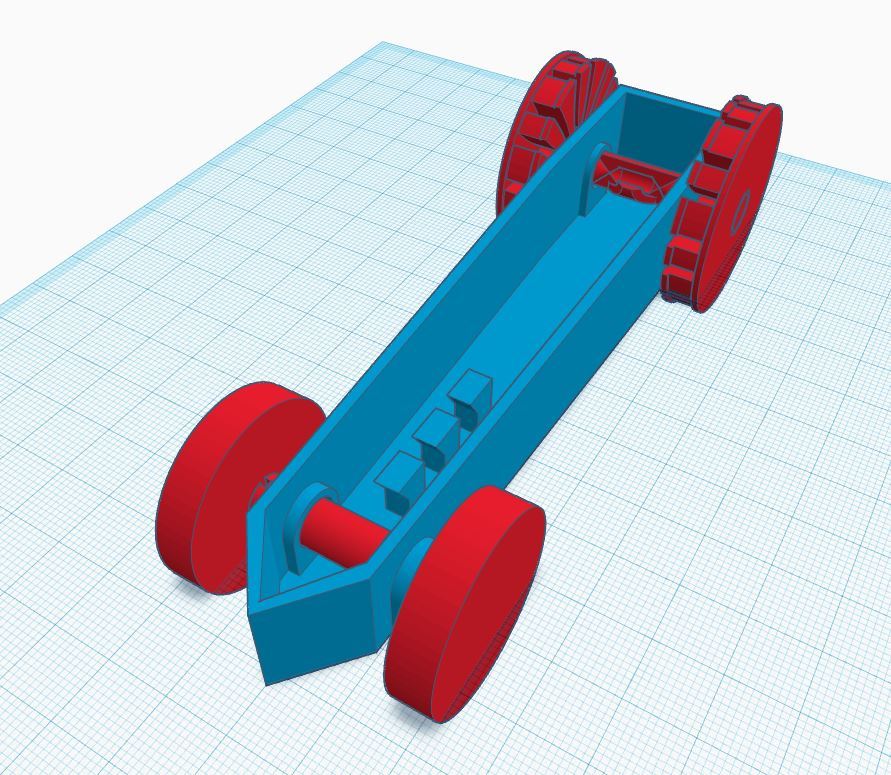
This is my take on the rubber band car. I had some kids in our office for "bring your kid to work day" and I downloaded the "Rubber Band-Powered Car" (RBPC) for a quick demonstration of my 3D printer. I found the RBPC very difficult to print on my printer (Prusa i3 MK2) with Maker Geeks raptor PLA (what I had setup in the printer at that time.) The RBPC axles are integrated into the wheel and so if the axle breaks off (and it will because it was a 4mm tower) you have to reprint the entire assembly. My design goals were to make a more robust and forgiving car (both for slicing/printing and also for when kids are playing.) I also wanted a low piece count and part that could be printed using the fastest settings on my printer (Prusa i3 MK2 running with the "0.35mm Fast" settings. I liked the overall body shape and simplicity of the RBPC so I, mostly, kept that overall design. I redesigned the entire car. First I made the wheels and axle to be more robust (8mm axle diameter) and they can be printed separately. To affix the wheels to the axle, I use super glue; the super glue was a small trade off instead of a press-fit design but I have plenty in of glue so that wasn't an issue. The axle was given a larger rubber band hook. The rear drive wheels were designed to wrap a rubber band around the circumference to give it traction. Excess rubber band material can be woven in the "oval pockets" of the wheel to accommodate differing rubber band sizes. The body was lengthened so the rubber band is fully elongated (without stretching) at rest; I was using standard #33 rubber bands (3.5" length, 1/8" width). The rubber band can also be woven around the body hooks (slalom skiing-style) so it doesn't shoot away when the axle inevitably releases the rubber band. All parts can be printed with fast printer settings except maybe the drive axle. The drive axle benefits from a 0.2mm layer height due to the integrated, and detailed, rubber band hook. I included a version of the wheels with integrated axles (as an experiment and also if anyone wants to lower the piece count). However, I broke the axle off the wheel assemble when removing from the print bed and so I will advocate for printing the axle separately so it is easily removed from the printer and reprints are quick. You will need to print (using separate axles and wheels): 1. The body. 2. The front axle (smooth) 3. The drive/rear axle (with the hook) 4. 2x front wheels (solid, 30mm dia) 5. 2x rear/drive wheels (with oval pockets, 40mm dia) OR You will need to print (using integrated axles and wheels): 1. The body. 2. The front axle and wheel assembly (smooth axle) 3. The drive/rear axle and wheel assembly (with the hook on the axle) 4. 1x front wheels (solid, 30mm dia) 5. 1x rear/drive wheels (with oval pockets, 40mm dia)
With this file you will be able to print Rubber Band Car with your 3D printer. Click on the button and save the file on your computer to work, edit or customize your design. You can also find more 3D designs for printers on Rubber Band Car.