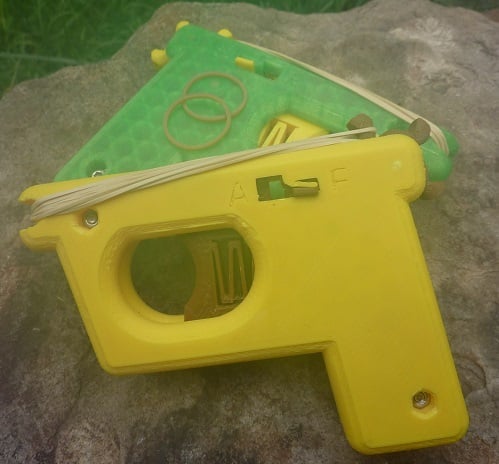
Rubber Band Gun with Full Auto Mode
thingiverse
Introduction This rubber band gun is based on the clever trigger mechanism used in “M1911 Rubber band gun” (thing: 3053501) and “MINI rubber band pistol” (thing: 2740883). The goal was to make a rubber band gun with the same attributes as the 1860 Spencer Carbine “… that you could load on Sunday and shoot all week”. Then a buddy suggested that if the “interrupter” could be disabled it would have a full automatic mode. Preliminary Preparation Before you start building this project go onto EBay or Amazon and order a supply of rubber bands. Number 10’s are 1 and ¼” long, number 12’s are 1 and ¾” long, and number 14’s are 2” long (un-stretched). The trade-off is a full load of number 10 rubber bands will put a lot of strain on the star wheel so cocking with a full magazine will be a problem. Less shots but they will shoot a bit farther. A full load of number 14 rubber bands could provide more shots but may not have as much range (I’ve not tried this size). Only number 10 rubber bands have been tested but I recommend you start with number 12 rubber bands. Also, while on EBay purchase a supply of 3mm cap screws that are 10mm long (i.e. M3x10) and 3mm nuts unless you already have a stock. You may also need a couple M3x20 cap screws for seating the 3mm nuts into the nut traps. Get a hex driver or metric Allen wrench if you don’t have anything that fits the cap screws. Then go down to Lowe's or Home Depot and purchase a 1/8” dowel for the star wheel and sear axles. Try to get Oak. If they only have Popular try to get "heart wood" because the star wheel axle gets a lot of strain. An easy way to cut sections of dowel is to mark the desired lengths, put a knife blade exactly on the mark with the blade 90 degrees to the dowel and roll it back and forth on a hard surface (I used a jackknife). Then snap off the pieces. If they don't snap easily, go back and roll the cut some more. Printing Instructions There are three sets of STL files. The “Everything.STL” contains all the components. This file will work if you don’t have adhesion problems. Note: you can tolerate a bit of lifting for the end of the grip and the muzzle. The “Everything_with_Adhesion_Pads.STL” has adhesion pads in case you have severe lifting problems with the print or start printing “bird's nests”. The “Left_Side.STL”, “Right_Side.STL and “Inside_Parts.STL” have all the components in separate files in case you want to print with different colors or your print bed is less than 200mm. I printed the parts with ABS using support for the bottom rounded edges, 0.25mm layer thickness, 15% fill, 2 vertical shells and 4 horizontal layers top and bottom, (0.5mm nozzle). The Z height of the bottom layer is set lower on my printer to squish out more first layer plastic onto the bed for better adhesion (of course that makes an elephant’s foot on the prints). After printing, I trimmed off the “elephant’s foot” on the tight fitting components using my jackknife (especially, the bottom of the trigger shoe, the front of the notch in the “A” selector pocket, the interrupter pin and its guiding slide slot). I have not tried printing this design with PLA. Assembly Assembly will need two M3x10mm screws plus nuts (I used cap screws so I could use a hex driver). Also, you’ll need two 21mm pieces of 1/8” dowel. The nut traps are tight (final assembly is a pain if they are loose). So, start the nuts onto the end of the screws then (drive, hammer, pound) i.e. force the nuts into the nut traps. OR, put an M3x20mm screw through the hole from the inside, start the nut, and use the hex driver to pull “cam” the nut into the bottom of the nut trap. OR, thread an M3x30 screw through from the inside, start a nut, heat the nut with a flame and pull the nut into the nut trap using the head of the M3x30 screw. I’ve used all approaches but prefer the brute force method (the second method works well but just takes a few minutes longer). Clean out any “elephant’s foot on the bottom (and top) of the “star” axle hole and drive a dowel piece in until the star is centered on the axle (it should be a tight fit). If the star is loose maybe because you drilled it out, add a couple drops of superglue to hold it in place. Push the other dowel piece through the sear for an axle. I found that starting assembly with the right side of the rubber band gun allowed the “elephant’s foot” side of the sear spring and the trigger shoe spring to be placed in the bottom of their pockets thus providing more clearance when snapping on the other (left) half of the gun. Put the selector pin in place with the fat square down toward the grip and the side bump back toward the muzzle. When assembling the left half use your fingernail to pull the trigger shoe spring forward to snap it into the retainer. Push a screw-driver/hex-driver in the back of the grip to seat the sear spring into that pocket. Wiggle the star to seat its axle then put in the screws. Operation I found that about 15 number 10 rubber bands made a full load due the effort needed to cock the star wheel for one more. (If there is too much force the interrupter can't retract after each trigger pull.) For semi-automatic operation slide the selector back toward the “F” position. Of course, with the selector in the “F” position, loading two or three rubber bands onto each star on the star wheel would produce multi-shot bursts for each trigger pull. If a “full burst of rubber bands” is desired, slid the selector forward and snap it up into the notch by the “A” position (i.e. for “Automatic”, or “All the rubber bands”). I tried to figure out how rapidly the piece shoots when set in the “A” mode. With 15 rubber bands loaded and the selector set to “A”, I pressed the muzzle into the seat of a padded chair and turned it loose. The rubber band gun went “bruuup” and the star wheel was still spinning. I thought the basic tone was about middle “C”, so that meant that the cycle rate was about 15 times faster than an MP7. If someone has a high speed camera, a cool video could definitively determine the cycle rate. Enjoy
With this file you will be able to print Rubber Band Gun with Full Auto Mode with your 3D printer. Click on the button and save the file on your computer to work, edit or customize your design. You can also find more 3D designs for printers on Rubber Band Gun with Full Auto Mode.