Rubik's Cube Braille Tiles
pinshape
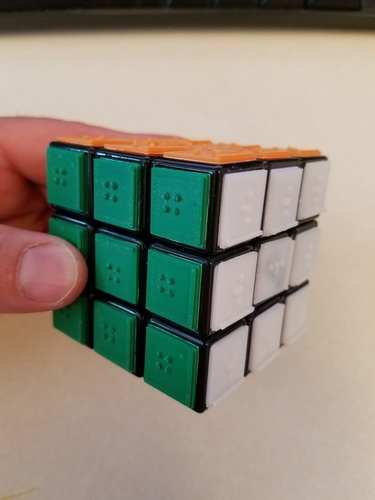
My oldest daughter (9 Years old) and I designed and assembled these braille tiles that can be glued to a Rubik's Cube. I work with the blind professionally in an education environment. Following the idea of Universal Design (Example - Curb cuts help people using a wheelchair, but also parents pushing a stroller) I try to create things that a sighted person and a person who is blind can work together on. If someone is color blind they can also use different color plastic to accommodate for the colors they can't differentiate. The braille is follows Grade 1 and is just the first letter of the Color: G = Green Y=Yellow O=Orange W=White (W and red are can be confused so a T could be substituted) R=Red B=Blue The next feature is that we added an orientation line at the bottom of each tile. This allows as the cube is turned that the braille user know were the bottom of each tile is. If you notice in my picture I already mixed it up so the orientation are not lined up perfectly (bonus points if you could get it back to all orientation lines are on the bottom) I used an Ultimaker 3 extended, I extended the brim to 14mm to make 10 tiles (1 extra just in case), moved them close to each other 5x5 and increased the bed temp to 100c at layer height of .06mm. 20% infill (but none was needed). When separating the tiles they can be snapped off then trimmed. I used a CHP-170 snipper to get a clean cut around each tile. Then used Krazy Clue with a brush to apply adhesive. All filament was Matterhacker ABS PRO which printed great and should hold up to the high temperatures of where I live.
With this file you will be able to print Rubik's Cube Braille Tiles with your 3D printer. Click on the button and save the file on your computer to work, edit or customize your design. You can also find more 3D designs for printers on Rubik's Cube Braille Tiles.