RWBY Professor Ozpin Glasses Cosplay
prusaprinters
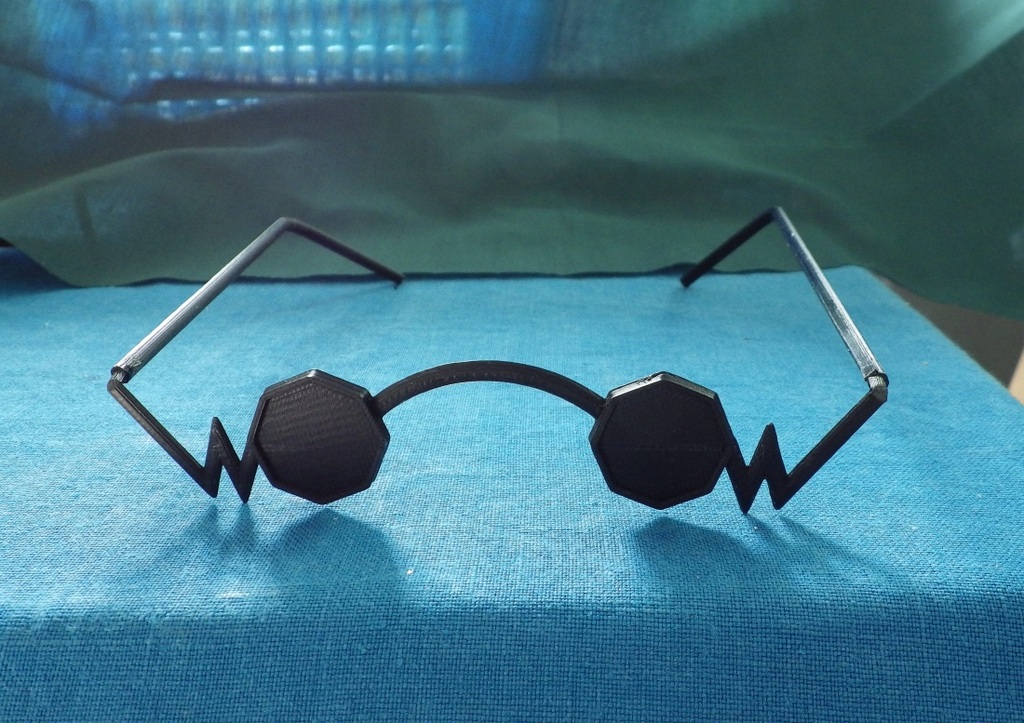
<p>Prop glasses, Professor Ozpin from the series RWBY.</p> <p>I'm sharing these in case they are useful to someone. They are a rough quick sketch of Ozpin's glasses. I've honoured the polygon shape.</p> <p>As they are worn on the end of the nose, they are printed with solid lenses as it has more impact and is similar to dark lenses in the show.</p> <p>Wear them so you can look over the top of them.</p> <p>Update 04 June 2016 - revisited and redrew this as original was rushed as needed them in a hurry. Use V2 design that is much better looking. Need super glue or similar to stick the legs onto the glasses. The V2 design has been made so that no supports are required when printing, leading to a clean finish.</p> <h3>Print Settings</h3> <p><strong>Printer Brand:</strong></p> <p>Printrbot</p> <p class="detail-setting printer"><strong>Printer: </strong> <div><p>Simple Black</p></div> <p><strong>Rafts:</strong></p> <p>No</p> <p class="detail-setting supports"><strong>Supports: </strong> <div><p>No</p></div> <p><strong>Resolution:</strong></p> <p>0.2</p> <p class="detail-setting infill"><strong>Infill: </strong> <div><p>25</p></div> <p><strong>Notes:</strong></p> <p>I used hair spray on the bed to keep the legs stuck as they printed,</p> <p>PLA 190 degrees</p> <p>E3D hotend</p> <h3>Instructions</h3> <p>V.2 Instructions</p> <p>Glasses shown printed with no supports for legs or glasses. Printed with black PLA on.</p> <p>My printer bed is 150mm, positioning the legs diagonally in Cura, they both fit on at a diagonal.</p> <p>Once glasses are printed, put them flat down with back facing you. Place a ruler or other firm edge at 5mm from the end of each leg stump, bend the stump a few mm back from the thinned part by 90 degrees toward you, using the ruler edge to give a crisp firm "fold". This should form an L:shape, don't do this repeatedly as the plastic will fatigue and snap, don't go beyond 90 degrees as it will weaken the bond. If desired, head with a hot air gun or hot hair dryer before bending to soften the plastic a little, although I found this was not necessary.</p> <p>Next place a dot of super glue on the thinned stump and in the hole in the end of the leg, push the leg firmly onto the stump and let it set. The leg should be twisted slightly, so that the back of the leg will grip the back of your head. This is important to keep the glasses in place when worn.</p> <p>Repeat for the other leg.</p> <p>V.1 Instructions</p> <p>Printed main glasses down no supports, no raft.</p> <p>On My printer I had to stop the print after about 10mm up the glasses legs as the print was starting to fail printing the legs as it got higher up.</p> <p>I then cut the legs down and used a separate print of the legs (included) to glue to the stumps on the first print of the glasses.</p> <p>The legs were printed with a raft and supports.</p> <p>You can use micropore tape to tape the legs under the wig or to ears if they slip too much, but version 2 glasses should have solved this problem.</p> </p></p></p> Category: Glasses
With this file you will be able to print RWBY Professor Ozpin Glasses Cosplay with your 3D printer. Click on the button and save the file on your computer to work, edit or customize your design. You can also find more 3D designs for printers on RWBY Professor Ozpin Glasses Cosplay.