RyBot (my D-Bot)
thingiverse
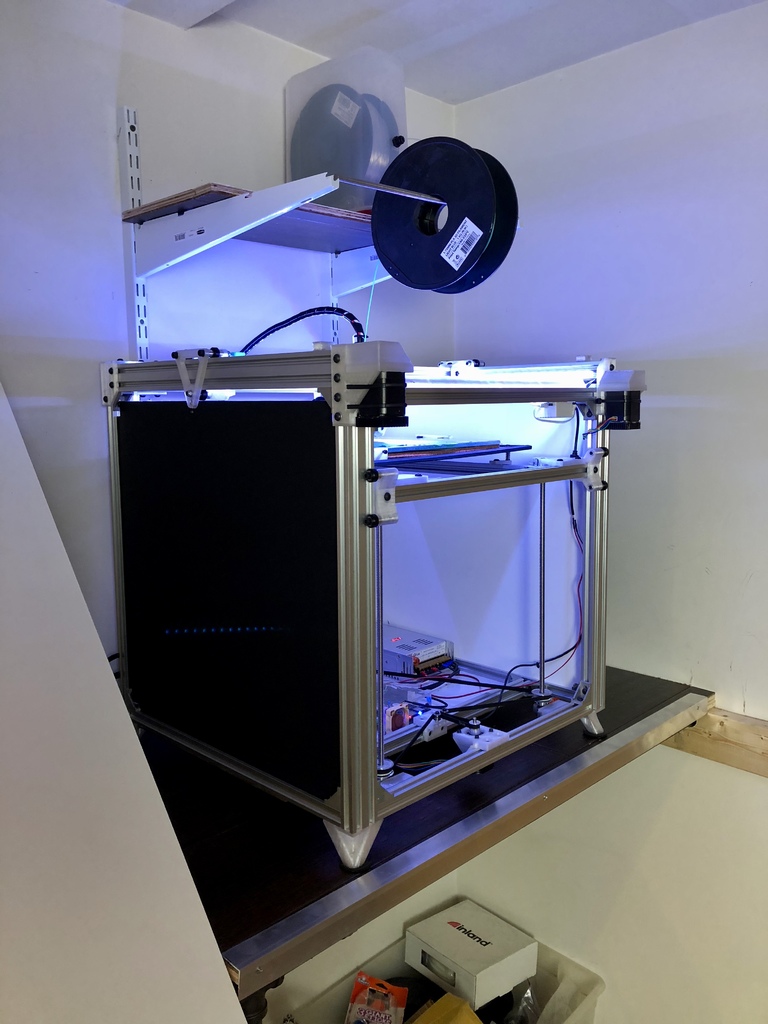
First, I want to say this is just meant to be a reference to my particular build based off of the D-Bot design. I have a few parts I designed and people may be curious as to the choices others have made to upgrade their printer. It's not instructions on how to build it or my attempt to present a new "better" version of the D-Bot. I don't know if my parts will work on your printer but just in case they might help someone, I wanted to make them available and give credit to the designers who helped me through this build. I started by figuring out my own cut list. I was planning to use a 300mm x 300mm heated bed so I wanted to be able to cover that. Looking over the D-Bot 300mm x 300mm cut list and taking into consideration that 2 x 500mm extrusions from Open Builds were the same price as 1 x 1000mm, I figured I could go a little longer on the X/Y and a little shorter on the Z. So, I decided to let them do some of my cuts and left the X/Y/Z at 500mm. The image of a cut list is just an example I made. I didn't actually write down the cuts as I was building my bot. Then I started scouring Thingiverse for upgrades and builds. I decided I wanted to use a Titan Aero and I already had the Titan and V.6 so I just needed the upgrade kit. I decided to support the bed on all 4 corners and use a 3 lead screw design for the Z axis. I didn't want the Z to be over constrained, so I found some Oldhams for the bed to ride on. Now it's a lot more stable so I could take the bed frame down to 2020 and gain back that 20mm of Z. I found a low profile stepper mount and designed the spacer to align the guide bearings with the Oldhams. I also designed some physical "end stops" to control the collision with the carriage. Everything was printed with Inland brand "natural" PETG. The electronics and the bed support are cut from finished hardboard, and the side walls are foam core. Thanks to all the original designers! *Update: I added a belt tensioner and a version with looser tolerances that will accommodate belts with a twist in them too keep the toothed side of the belt from causing artifacts by riding on the smooth idlers. Also, a graphic showing how I twisted them. *Update: Added Re-X-Carriage Adjustable Mount for Mini Differential IR Height Sensor and the sensor carriage. Will need an M3 x 20 bolt, M3 nut, and a spring. These and the belt tensioners can also be found under remixes for the Re-X-Carriage. *Update 4/27: I have added a wiring harness support that I designed and a remix of the wires mount for the Re-X Carriage that is stronger. I also added remixes to fit a 27mm drilled piezo and the Universal PCB v2.x. The IR height sensor was not performing well with Printbite+ and piezos are just so cool. As an example of print quality, I attached pictures of Baby Groot (my fourth print on this machine). .15 layer height, 2/3 scale
With this file you will be able to print RyBot (my D-Bot) with your 3D printer. Click on the button and save the file on your computer to work, edit or customize your design. You can also find more 3D designs for printers on RyBot (my D-Bot).