Ryobi Battery DC Power Jack
thingiverse
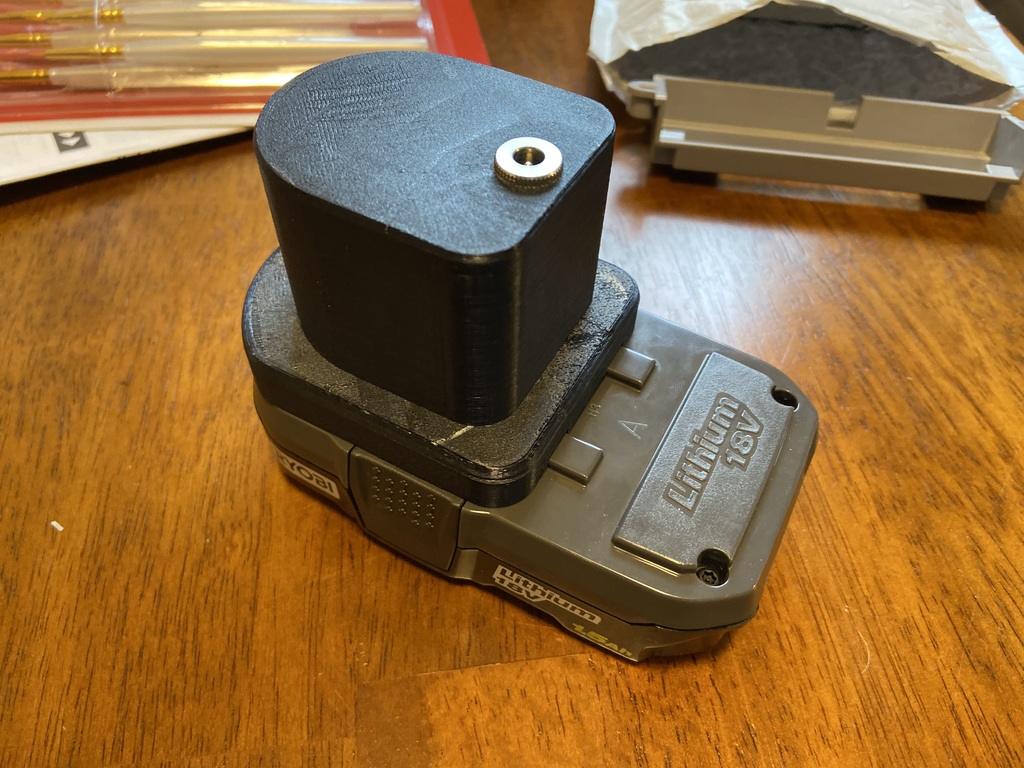
This provides a 5.5x2.5 DC power jack from a standard 18 volt Ryobi tool battery. I use it with my TS100 soldering iron. Parts needed: - 1x 5.5x2.5 barrel jack - https://www.mouser.com/ProductDetail/163-2325-E - 2x AAA battery contacts: https://www.mouser.com/ProductDetail/534-204 - 4x 16mm M3 screws: https://www.grainger.com/product/FABORY-M3-0-50mm-Machine-Screw-31JT09 - 1x 2 meter 5.5x2.5 male to male power cable: https://www.ebay.com/itm/2-5mm-x-5-5mm-DC-Connector-Lead-Male-to-male-Power-Cable-50cm-1m-2m-3m-5m/382435803119 To assemble: 1. Solder wires to the power jack. 2. Insert the jack into the hole on the cover. 3. There isn't enough room to turn the nut inside the cover, so you'll need to slide the nut and washer in place inside, then twist the jack to screw them together. I recommend using a pair of pliers to get a good grip on it. 4. Solder the battery terminals to the wires from the power jack. 5. Slip the battery terminals onto the stem. 6. Slide the top of the stem into the cover. Depending on your printer, this may require a decent amount of force after you line it up. It should end up with the screw tabs of the stem flush with the bottom of the cover. 7. Screw the base onto the stem and cover.
With this file you will be able to print Ryobi Battery DC Power Jack with your 3D printer. Click on the button and save the file on your computer to work, edit or customize your design. You can also find more 3D designs for printers on Ryobi Battery DC Power Jack.