Schmidt Coupling - Offset Coupling (w/ prop)
thingiverse
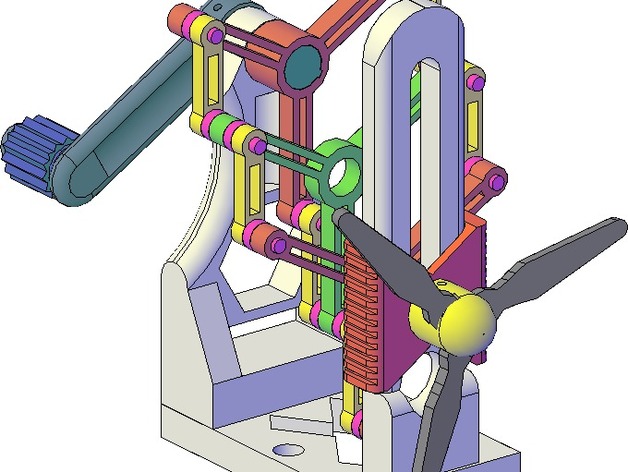
Schmidt couplings enable shaft connection despite misalignment or radial displacement changes during operation. The equal balance of pulling and pushing forces creates sinusoidal overlaps for continuous torque transfer between input and output shafts. All pivots are 1/8" plastic rod stock, captured by flattening ends after assembly, or alternatively, print .stl files. Assemble the mechanism with a separate front upright and adjustment tab, followed by gluing onto the base plate. Ensure alignment from a frontal view for aesthetics and perpendicularity from a side view for functionality. Use 2 teal/blue CrankShafts, 2 red EndPlates, green MidPlate, 6 yellow Links, 12 pink Spacers, and 6 short Pivots, with 3 long Pivots. Watch this video tutorial for further guidance: http://youtu.be/E_YXZDF7vYs. Address warping issues by printing larger parts standing up and smaller ones lying down; heat guns can help straighten minor warps.
With this file you will be able to print Schmidt Coupling - Offset Coupling (w/ prop) with your 3D printer. Click on the button and save the file on your computer to work, edit or customize your design. You can also find more 3D designs for printers on Schmidt Coupling - Offset Coupling (w/ prop).