Scissor Lamp / Scherenlampe from IKEA parts
thingiverse
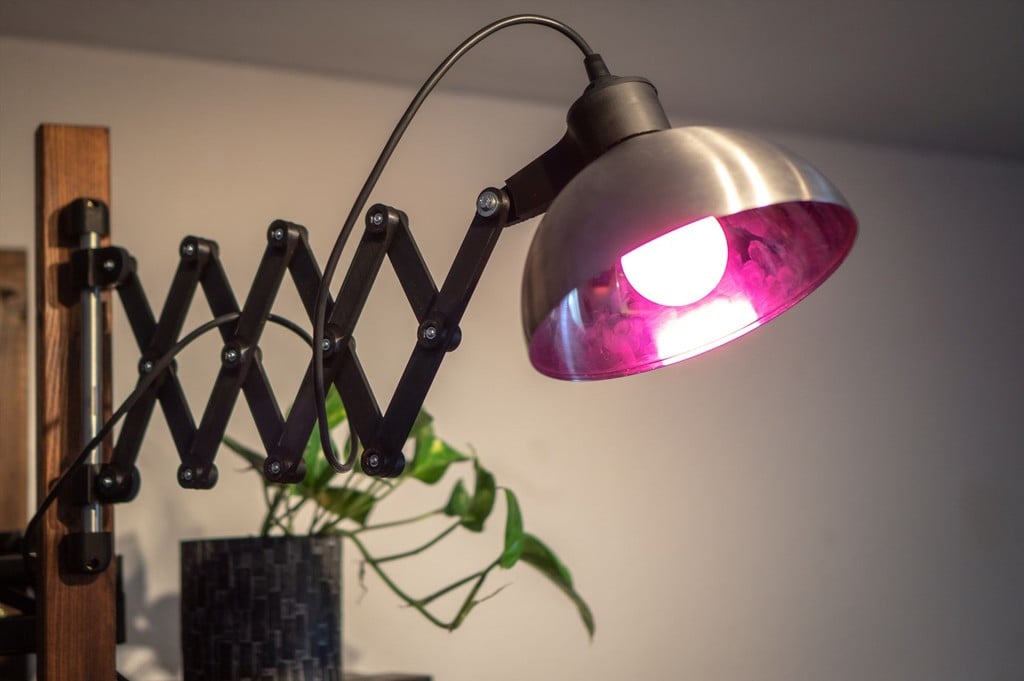
I modeled a retro style scissor lamp to modfy some basic IKEA items into a stylish home decoration element. The mechanism is completely printable in PLA and only requires the connecting hardware as well as a piece of (in my case stainless steel) tubing. To complete this build, following parts are needed: printable: 4x "scissor arm with nut" 3x "scissor arm with head" 1x "half length arm with head" 2x "tube endpiece" 1x "tube slider with head" 1x "tube slider with nut" 1x "bulb socket holder" IKEA: 1x stainless steel bowl 200mm diameter "BLANDA BLANK" 1x bulb socket assembly "HEMMA" 1x E27 Bulb hardware: 12x M5x20 mm countersunk bolts 13x M5 hex nuts (ideal are self locking nuts) 1x M5x20 wing bolt 2x 3,5mm diam. Screws for mounting 240mm long 15mm diam. Tube (material doesn't matter, i chose stainless to match the optics of the bowl) some kind of epoxy glue assembly: after printing the required parts and buying the hardware you can start by assembling the scissor mechanism with the countersunk bolts and hex nuts. Make sure to noth overtighten all the bolts, as a bit of movement is needed for the scissor mechanism to work properly. After that you can slide the tube sliders over the tube (head and nut side of the sliders have to face in opposite directions) and close of the ends with the tube endpieces. On the other side of the mechanism you have to install the half length arm so that there is a free end on the last arm, on wihch you can mount the socket holder with the wing bolt. After that you can drill a 32mm diam. hole in the bottom of the IKEA bowl. Make sure to smooth out the rough edges to prevent injuries. Now, glue the socket's ring nut to the bowl. Sand the stainless surface with a fine grit sandpaper to optimise adhesion and use degreaser afterwards. Unscrew the ring nut from the socket and glue it to the bowl with the flat side down (use anykind of 2K epoxy or other suitable glues, even superglue should work) The model fits the current version of the HEMMA Bulb socket (3€ in Germany) with a outer thread diameter of 40mm and a thread length of 38mm. As the glue dried, put the HEMMA Socket through the hole in the "socket holder" and clamp it with the ring nut, that is glued to the bowl. Install the bulb, route the cable and you're good to go :) now you should have a functioning scissor lamp mechanism which you can mount anywhere you like using two 3.5mm wood screws, adjust the overall length and tighten one of the M5 bolts a bit more to lock everything in place. I hope you enjoy building this retro style deco lamp and improve your room, desk or workbench :) feel free to contact me if you have any suggestions for improvements
With this file you will be able to print Scissor Lamp / Scherenlampe from IKEA parts with your 3D printer. Click on the button and save the file on your computer to work, edit or customize your design. You can also find more 3D designs for printers on Scissor Lamp / Scherenlampe from IKEA parts.