Screw Handle (print in place) for Anycubic Photon Zero and Wash&Cure Machine
thingiverse
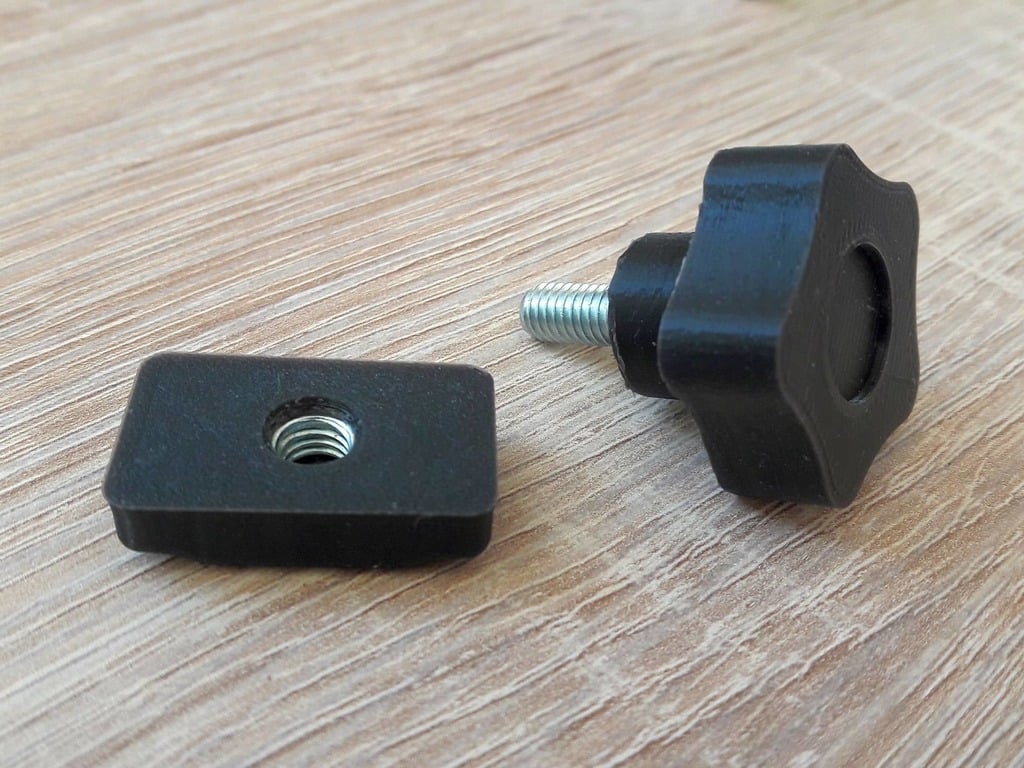
### Screw Handle for Anycubic Photon Zero If you are using the Anycubic Wash&Cure together with a Photon Zero printer you may have noticed that it lacks a way to secure the printing platform to the holder of the washing machine. This is a recreation of the screw handle which is already included with the Wash&Cure machine. ### Print in place = no glue needed! You will need a M6x20 screw and a M6 nut (preferably galvanized). How to print this part with the inserted screw: 1. Place the 'elevated handle' STL with the small circle standing on the print bed. 2. As the main part of this print is floating in mid air, generate support structures (only allow supports that touch the printing surface to avoid filling the hole in the middle). 3. Pause the print at the last layer before the hole in the middle is being closed and park the print head some distance away. Some slicers such as Cura may support 'auto-pause-at-layer' functionalities. 4. Insert the screw (M6x20). I recommend a galvanized screw to make it chemically resistant. It should slide easily into the hole. After that resume the print and let it finish. 5. Remove the support structures. The lower side may need some sanding. Printing the second part is easier as it doesn't need to be elevated. Also pause at the highest layer before the hole is being closed and insert a M6 nut. 6. Congatulations! You have created a professional looking and strong screw handle without having to glue anything.
With this file you will be able to print Screw Handle (print in place) for Anycubic Photon Zero and Wash&Cure Machine with your 3D printer. Click on the button and save the file on your computer to work, edit or customize your design. You can also find more 3D designs for printers on Screw Handle (print in place) for Anycubic Photon Zero and Wash&Cure Machine.