Scribing tool
thingiverse
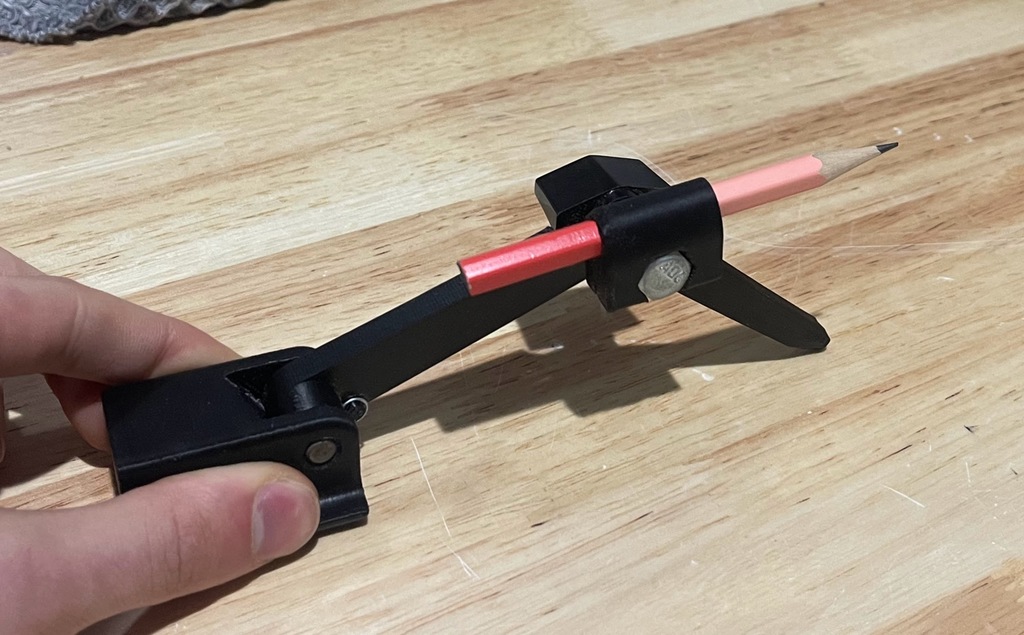
Easily adjustable detail scribing tool, perfect for scribing any surface onto a perpendicular one. I use it for trimming baseboards to match bumpy floors or moulding to match brick/stone. The tool requires an extension spring less than 1/4" in diameter, one 1" long by 1/4" diam pin, a 1/4-20 hex bolt, and a 1/4-20 knob-nut or wing-nut (plus a pencil of course!). Assembly: 1) Use the pin to connect the lower arm (with boss around pivot) to the base. Make sure to mount it in the correct orientation as shown in the fourth picture. 2) Wrap one end of the spring around the cross-bar in the base, than pull the other end up and hook it onto the post on the lower arm. 3) Pass your pencil through the pencil holder (hexagonal hole). 4) Pass the bolt through the pencil holder, upper arm, lower arm, and nut. Note: It is possible your pencil will be too large to fit or too small to be secured with the bolt tightened. If so, feel free to scale the part as needed, making sure that the bolt can still fit. To use: Set your scribing height by adjusting the pencil relative to the upper arm tip (make sure that the pencil will contact the surface being scribed on to before the upper arm tip). Then smoothly slide the base along whatever surface needs to be scribed, making consistent contact with the pencil. I find that keeping the scribing tool at a 45 degree angle to the wall works best. If you are finding that the upper arm tip is not following the surface to be scribed, try reducing the pressure on the pencil tip or using a tighter spring. When you are done with the tool, you can fold the pencil and upper arm up to make it more compact and protect both tips!
With this file you will be able to print Scribing tool with your 3D printer. Click on the button and save the file on your computer to work, edit or customize your design. You can also find more 3D designs for printers on Scribing tool.