Scuddy Dual Z Upgrade Kit for the Ender 3
thingiverse
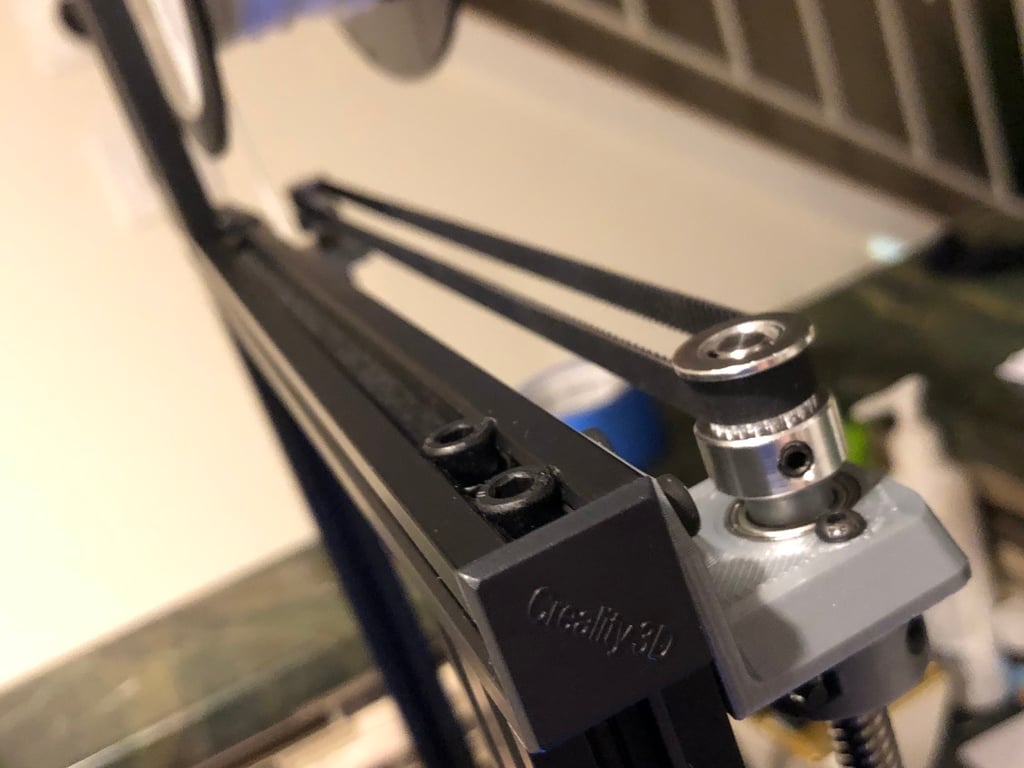
<b>This is my Scuddy Dual Z upgrade for the Ender 3. It's a mix of my own designs and one remix part. My whole goal was to design a well thought out and cheap dual Z upgrade for the Ender 3. I upgraded mine for about $35 in parts. </b> <b>IMPORTANT: Use this Z Axis Motor Holder (https://www.thingiverse.com/thing:3189649) to correctly adjust and align your stock lead screw FIRST. Otherwise, your lead screw will NOT correctly line up with my bearing support bracket. Individually test each lead screw for smooth operation. </b> <b>NEEDED ITEMS:</b> (1) T8, 2mm pitch, 400mm long lead screw with brass nut - https://amzn.to/2EtxVwl (2) GT2, 8mm bore pullies - https://amzn.to/2EtU4L0 (1) GT2 3mm bore idler pulley - https://amzn.to/2EuUK2I (2) 688zz bearings - https://amzn.to/2XgPFTj (1) GT2 belt - https://amzn.to/2Xmv5AU I used Hatchbox Silver 1.75mm PLA for my build - https://amzn.to/2XoeFrx I highly recommend eSun PETG if you want something stronger https://amzn.to/2IC6HYC <b>UPGRADE PART DESCRIPTIONS:</b> Dual Z bracket (Print 1) - Two versions are available. One has slots to capture M3 lock nuts. This makes adjusting the lead screw brass nut much easier later. Mount this bracket with (3) M5x42mm screws and the stock lock nuts. You will use the spacers below to space the bracket from the stock v-slot wheels. Z Bracket Spacer (Print 3) - These spacers help mount the Z bracket and align it perfectly with my custom top bearing supports. Belt Tensioner (Print 1) - This is optional if you make your own closed GT2 belt to size. You will need CA glue to join the belt. The one pictured I made to size. I do have to loosen a bearing support bracket on one side to get my belt over it. That’s how long or how much tension is in it. https://www.thingiverse.com/thing:1827260 This is the stop collar I used (https://www.thingiverse.com/thing:2940715) to secure my second lead screw. It will keep the lead screw from riding up the bearing support bracket. If you decide to use it, space it away from the bearing support bracket with one pulley lead screw spacer. <b>ADDITIONAL RECOMMENDED PARTS:</b> Print and use this jig (https://www.thingiverse.com/thing:1827260) to help you cut and create a custom closed loop GT2 belt. You will need CA glue to join the belt. Use my clamping lead screw control knob (https://www.thingiverse.com/thing:3459199) to help you manually adjust your x-axis gantry. I noticed after installing the second lead screw there was too much tension to manually move the x-axis gantry. This lets you do it easily. UPDATE 2/27 - New version of the rear PSU bracket has been added. I incorporated a cap into the back of it to fully cover the frame extrusion and take the guess work out of how far back the PSU should be. UPDATE 2/26 - Top bearing support bracket (V5) has been updated with a thicker mounting area and bigger opening on the bottom to allow the collar spacer direct contact with the rotating bearing instead of the bottom of the bearing support bracket. <b>DISCLAIMERS:</b> By using my designs, you are doing so at your own risk and agree not to hold me liable for any misuse, injury or damage to property or life that may inadvertently result. It takes time and effort to develop things. You can contribute by tipping me, the designer.
With this file you will be able to print Scuddy Dual Z Upgrade Kit for the Ender 3 with your 3D printer. Click on the button and save the file on your computer to work, edit or customize your design. You can also find more 3D designs for printers on Scuddy Dual Z Upgrade Kit for the Ender 3.