SCX10.2 RTR Interior
pinshape
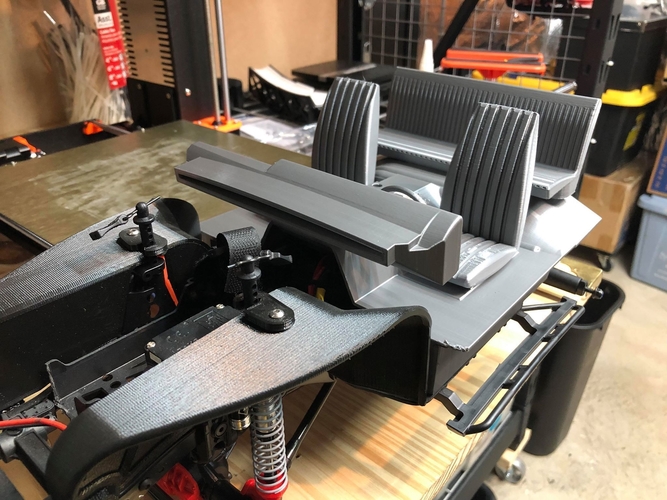
It's been a long time coming! I've finally completed the Interior that will fit the SCX10.2 RTR, and it's a game-changer. The higher tunnel allows for complete clearance of the transmission, unlike the Kit version with its built-in transfer case. This print is expected to take about 20 hours to fully complete, and you'll need supports and all parts to get it done. To ensure proper printing, please follow these orientation guidelines: Floor Orientation - On End Front Down (If Printing Right Hand Drive Dash, remember to mirror the floor before slicing). For optimal results, use the following orientations: Dash Orientation - Back Down (No Supports Needed) - You have the option of Left Hand or Right Hand Drive. Steering Wheel - Face Down (To mount securely, wrap a layer or two of Electrical Tape around the column or hot glue it in place. The loose hole in the dash is intentionally designed for a servo-driven wheel, which I'll finish designing when I get the chance. Here are the hardware requirements: 8 - 3x8mm Hex to assemble (or Glue) and 4 - 3x22mm Hex to attach the system to the floor boards of the truck. Use the 3x22mm in place of the stock screws that hold the rock guards to the truck. For a secure fit, either hot glue the Dash to the Floor or inside the shell in the appropriate location.
With this file you will be able to print SCX10.2 RTR Interior with your 3D printer. Click on the button and save the file on your computer to work, edit or customize your design. You can also find more 3D designs for printers on SCX10.2 RTR Interior.