SD to IDE 3 1/2" Enclosure
prusaprinters
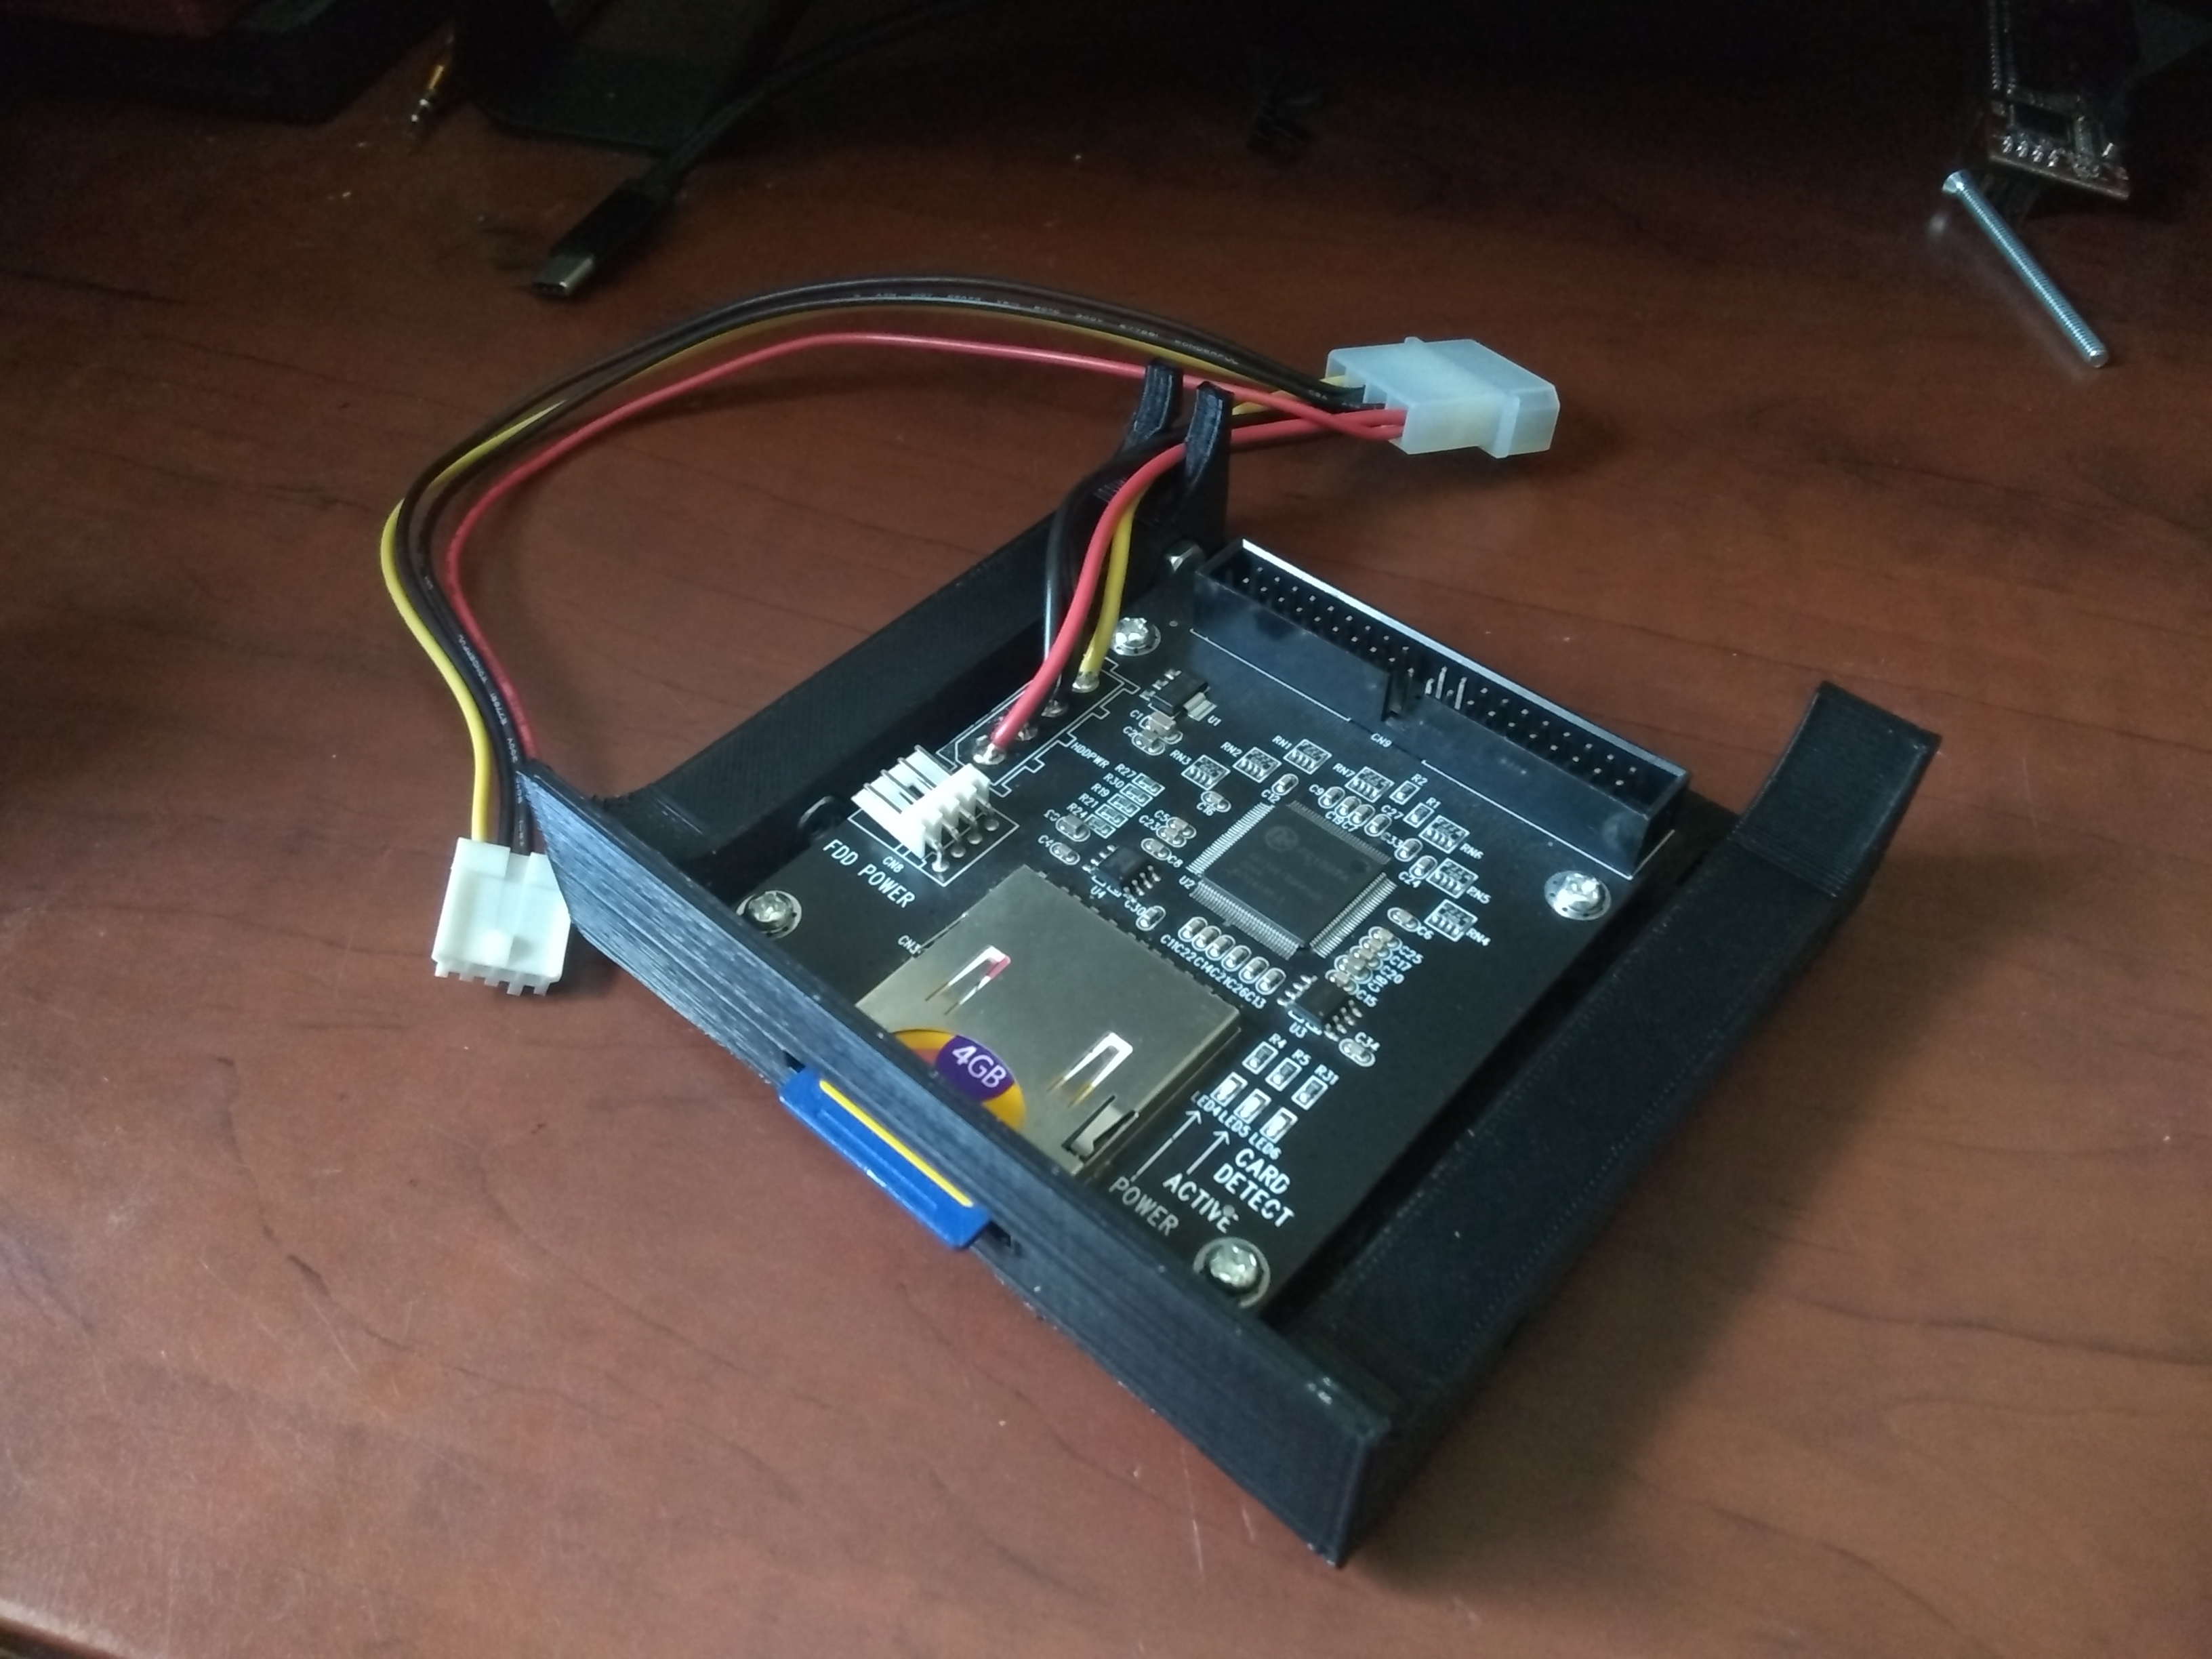
<p>Recently I have been using an SD to IDE converter purchased off of amazon in my retro Windows 98 PC <a href="https://www.amazon.com/SDHC-40Pin-Adapter-Memory-Drive/dp/B08SK28S2Y/?tag=thingiverse09-20">https://www.amazon.com/SDHC-40Pin-Adapter-Memory-Drive/dp/B08SK28S2Y/</a>. However the manufacturer only provides a bare PCB with no enclosure to allow it to be easily mounted.</p><p>So I decided to take on the challenge my self of making a 3-1/2" drive bay enclosure for my SD to IDE adapter.</p><p>This project will require some basic soldering skills as you have to de-solder the Molex power connector and solder wires directly to the PCB. This is because when a Molex power connector is pugged in the socket the combined height of the PCB mounted connector and the cable mounted power connector is higher than the drive bay. I recommend sacrificing a Molex to SATA converter by cutting off the SATA plug and soldering the wires to the PCB as shown in the included pictures.</p><p>Slicer Settings:<br>Generate supports with overhang set to 89% (This will limit support generation to the SD slot only)</p><p>Nozzle: 0.4mm</p><p>Profile: Normal (0.175mm)</p><p>Approx. print time 7 hrs</p><p>You will also require the following hardware</p><p>For mounting the PCB:<br>Bolt: M2.5-0.45 x 15.7mm<br>Nut: M2.5-0.45</p><p>For mounting to the chassis:<br>6-32 Imperial size nuts and bolts.</p>
With this file you will be able to print SD to IDE 3 1/2" Enclosure with your 3D printer. Click on the button and save the file on your computer to work, edit or customize your design. You can also find more 3D designs for printers on SD to IDE 3 1/2" Enclosure.