Seedling Shells
prusaprinters
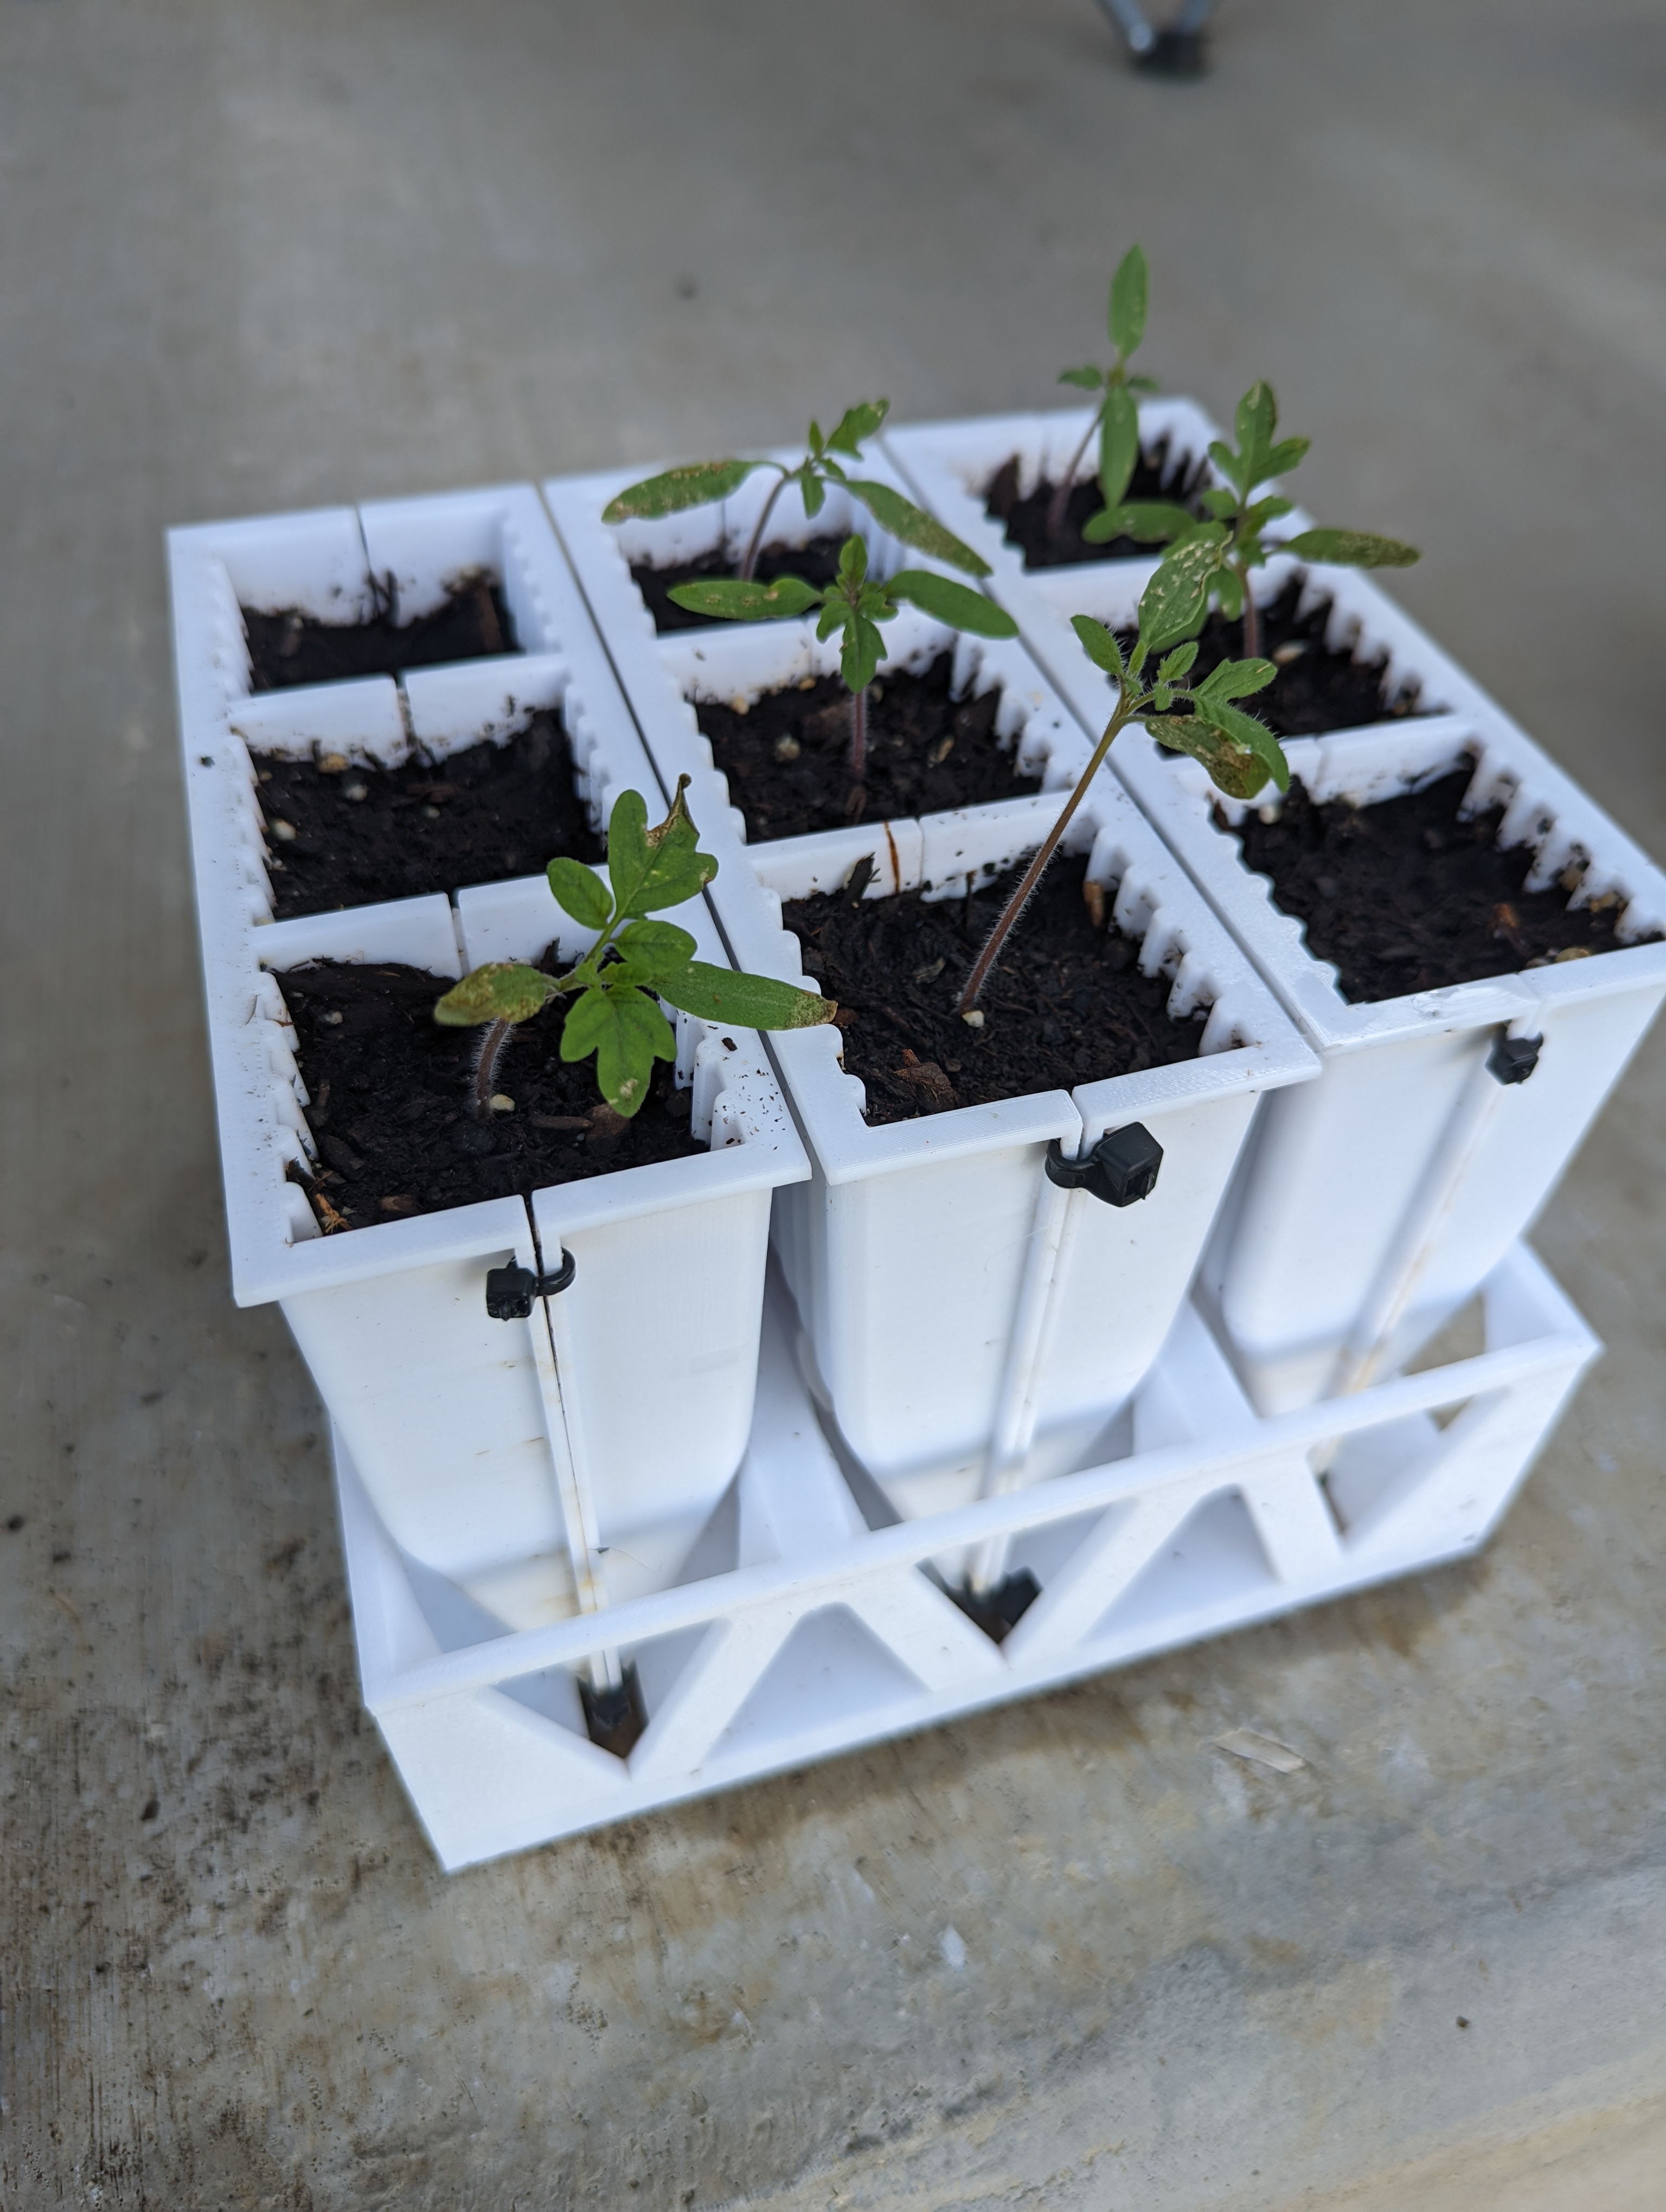
<p><strong>Benefits</strong></p><ul><li>Deep, consistent root growth</li><li>The ribbed sides and taper encourage downward and perpendicular root structure instead of balling or clumping.</li><li>An open bottom air-prunes roots to further avoid balling or clumping.</li><li>Separating shell-halves allow full access to seedling, no digging or prying required. Root shock is eliminated.</li><li>Watering by dunking saturates entire column of soil while preventing anaerobic environment of constant bottom-watering. </li><li>Rugged and durable, should last years.</li></ul><p><strong>Printing</strong></p><ul><li>Printing six seedling shells (three pairs) and a tray provides nine cells to sow.</li><li>This is an outside application, so it's probably best to print in PETG to avoid warping. No warping present during a hot Texas summer. If you're in a cool environment, you might get away with PLA.</li><li>Low infill, 10-15% works fine since this are mostly walls and aren't under heavy load.</li><li>I found it helpful to print two shells at once, oriented parallel with the Y-axis if you're using a bed-slinger, with a brim.</li></ul><p><strong>Sowing</strong></p><ol><li>Combine two seedling shells. The halves should stick together fine with the friction of the tabs. However, slots are available on the sides for small zip ties if they won't stay together.</li><li>Pack good soil into each cell of the seedling shell pair, stuffing the soil down with your fingers. Make sure soil reaches the bottom.</li><li>Dibble holes in the soil and drop in your seeds.</li><li>Place the seedling shell pair in a tray slot. </li><li>Once all three slots are filled, dunk the full tray into a bin filled with water. You may mist or shower additional water on the top. The soil should be saturated in a minute or two. <i>This will be your primary method of watering trays.</i></li></ol><p><strong>Transplanting</strong></p><p>Once the seedlings have reached the desired size for transplanting, you may remove a seedling shell pair from the tray and gently pry open the shells; remove zip ties if you have used them. Each seedling should have a consistent root structure and be easily movable into their transplant spot. I like to carry an open shell into the garden and simply slide the seedling into their pre-dug hole.</p><p><strong>Note</strong>: Some of the photos show an earlier version of the shells. The final version has some filleted corners and beefier flanges.</p><p> </p><p><i>Happy planting!</i></p>
With this file you will be able to print Seedling Shells with your 3D printer. Click on the button and save the file on your computer to work, edit or customize your design. You can also find more 3D designs for printers on Seedling Shells.