Sega Master System 2 NoCut AV Mod
thingiverse
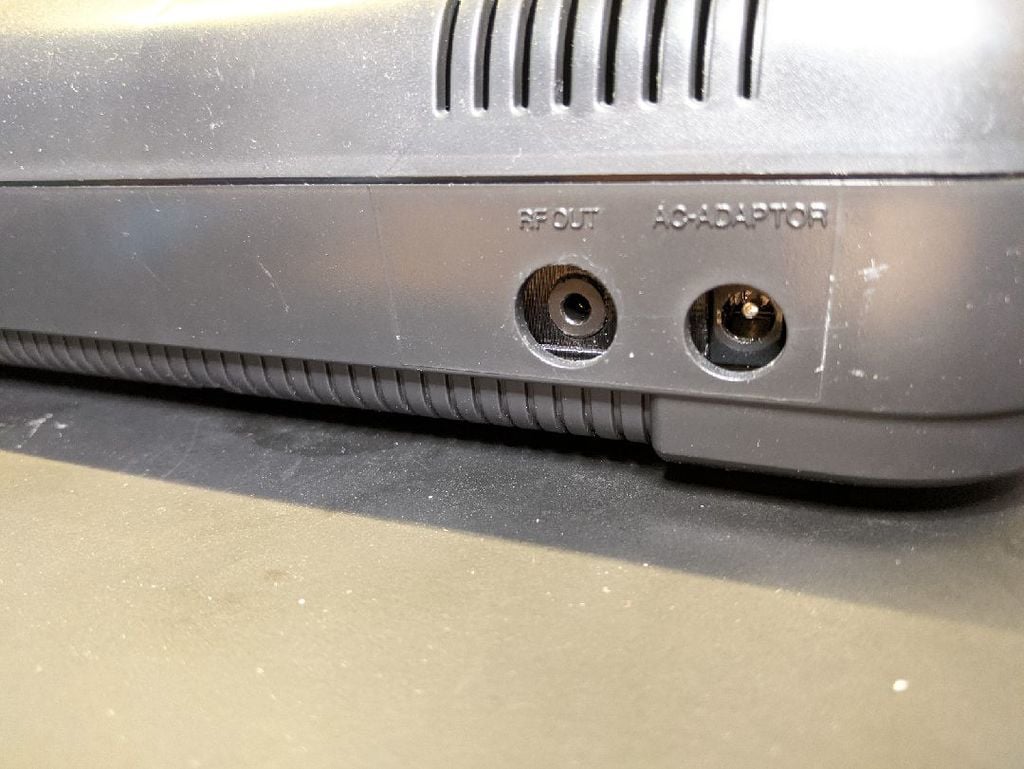
This mod brings out the Composite (**not** the RGB as in the original mod, so the image quality might not be as good as with the other mod) video signal and the audio signal (mono only) to a 4-pole headphone jack. **Double check everything before powering up. I am not to be held responsible in any way if you screw up your precious console!** I liked the idea of the original mod (thans **@zitruskeks** for sharing!), but as no sources were given and I had no suitable connectors at hand, I re-designed this in OpenSCAD to be able to fit a 4-pole 3.5mm headphone jack. I had some cables lying around from older cell phones which usually provided a composite signal from the jack via the 4th ring. As stated in the original Thing, you will need to **de-solder the RF modulator** (no modern TV I know of still sports an analogue TV capable receiver anyway) in order to put this into place. The thermal mass of the shielding is rather high, so be careful on removal. **Note: ** I helped myself with a trick I picked up recently: adding a **little bit** of *Bismuth* (https://en.wikipedia.org/wiki/Bismuth#Other_metal_uses_and_specialty_alloys, you can get this easily e.g. on Amazon) to the solder. This will drop the melting point significantly and using a solder sucker becomes much more easy as the solder takes more time to solidify. Just be sure to thoroughly clean off the remaining solder once you are done. I got the jacks from here: https://www.amazon.com/s?k=B089222S84 and with the current design they fit nicely flush. Just attach the cable you want to use and use a Multimeter to check which tab goes to which part of the cable. For the other connections I did some research on the net (the key word is **CXA1145P**, which is the signal encoder used in the SMS2) and what I found working nicely is to * put 75Ohms (I used 2x 150Ohms in parallel) in series with a 220uF electrolytic capacitor for the Composite video signal * put a 10uF electrolytic capacitor in series for the audio signal To get the best signal quality possible, I grabbed them immediately after the chip. According to the SMS2 schematic (I love the Internet), I had to remove some components to avoid interference ('upper' means *near to the backside*): * de-solder R21, R28, C40 from the board * use the 'upper' solder pad of R21 for the video signal * use the 'upper' solder pad of R28 for the mono audio signal (just split it after the cap) Please check the pictures for details. I also used two grounding points just to be safe. **Note:** for the electrolytics, I put the *positive* side next to the CXA1145P pins. Don't know how much difference it makes, though. The print should fit snugly between the power supply connector and the RF shielding. If you happen to have other jacks, just go ahead and check the OpenSCAD source how to modify it according to your needs. Finally: Have fun playing the old classics!
With this file you will be able to print Sega Master System 2 NoCut AV Mod with your 3D printer. Click on the button and save the file on your computer to work, edit or customize your design. You can also find more 3D designs for printers on Sega Master System 2 NoCut AV Mod.