Segufix Compatible Locks
prusaprinters
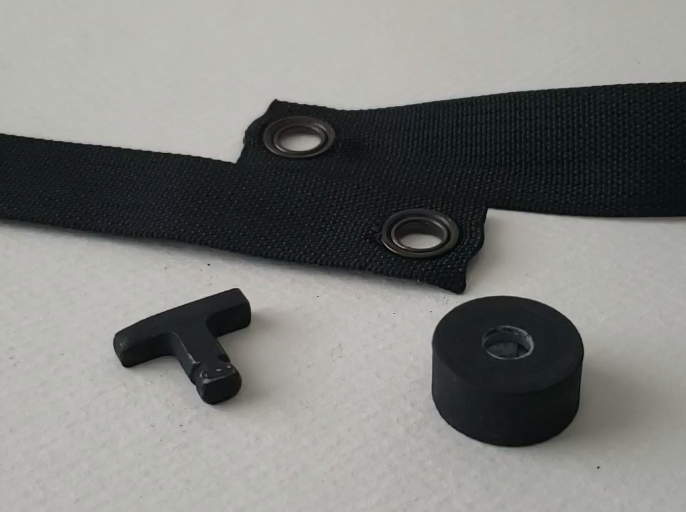
<h3>Compatibility</h3><p>These locks are compatible with Segufix systems. The posts are 7.11mm at their maximum diameter meaning they fit easily in 8mm eyelets. </p><p>3 post lengths are included for locking together different thicknesses of straps, and STEP files are included so they can be modified as needed.</p><p>The “head” of the lock is more compact than the original Segufix locks.</p><h3>Printing Settings</h3><p>I have had good luck printing on standard quality (0.2mm layer height) with 0.4mm nozzle on an Ender3. I use Cura for slicing, however none of these parts are particularly finicky so the settings are not that critical.</p><p>Since most of the parts are thin, they end up having no infill, however the slider can be printed with ~15% infill since it is not under any significant load, and the post can be printed at anywhere from 15-100% infill depending on your desired strength. I recommend starting at 15% infill to get an idea of how strong it is before moving to a higher infill.</p><p>These parts are designed to use NO SUPPORTS. Use the orientation in the following image when slicing:</p><figure class="image"><img src="https://media.printables.com/media/prints/256878/rich_content/f1dd4a4c-2d43-448e-b466-1a8248882eee/screenshot_20220823_091452.png#%7B%22uuid%22%3A%22b6080df4-2dfb-4bc4-9aac-d716e25839dc%22%2C%22w%22%3A1531%2C%22h%22%3A776%7D"></figure><h3>Additional Parts</h3><p>Each lock requires a ¼" SAE washer. It MUST be SAE or it won't fit. </p><p>Additionally, two 4mm diameter, 2mm thick neodymium magnets are needed for the slider. These are very inexpensive from sites like amazon or Aliexpress. </p><p>Finally, a larger magnet is needed for unlocking. This could be two disc magnets axially polarized so that they attract the 4x2mm magnets inside the lock. From testing, simply using 4x2mm magnets as the key for unlocking doesn't work because they are not strong enough to pull the slider away from the washer.</p><h3>Assembly</h3><p>The assembly of the lock is fairly straightforward but a video is included to make things more clear. Superglue (cyanoacrylate) should be used to fix the magnets to the slider and the washer to the case if the press fit is not very tight. Additionally, glue should be used to hold the lid to the case once the lock is confirmed to be working.</p><p>For convenience, make sure when you are making multiple locks that the magnets in the sliders are all facing the same direction so that the same side of the magnetic key unlocks all of your locks.</p><p><a href="https://imgur.com/a/B2zNg98">Here is a render of the how the lock works</a>, which is also acts as the assembly instructions.</p><h3>Troubleshooting</h3><p>The slider and barb should move freely within the housing. Any catching may prevent the lock from opening when the magnetic key is applied. When printing the parts, the settings may need to be tuned to prevent “elephants foot” that could mess with the fit.</p>
With this file you will be able to print Segufix Compatible Locks with your 3D printer. Click on the button and save the file on your computer to work, edit or customize your design. You can also find more 3D designs for printers on Segufix Compatible Locks.