Self Aligning Bushing Block
thingiverse
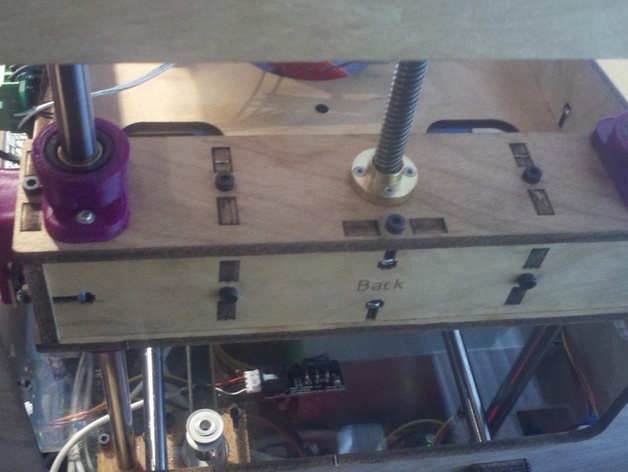
Improve your Thing-O-Matic's Z axis performance by following these steps. First, plot four bearing blocks and install an o-ring and bronze bushing in each one. These modifications enable self-alignment of the bushings, reducing binding and noise. Mount the blocks on the Z axis with #2 wood screws, ensuring ample clearance for alignment. This $5 upgrade enhances Z axis stability and quietness significantly. Be mindful of tight clearance near the shaft retaining bolts; using a different screw head or lowering the Z axis home switch may help.
With this file you will be able to print Self Aligning Bushing Block with your 3D printer. Click on the button and save the file on your computer to work, edit or customize your design. You can also find more 3D designs for printers on Self Aligning Bushing Block.