Self-Reseting Tilting Bucket Mouse Trap with Magnetic Release
thingiverse
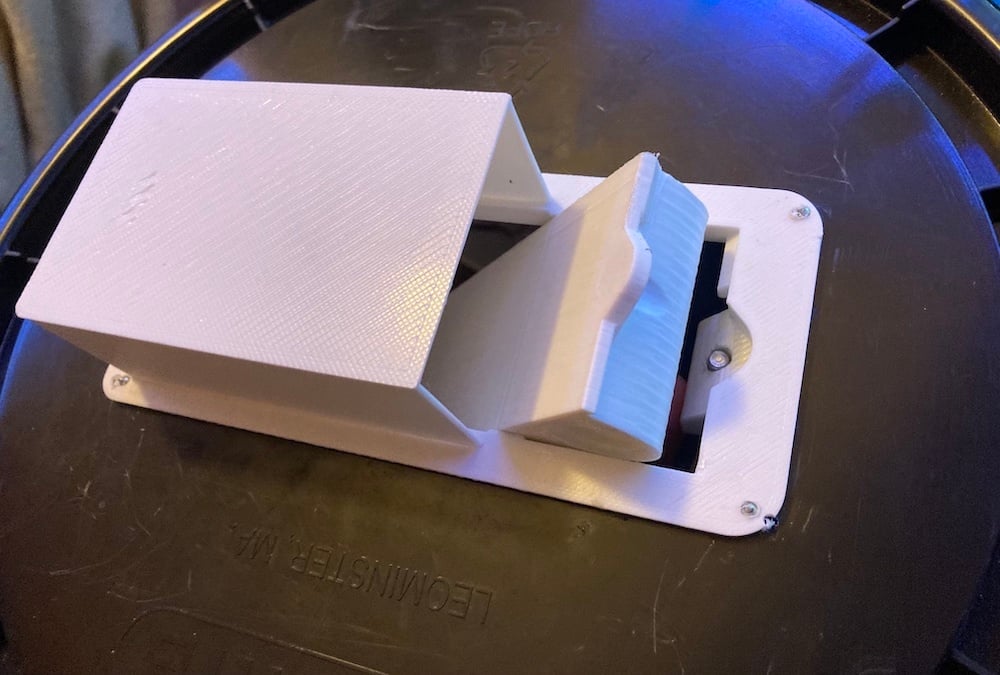
This is a tilting style mousetrap with an adjustable magnetic release for a snap action. The counterbalance weight is also adjustable. I designed it to work with pennies, but the two threaded plugs can sandwich any type of mass and allow it to be centered. The trap is meant to fit into a standard five gallon bucket lid, but other containers should work. The cover will prevent mice from jumping out should it be used as a live catch trap. It is capable of catching multiple mice without being reset. No supports are required, but holes will need drilling to exact sizes and some trimming of an integrated bridge support will be necessary. Filing for a smooth fit or to make the door more level when closed may also be required. Some parts must be glued. Step versions of all models are included to facilitate customization. Note that the photograph is of the first version. I made some minor tweaks after and it didn't seem worth reprinting it all, so I included a screenshot of the most current models as well. Additional hardware required: 1 10mm dia, 3mm thick magnet 2 10-24 nuts 1 10-24 bolt (approximately 1.5" long) 6 6-32 screws, (approximately 3/4" long) 6 6-32 nuts 6 6-32 washers a (cut-down) nail or similarly sized metal rod (approximately 1/8" in diameter) pennies or other mass for the counterweight To assemble: 1) Place the frame upside-down on your lid where you want it and use the four small holes on the corners of the insert to mark the corners of the cutout required. Remove this material from your lid. Flip the flange over and test the fit, then drill holes for the six 6-32 bolts. 2) Drill the door's hinge pin hole to the required size (go slowly, letting the bit cool down every so often to avoid melting the plastic) and insert the hinge pin. Holding the door by the pin so it can tilt freely, add pennies (or other mass) inside the threaded counterweight hole until the door is tilted backwards in the closed direction. Try to add as little weight as necessary to achieve this, as the magnet will provide the primary holding force. Center the mass in the threaded hole and clamp it in place with two threaded plugs. 3) Glue the magnet into the recess at the back of the door. Be sure to press it flat. 4) After drilling and cleaning up the hole for the 10-24 bolt that sits over the magnet, glue a 10-24 nut into the recess in the frame, again being sure it's flat. Avoid getting glue on the threads. The forces involved will be small, so not much glue should be required. Once dry, put another nut onto the 10-24 bolt and thread it into the glued-in nut. The idea is to have a double nut so the bolt can be locked in the correct position to give the right amount of attraction with the magnet. 5) Drill the hinge pin holes in the frame to the appropriate size. Trim the hinge pin so it doesn't protrude past the insertion width (the part that fits into the cutout in the lid) of the frame. 6) Glue the hood onto the flange, aligning it with the groove in the frame's top. This prevents mice from leaping forward or sideways once the door starts tilting. 7) Assemble the door into the frame and insert the frame into the rectangular hole cut into the container lid, then bolt it into place using the six 6-32 bolts, washers, and nuts 8) Place the bucket trap where it will be used (to match the level of the ground) and then adjust the 10-24 bolt so that it releases at the correct location and force I used a 13 gram weight (some pennies taped together) placed about an inch and a half from the bait end of the door. This has to be done very gently and verify it behaves properly a few times. Now mark the bolt with a marker so you can avoid accidentally turning it. Since it is so sensitive, you want a line along the length of the bolt that matches a mark on the frame so that any angular motion can be spotted and corrected. Tighten the locking 10-24 nut to secure the bolt, using the mark to maintain the correct position. 9) Add some peanut butter to the shelf at the back of the hood. This is best done from the bottom of the lid, where, now that it's upside-down, the trap's counterweight will help hold the door open. 10) Add about six inches of water to the container if this is to be a kill trap. If a live trap, be sure to check the trap every day for mice and possibly put some food, water, and bedding in the bucket so they are less stressed. 11) Place a piece of wood leading up to the top of the bucket to act as a ramp so the mice can climb up easily.
With this file you will be able to print Self-Reseting Tilting Bucket Mouse Trap with Magnetic Release with your 3D printer. Click on the button and save the file on your computer to work, edit or customize your design. You can also find more 3D designs for printers on Self-Reseting Tilting Bucket Mouse Trap with Magnetic Release.