Self-Resetting Mouse Trap
thingiverse
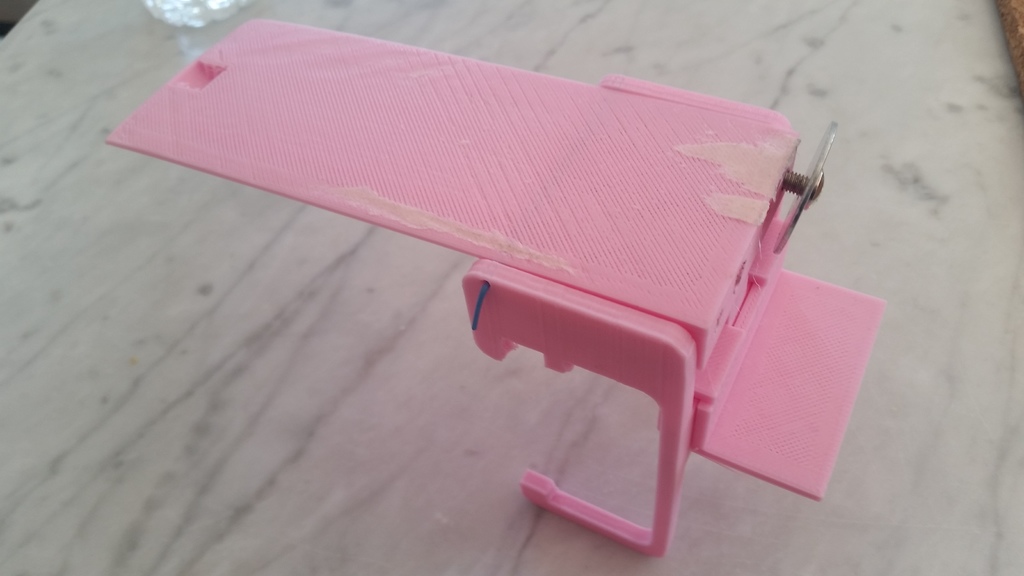
I used the original mouse trap design as inspiration, but rebuilt most of its parts from scratch. I still need to use a straight wire or paperclip as a hinge. I'm thinking of reworking it so it won't require a paper clip at all. Since I don't have one handy, the final test of the assembled unit is a bit tricky! The plank needs a magnet in the back and some screws/bolts for counterweight. I printed the plank in black PLA and left it in the sun - big mistake! It softened and sagged. Use a different color or material, don't expose it to sunlight, or add a little reinforcement. The only part of the original that supported printing on the plank was the bait cup. This might help hold peanut butter in place, making it harder for prey to avoid falling into the bucket. I removed the discs at the four corners of the plank and shortened it to fit smaller print beds better. I added two supports under the plank for extra rigidity - the original design was prone to sagging. I added a bait cup to the end of the plank, filled with peanut butter or nutella. This reduces the chance of it falling off. I eliminated the coin counterweight slots at the rear of the plank and replaced them with 4 holes of different sizes for screws/bolts. You can also add washers and/or nuts to fine-tune the balance. I eliminated the wire slot and secured the wire to the plank with a single hole extending from one side to the other. I printed the plank at 10% infill to save filament, but you may want to try higher infill for better results. Print it upside down on the bed for added stability. You can use a 3D pen to add more filament or attach other items as counterweight. I used mine to hold washers and a magnet in place. The photo shows a single screw with a large washer as counterweight. I'm reworking the design to have more material at the back end, reducing the need for counterweight. Higher infill might also help - please share your results! I revised the bracket to print in one piece, eliminating extra screws and supports. It got a bit messy around the part that hooks onto the bucket, but it's not a big deal. I created a ramp support to make positioning easier. This printed with supports for me under where it hooks onto the bracket. The ramp support slides onto the back of the bracket and provides a platform for prey to walk up to reach the plank. This should help - I often found my ramp on the ground after it had slid off the bucket!
With this file you will be able to print Self-Resetting Mouse Trap with your 3D printer. Click on the button and save the file on your computer to work, edit or customize your design. You can also find more 3D designs for printers on Self-Resetting Mouse Trap.