Sequential Shifter
thingiverse
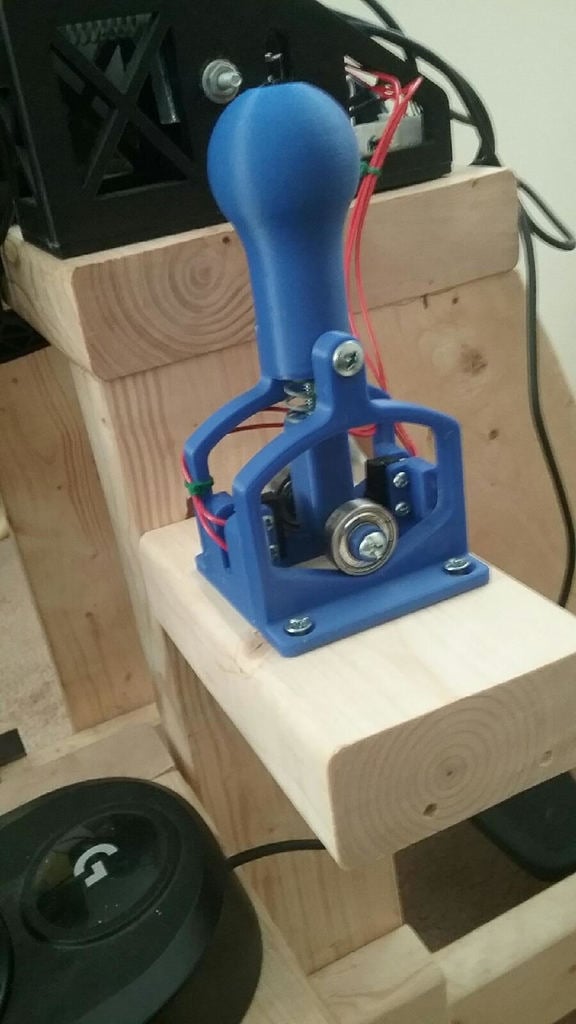
Parts Needed: Printed: 1x Shift Knob 1x Bottom Support 1x Front Mount 1x Back Mount 2x Side Mounts 2x Bearing Adapters 2x 608 Skateboard Bearings Non-Printed: 1x Zero Delay USB Encoder 3x Machine Screws (10-24 x 2.5", 10-24 x 2", 10-24 x 1.5") 9x Nuts (10-24) 2x Limit Switches 1x Compression Spring (#28 or equivalent) 4x Screws (attach limit switches to shifter) 4x #10 Countersunk Head Wood Screws Assembly: Insert the 10-24 x 1.5" machine screw through the shift knob hole and secure with a nut on the bottom side. Cut down the compression spring to approximately 15mm total length and place it on the bolt. Attach the Bottom Support to the knob assembly by capturing a nut in its hex-shaped hole until the spring begins to compress. (Note: You may need to cut down the machine screw for adequate travel, or use a longer screw like a 2" one that you can trim as needed.) Once the shift knob assembly is complete, insert both bearing adapters into each bearing's bore. Attach these to the 10-24 x 3" machine screw and feed it through the crosswise hole of the Bottom Support with enough nuts to secure the bearings' position. Next, attach the combined shift knob and bearing rod assembly to the Side Mounts using a 10-24 x 2" machine screw. Secure this assembly with a nut and adjust the final spring preload by rotating the Bottom Support until the bearings just contact the Side Mounts at their rest position in the center. Prepare the Front and Back Mounts by attaching limit switches (without levers) using small screws. Perform a dry fit to ensure proper alignment, then glue these mounts to the Side Mounts to complete the assembly.
With this file you will be able to print Sequential Shifter with your 3D printer. Click on the button and save the file on your computer to work, edit or customize your design. You can also find more 3D designs for printers on Sequential Shifter.