Servo point motor
prusaprinters
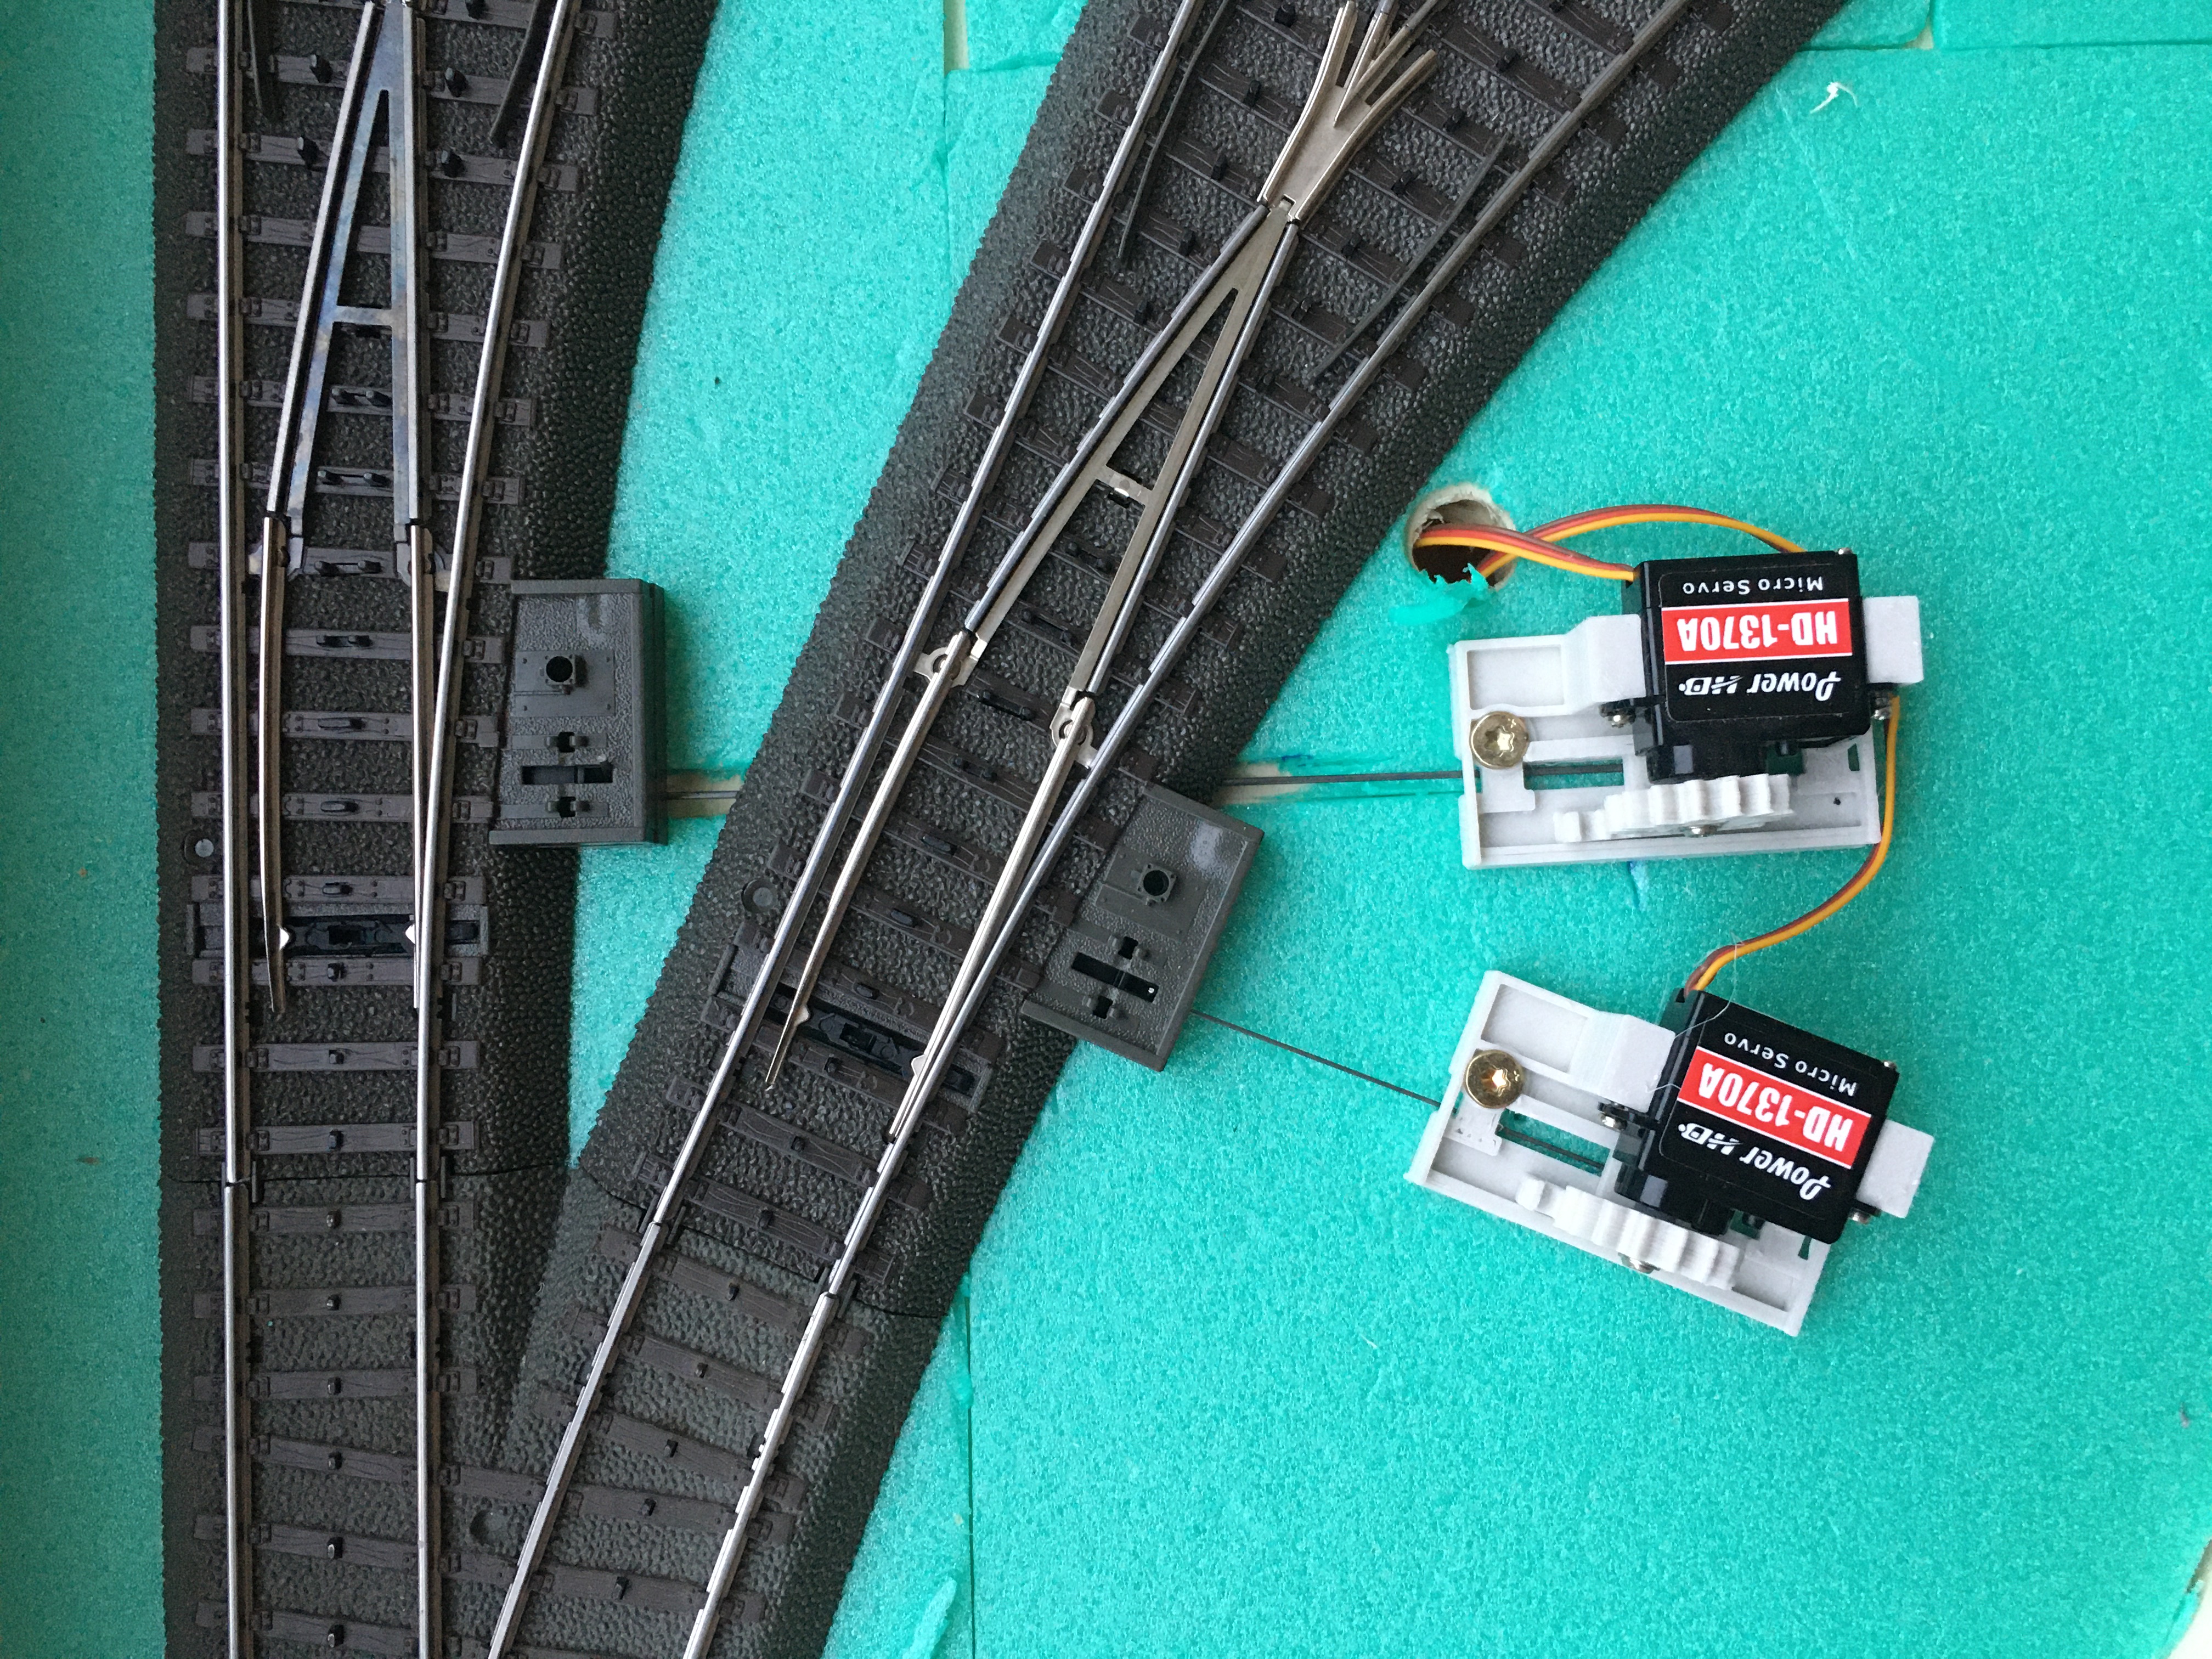
<p>The print allows for mounting a servo motor and translating its rotation to a linear motion for point control on a model railroad. The motor is mount underneath the table with the included arm poking up through the table. The point itself is connected with a spring steel wire made to fit.</p><p>To assemble the motor, screw in the servo with the screws delivered with it. Rotate the servo to one extreme and put the rack on that side of the guide. Now push on the gear and fasten it with the screw. The motor is ready for use.</p><p>The link with the point depends on the point, but I usually first mount the spring steel wire to the point mechanism measure where the hook for the motor needs to be and bend the wire there. Then I set the motor over the hook and screw it down.</p><h4>Printing</h4><p>Prints have been done in both PLA and PETG on a prusa i3 mk3s. For one motor you'll need to print a baseplate, a gear and a rack. Pick the ones correct for your servo and mounting. The rack for under table mounting needs supports to print. I used 0.2 mm layer height.</p>
With this file you will be able to print Servo point motor with your 3D printer. Click on the button and save the file on your computer to work, edit or customize your design. You can also find more 3D designs for printers on Servo point motor.