Servo Touch - Z Probe for Ender 3 - option to BLTouch
thingiverse
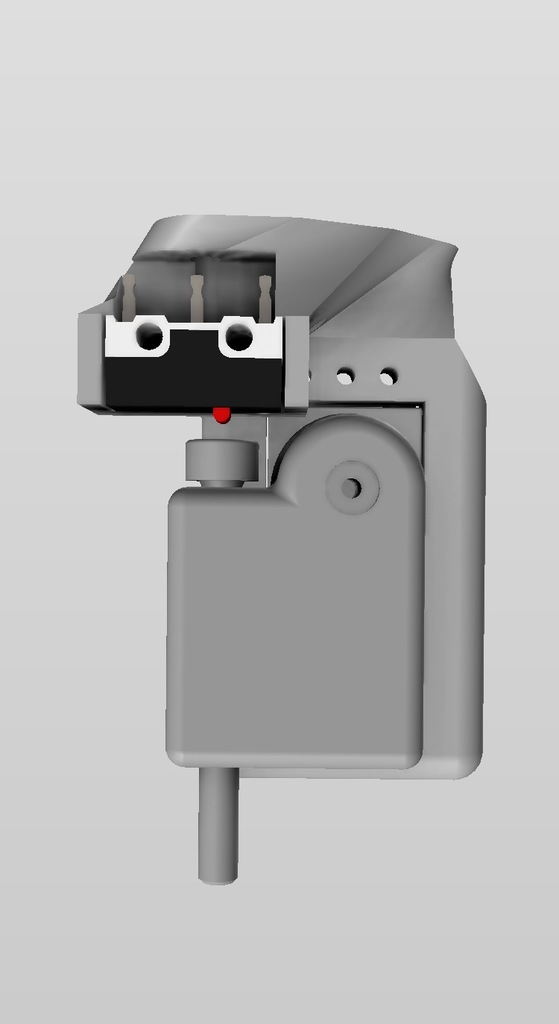
I had the basic idea of this Z-Probe, which I also used first and delivered good results. When I started to print ABS and bed-leveling became more important, I thought about how to improve the sensor because accuracy was no longer enough for me. Two things were important to me: easy and cheap to produce yourself, and higher accuracy than my current setup. The biggest measurement error was probably because the microswitch was attached to a moving arm and did not always have exactly the same position due to the play in the servo axis and its connection to the arm. Therefore, the microswitch now sits firmly in the top of the holder and is actuated by a plunger, which is swung in and out with the servo. So I could increase the measuring accuracy and reduce the standard deviation to under 0.015mm (4x 25 measurements with movement and repositioning). The mean deviation was about four-hundredths of a millimeter, that's the width of a hair! The holder has the same size as the BLTouch on the top, so it fits on most mounts, while of course it requires more space all around. As a servo, I used an SM-S2309S. The microswitch is the same as the Ender3 Z-Endstop, you could also just unsolder it. The metal tab can be left on the switch this increases the contact surface for the plunger. As a ram, I took a M3x30 Allen screw. It is advisable to sharpen the screw at the front so that the contact surface is smaller. Likewise, care should be taken that he head of the screw is flat. Offset Nozzle to Probe: #define X_PROBE_OFFSET_FROM_EXTRUDER -41.1 // X offset: -left +right [of the nozzle] #define Y_PROBE_OFFSET_FROM_EXTRUDER -2.1 // Y offset: -front +behind [the nozzle] #define Z_PROBE_OFFSET_FROM_EXTRUDER -3.05 // Z offset: -below +above [the nozzle] The values may be slightly different when everything is built
With this file you will be able to print Servo Touch - Z Probe for Ender 3 - option to BLTouch with your 3D printer. Click on the button and save the file on your computer to work, edit or customize your design. You can also find more 3D designs for printers on Servo Touch - Z Probe for Ender 3 - option to BLTouch.