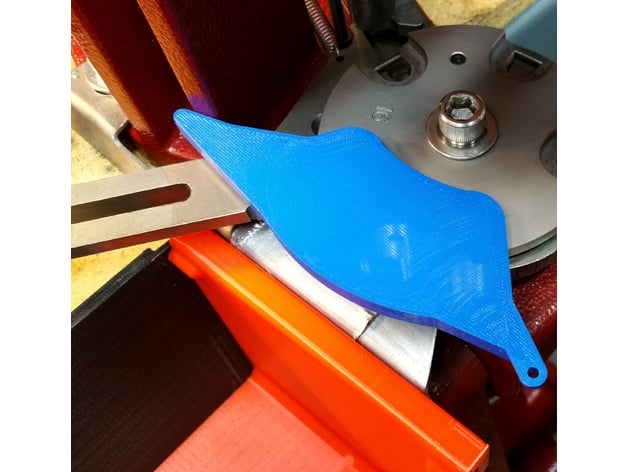
Shellplate Lock/Stop Tool for Hornady Lock-n-Load Progressive Reloading Press
thingiverse
You could, of course, buy the lovely red-anodized aluminum tool from Hornady (I have one, it's great but also overkill and overpriced). Really... they should've included this chunk of plastic with the press. The first time I got my shellplate stuck (and didn't yet have the fancy Hornady wrench) I was very irritated. To use it to loosen/remove the shellplate, click the shellplate forward by a half-click, and press the tool down into the two slots of the shellplate toward the front of the press. Then use your handy hex/allen key to loosen the bolt, while pressing down on your fancy new tool to make sure it remains deeply seated. The shellplate will rotate backwards slightly until the stop/lock tool stops it against the frame of the press and you can crank away with the hex wrench. To use it to tighten the shellplate... well, it should be self-explanatory. Note that you really don't need your shellplate on too tight. Just tight enough to stay put for a solid session of making dem boolits. You could easily break this tool by trying to overtighten your shell plate. It is much stronger during the removal process, due to leverage/distance from the front frame member of the press. I demolished a couple of the prototypes during testing, and though they were weak/fast prints, that big hex wrench can lay down some serious torque. Go easy on the tightening. The photos show one of the final prototypes, printed at very fast/low quality. See "Print Settings" for more information. Also note, this was designed and tested against a #16 (.223/5.56) shellplate. From feedback it sounds like it might not work too well with every shellplate out there. I'd be willing to do some mods for the 9mm, 40SW, 45ACP, .308 shell plates if anyone discovers a problem but really needs it to work with one of those. Those are the only shell plates I have for my own progressive. BTW, is it one word, "shellplate" or two, "shell plate"? Print Settings Printer Brand: MakerGear Printer: MakerGear M2 Rafts: No Supports: No Infill: 80% Notes: For the real thing, I highly recommend 5 or 6 layers on the bottom (which is actually the top of the tool), 6 layers on the top (which is actually the bottom) and 6 outline layers. Then at least 70% infill, maybe more, possibly print a solid layer every 5 or so infill layers for extra strength. PLA+ is tougher than ordinary PLA and this tool will benefit. You might also disable your bed fan (there's no bridging, no supports), and really, you want the absolute maximum layer-to-layer adhesion you can manage, so you might even ratchet up the extruder temperature a couple degrees from your usual (there's nowhere for the thing to generate "strings" either. ABS might be a pain due to shrinkage - the tolerances are very tight in order to maximize strength. I pretty much never use ABS, but if you make it work, that might be nice and tough. Same for PETG, though I guess it shrinks a bit less. On my MakerGear M2, this takes a bit over an hour to print at the quality/strength settings mentioned above.
With this file you will be able to print Shellplate Lock/Stop Tool for Hornady Lock-n-Load Progressive Reloading Press with your 3D printer. Click on the button and save the file on your computer to work, edit or customize your design. You can also find more 3D designs for printers on Shellplate Lock/Stop Tool for Hornady Lock-n-Load Progressive Reloading Press.
