Shelly 1 - Wago holder
prusaprinters
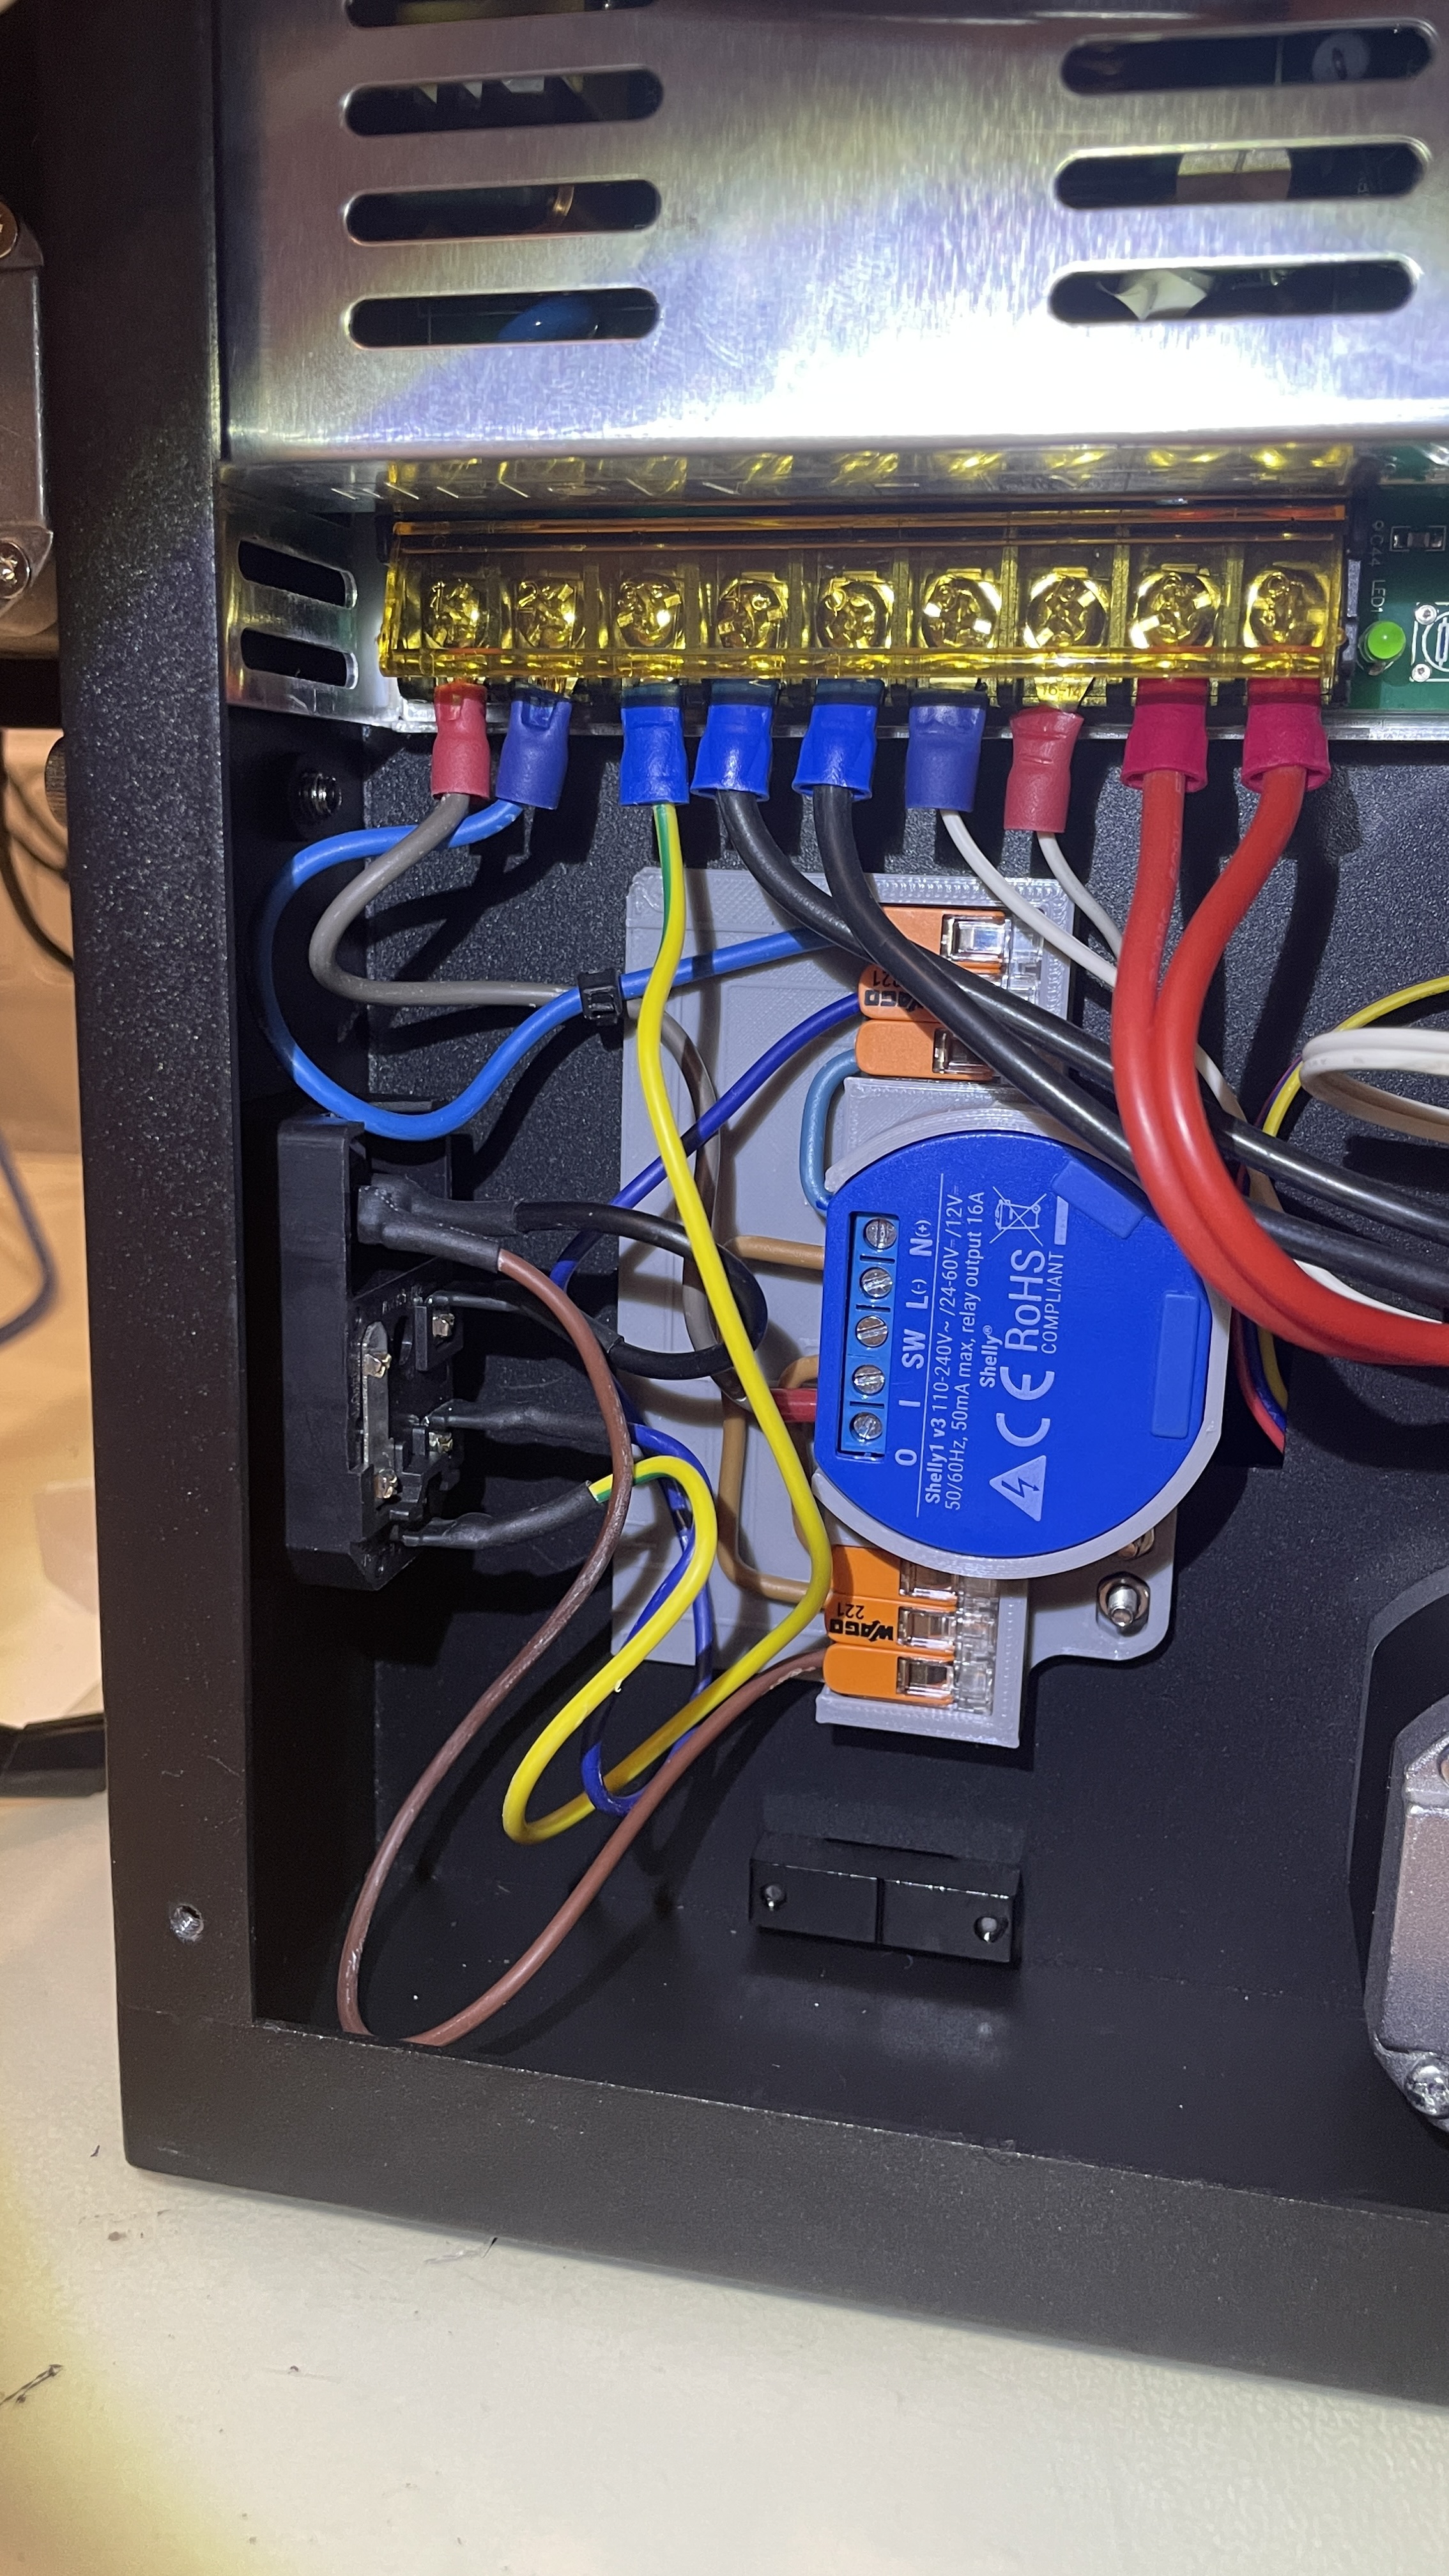
<h3>Caution</h3><p>The following work should not be carried out without electrical knowledge. I'm not responsible for any damage caused. Everything you do is done at your own risk.<br>Unplug the power cord before opening the printer.</p><h3><strong>BOM</strong></h3><ul><li>2x Spade Connectors</li><li>2x Nut M3</li><li>M3x min 12mm Socket Head Cap Screw</li><li>2x Wago 221-413</li><li>1x Shelly 1 configured</li></ul><h3>Assembly</h3><p><br>The holder attaches to the inside of the Y-axis limit switch holes. You have to remove the limit switch beforehand. The existing screws must be replaced with longer ones.</p><h4><strong>Options</strong></h4><p><br>If you control the printer via Octoprint you can use the two plugins <a href="https://plugins.octoprint.org/plugins/psucontrol/">PSU Control</a> and <a href="https://plugins.octoprint.org/plugins/psucontrol_shelly/">PSU Control - Shelly</a> to switch the printer on and off.</p><figure class="image"><img src="https://media.prusaprinters.org/media/prints/133579/rich_content/526f9296-f66a-48a8-9acf-67828a31a6c8/2022-02-03-08_58_09-greenshot.png#%7B%22uuid%22%3A%225996ce88-b8d4-46ba-9a0b-9062bf2b40c4%22%2C%22w%22%3A973%2C%22h%22%3A827%7D"></figure><figure class="image"><img src="https://media.prusaprinters.org/media/prints/133579/rich_content/5ed7f89e-1fbe-483e-a11d-6a1178c5b1e1/2022-02-03-08_58_27-greenshot1.png#%7B%22uuid%22%3A%22c8c9c8fa-d8db-4c01-a9af-20d56581e0b4%22%2C%22w%22%3A976%2C%22h%22%3A829%7D"></figure>
With this file you will be able to print Shelly 1 - Wago holder with your 3D printer. Click on the button and save the file on your computer to work, edit or customize your design. You can also find more 3D designs for printers on Shelly 1 - Wago holder.