Shoelace Assist
thingiverse
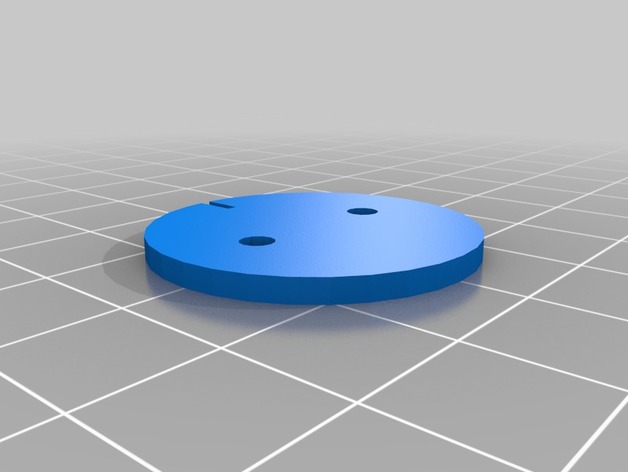
I teach a grade 8 computer exploratory and wanted to bring maker culture into the classroom. I asked my students to help me design a tool that would allow my father in-law, who suffers from ALS (a fatal degenerative muscular condition), to tie his own shoes despite the fact he no longer has use of his thumbs. The attached thing was the best product that the kids designed and printed, and what he currently uses. I have since used this design to create a lesson sequence teaching the Engineering process to other students. It doesnt reference 3D printing however as I wanted it to be usable in schools that do not have access to 3D design software. It is easy however to allow the students to use any tools including 3D design software as they create their prototypes. I have now used this lesson sequence to design and print several other assistative technologies. Matt Boulton Gordon Head Middle School Victoria BC Print Settings Printer: Infinity 3D Rafts: Doesn't Matter Supports: Doesn't Matter How I Designed This Here is the lesson sequence utilizing the attached 3D design Applied Design Learning Experience 1 Prototyping Structured/ controlled Inquiry Big Idea Design can be responsive to identified needs. Introduction: “Today you are going to take on the roles of engineers, technologist and technicians. We will be identifying a real world problem, brainstorming possible solutions, building technology to solve a real world problem and assessing our prototypes to see if we can improve our designs.” Required materials: 2 Pairs of lace up sneakers per group (ask for student volunteers) Large Buttons with at least 2 holes that laces can fit through (or cardboard disks with holes punched in them) Twist ties Student Prototype handout (two per group: 1 for Prototype 1.0, and 1 for Prototype 2.0): see attached form below lesson sequence Keywords Technology - a tool that is used to improve human life Engineers - People who design tools to improve human life. Engineering - The process of designing technology that involves: concepting, designing, prototyping, testing, and manufacturing new systems and products. Engineers - Professionals who often work closely with engineering scientists in developing new technology via research projects. A minimum of four years of study is required to become an engineer. Mathematics and science are emphasized. Most baccalaureate-level engineering programs are accredited by EAC/ABET. Engineering technologists - Professionals who use technical skills to support engineering activities, they are typically involved in product development, manufacturing, product assurance, sales, and program management. Engineering technicians - Professionals who work with equipment, primarily assembling and testing component parts of devices or systems that have been designed by others; usually under direct supervision of an engineer or engineering technologist. Their preferences are given to assembly, repair, or to making improvements to technical equipment. Form - Physical shape of an object Function - The purpose of an object Prototype - the first version of a model upon which further designs are modeled Trial - a test of performance User - the person who uses the prototype/technology User requirements - the specific needs of the user Students are expected to be able to do the following: Researching ● Engage in research to understand a design issue How do people (in the room/around the world) keep shoes on their feet - how does each method keep the shoe from falling of the user’s foot? Laces/ Velcro/ flip flop thong/ strap around the back/ zipper/ buckle/ stretchy fabric ● Gather information from potential users Why do you use the shoe type you do? Do you use different types for different situations? Strength, speed of release, ease of use, breathability, comfort ● Empathize with potential users to find issues and uncover needs Why would some attachment types be better for some users? Physical ability/ age, Access to materials, comfort, style Now try to tie and untie your shoes without using your thumbs - is it easier or harder? How would it feel if you were not able to tie your own shoes or wear the shoes you like because due to a physical impairment? Identifying a Problem ● Identify a design issue Someone wants to wear laced shoes (sneakers) but can’t tie the laces - age, dexterity, infirmity (pretend their thumbs don’t work to simulate the problem of tying laces) Have students fill out the “Identify Problem” section of their Prototype handout ● Identify key features or potential users requirements, along with criteria for success Imagine an ALS patient who would like to be able to fasten and unfasten their own shoes but they do not have the ability to use their thumbs. What would they need in a device that allowed them to wear tie up shoes? They would need a device that allowed them to tighten a laceable shoe around their foot, and wear it without falling off. It would have to be comfortable and stay tight while the user walked around. They would also have to be able to remove the shoe easily later (i.e duct taping or stapling the shoes closed won’t be good enough). Also should the be fashionable? Have the students fill out the User Requirements section of the handout Concepting / Designing - “You will now take on the role of engineers” ● Generate potential ideas ● Add to others’ ideas ● Screen ideas against the user requirements ● Evaluate personal, social, and environmental impacts and ethical considerations ● Choose an idea to pursue Students should work in small groups of 3-4 discussing options and brainstorm different prototypes that will solve the problem of how to tighten a sneaker around a user's foot without tying the laces. Try to guide students to listen to each others ideas and ask probing questions: Why did you choose __? Why is that important? Have you thought about __? After 10-15 minutes of discussion, bring the students back together and have groups report out on their ideas. Model the questioning process and refining of ideas for the class by asking the same probing questions above. List the potential options on the board that the students may not have thought of such as: Twist ties, buttons, toggles and loops, extra straps, tape, wrapping laces around hooks or buttons, rubber bands, rods through loops (like in pin and barrel hinges) “We will now select two of these ideas to prototype and test” Prototype 1.0: Buttons, Prototype 2.0: Twist ties Have students fill in the materials/ resources section of the Prototype form Prototyping - “You will now take on the role of Technologists” ● Develop a plan that identifies key stages and resources ● Explore and test a variety of materials for effective use ● Construct a first version of the product or a prototype, as appropriate, making changes to tools, materials, and procedures as needed ● Record iterations of prototyping (i.e. 1.0, 1.1, 2.0) Have students select one pair of shoes to test each prototype 1.0 on (leaving its partner laced). Thread a lace in through one hole on your large button and out through another whole allowing the button to slide along the lace with some friction. Thread the other lace through a different button and slide both buttons down the laces to the tops of the shoe and pulling any slack through the buttons, tightening the shoe. Now wrap the slack lace around the buttons (without using your thumbs) until all the slack is tightly bound. Use the second pair of shoes to try out the other prototype 2.0 (leaving its partner laced) use twist ties instead of laces linking the different sides the of the shoe together remembering to twist without using your thumbs. Testing - “You will now take on the role of Technicians” ● Test the first version of the product or the prototype ● Gather peer and/or user and/or expert feedback and inspiration ● Make changes, troubleshoot, and test again Have the student walk around and compare the button laced shoe to a regularly tied up shoe to see if it remains and tight, comfortable. Have students attempt to lace and unlace the both the prototype shoe and a regular knotted shoe without using their thumbs. Have students discuss which prototype worked the best according to the user requirements Have students fill in the testing section of their handout for each prototype Did their prototype solve the problem? If yes how could they refine and improve on their design (prototype 1.1) to improve upon it? Are their more user requirements they could take into consideration? Can they refine their design for efficiency and ease of making? Easy of use, strength of the prototype, expense of material. If no can they go back to the brainstorming design stage to choose a new design to prototype (2.0 or 3.0) to build and test Manufacturing “You are now taking on the role of the technician” ● Identify and use appropriate tools, technologies, and materials for production ● Make a plan for production that includes key stages, and carry it out, making changes as needed ● Use materials in ways that minimize waste Have students discuss are buttons or twist ties the best technology for the job. Are they the cheapest? Easier to use? Is there a way to make these more cheaply/ Recycle? Have students fill in the manufacturing considerations section of the handout Sharing Out of Ideas ● Decide on how and with whom to share their product ● Demonstrate their product ● Explain their process, using appropriate terminology, and provide reasons for their selected solution and modifications ● Reflect on their design thinking and processes ● Evaluate their product against criteria ● Identify how their product contributes to the individual, family, community, and/or environment ● Identify new design issues ● Evaluate their ability to work effectively both as individuals and collaboratively in a group, including their ability to share and maintain an efficient cooperative work space Demonstrate how students could share out their work. Present which prototype worked better according to the user requirements and why. Do either designs need refinements (prototype version 1.1) and are either designs ready to be put into production. Students could share out which prototype they felt was more appropriate for the user and explain their rationale. This could be extended with a marketing/advertising lesson sequence. Applied Technologies Evaluate tools and technologies that are present in their everyday lives Identify how technology use can differ depending on culture, economics, access to resources, and social expectations. An extension activity could look at the materials available to different cultures and the different user requirements engineers may need to look into (show an example of waterbottle shoes used throughout the third world) Students Names____ Prototype version __ Identify the Problem:____ User Requirements Materials/ Resources Concepting/ Designing Prototype Version ___ Testing: Did the prototype solve the problem? Is the design approved for manufacturing?_____ Manufacturing considerations: Lesson 2 Same format but now controlled vs. guided inquiry Accessibility options such as: chopsticks for toddlers, umbrella holder for wheelchairs, etc Or specialized technology for students: Cell phone holder for a bike or skateboard, tools and other technology to personalize their own lives Students could also utilize online 3D design programs like Tinkercad.com, this website is free has lesson sequences the student follow, allowing them to design 3D objects in a virtual space which can be 3D printed (if you have access to this technology).
With this file you will be able to print Shoelace Assist with your 3D printer. Click on the button and save the file on your computer to work, edit or customize your design. You can also find more 3D designs for printers on Shoelace Assist.