Shoelaces Attachment
thingiverse
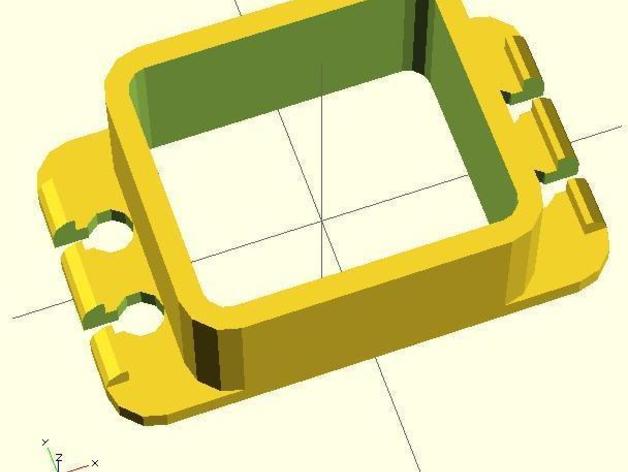
This thing provides a way of easily attaching a packaged electronics device to your shoelaces or various other locations. A large rounded rectagular prism cutout holds the packaged device in the centre, at the base of this there are "arms" that spread out from the central part with cutouts to pass laces over and a sharp egded raised lip to keep them there. This relies on a friction fit to keep the packaged device in place so if you find that yours is too loose you may need to pad it out with tape etc. In this case it was used with the output of the Customisable Electronic Device Packaging script http://www.thingiverse.com/thing:7658 Note: you will need the mouse_ears_test.scad file in the same folder for the mouse ears to compile with this file properly Changes from previous versions: 0.6 reduced tolerance from 0.45-0.3 0.5 Fixed faulty internal breadth calculation to use held_item_b instead of held_item_h New module to handle strange shaped cutouts Corrected lack of $fn variable in rounded_cuboid_2_3 module Reduced overall height (introducing new variable total_h=15) from 30.6-15 Cleaned up code 0.4 reduced tolerance on corners from 0.45-0.1 increased tolerance from 0.3-0.45 used newer implementation of rounded cuboid module 0.3 added mouse ears changed held item dimensions to those of mass produced SLA clear resin WIMUv3 Packaging i.e. 30.6 32.5 38.5 0.2 added cutout_radius variable 0.1 First attempt Instructions Measure the external dimensions of the device to be packaged (length, breadth, height and radius of corners)and some properties of your shoe (lace diameter, minimum width of tongue, distance between adjacent lace crossovers) Open the OpenSCAD script Choose the fit type by commenting in/out the relevant lines e.g. for a hold fit: //clearance= force_fit; clearance= hold_fit; //clearance= slide_fit; //clearance= free_fit; Enter recorded values for your packaged item (held_item_l, held_item_b, held_item_h, held_item_r) Enter values for determining the remaining features of the holder i.e. arm_length cutout_width (make sure this is wide enough to easily pass your lace through) cutout_length (this should be roughly the distance between adjacent lace crossovers) cutout_separation (gap between the adjacent cutouts) cutout_radius (radius of cyliner at end of the cutout, making it larger than cutout_width/2 will make it hold the laces in place better) Choose a strength by setting the wall_t, I used 3mm. Print raftless Remove, clean & test fit device (if too loose add tape etc.) Attach to shoe by placing lengthwise along tongue and passing the bottom lace crossover throguh the cutouts on the toe end and the most conveniently close lace crossovers through the tongue end Check it is held in place well by shaking your foot about insert packaged device and begin testing!
With this file you will be able to print Shoelaces Attachment with your 3D printer. Click on the button and save the file on your computer to work, edit or customize your design. You can also find more 3D designs for printers on Shoelaces Attachment.