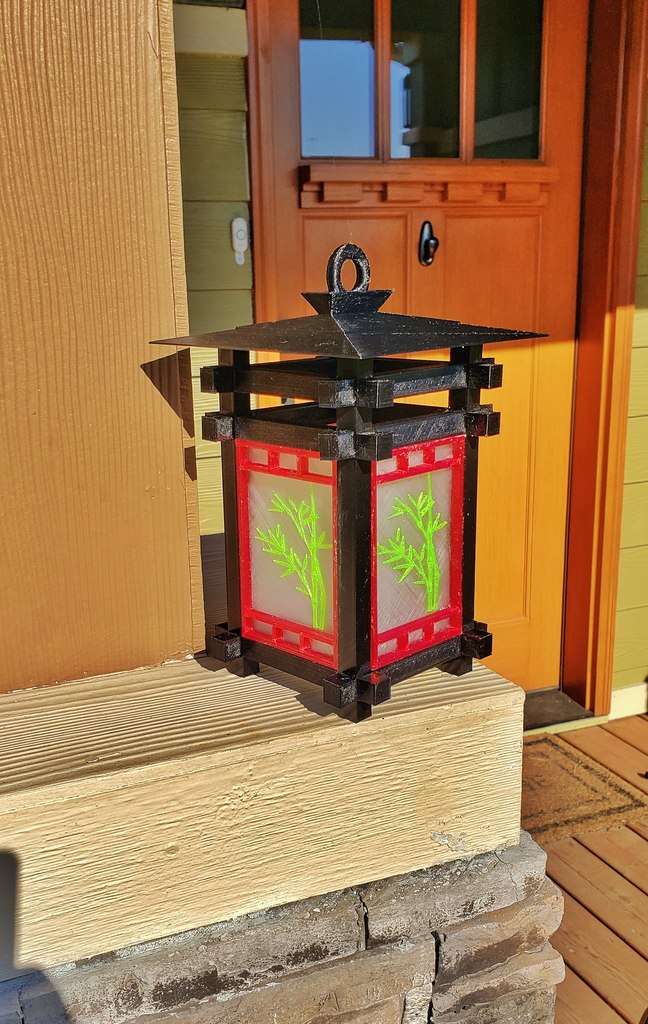
Shoji outdoor lantern
thingiverse
Update 11/15/2020 Redesigned the Shoji top in a real CAD program so it's MANFOLD! yay. Update 10/30/2020 3:08pm My time. I've moved on from tinkercad and I'm learning to use Onshape, I have remade the 3 main files Shoji Beam, Shoji Roll and King Joint. I've made them so they fit together better and look better. More changes coming soon, I've made a different circuit that uses 3 AA battery's and lasts longer and also a different way to make the panels with traditional "Rice paper" for the screens (Looks way better) Update 9/7/2020 7:33pm my time. Just a note about the 18650 battery caps, I have noticed that because of the summer heat the caps can work their way off the 18650 and lose connection, to stop this you can glue the caps to the battery, I used a small N52 magnet on both sides of the batteries to hold them in place. Yeah, I didn't think it would work either but after 3 days it's still good. Update 8/24/2020 7:38pm my time. I changed the solar circuit for a much better one, I included a schematic and photo of how one looks that I made. This circuit gives full brightness to the LED and also had voltage leakage protection. Updates 8/10/2020 8:30am my time. I added a LED diffuser to make the LED shine more around the lamp, I had thought about fully enclosing the inside of the lamp so bugs and spiders can't make a home inside? but I don't know if it's really worth it? after they hang for a year I'll know if I need to make changes?. Updates 7/21/2020 5pm my time. I changed the Shoji top to add a bigger wire chase, the other was for 26ga wire and I want to use bigger wire. I also changed the circuit to add a 4001 Diode, The Diode is to stop voltage leakage through the solar panel. Updates 7/20/2020 8:30am my time. I added end caps for the 18650 cells making it easier to connect the battery to the Solar cell with M3 Ring terminals. it's made for M3 Button head screws, you insert them from the inside of the caps so the threads come out the bottom for the ring terminal to connect. Updates 7/17/2020 8am my time. I needed to add some stuff to the Shoji top, I added a hole for the wire to the LED to go from the ring holder down through to the LED pedestal to make it easy to hide the wire, I also made the socket holes at the bottom a 1/32 larger to make it easier to fit the top of the king joints. I also added a case for the TP4056 to mount where every you like, I'm putting them and the battery on the solar panel or inside the Barn, so this part will change soon I bet, would be nice to have everything in the Lantern but it's so small I don't want to mess up the path of the light showing whats inside at night. 7/15/2020 This is designed from scratch on Tinkercad, Yes I'm lame and Old. I had to make my own because every one of these lamp Designs I've tried either don't fit together or are unfinished, this one will be different. I'm making these lanterns for the front of my barn, they will power with 6v solar and hang from a wooden bracket, LED's for the lights. The LED are 1 watt (Star kind), with TP4056 (the one with charge protection) charging the one 18650 with a 5v/1.2 watt solar panel, I've found after 2 years of testing, this Circuit to be very robust and even in the Oregon winter to still give all night bright light, I've included a photo of the Circuit and full parts. Parts List. I'm sure there are other ways of making a circuit like this but this is what I'm using if you know of anything better? Please let me know. 1 - TP4056 (With Charge protection) 1 - BD140 Transistor (I've seen you can run the LED straight off the TP4056 without BD140 but I haven't tested it yet) 1 - LED of your choosing I use a 1 watt on a heat sink board (added a model of the Star Led so you can see what I'm talking about) 1 - 18650 Li-on Battery 1 - 18650 Battery holder 2 - M3 button head machine screws 4 - M3 Nuts 2 - M3 washers 1 - 1n4001 Diode Hook-up wire (the Circuit is very simple and if you have a soldering iron you can do this) Dimensions for the full lantern are 5 inches wide by 5 inches deep and 7.5 inches tall. I've been making these out of wood but wanted to try something on the 3D printer. I'm making the art panels next and can be covered in birch paper on the back and weather-sealed for Oregon rain, but I'm going to 3D Print everything, the panels will require a color change after the first 2 layers of clear PETG, then I change to clear green for the Bamboo. The Art panels are made by printing the frame, gluing the panel with the design. I will update this and add other pieces as I get them completed, Please be nice, I'm an old woodworker and I'm learning how to use the interactive TV (Laptop), If you have any questions that I can answer I will try, but I'm NOT an expert in 3D printing or Electronics, this project (2 years testing) has been a labor of love for the art of Japanese style and function, and I hope to add something that can be enjoyed by all.
With this file you will be able to print Shoji outdoor lantern with your 3D printer. Click on the button and save the file on your computer to work, edit or customize your design. You can also find more 3D designs for printers on Shoji outdoor lantern.