Sidewinder X1 V4 Hemera Mount
thingiverse
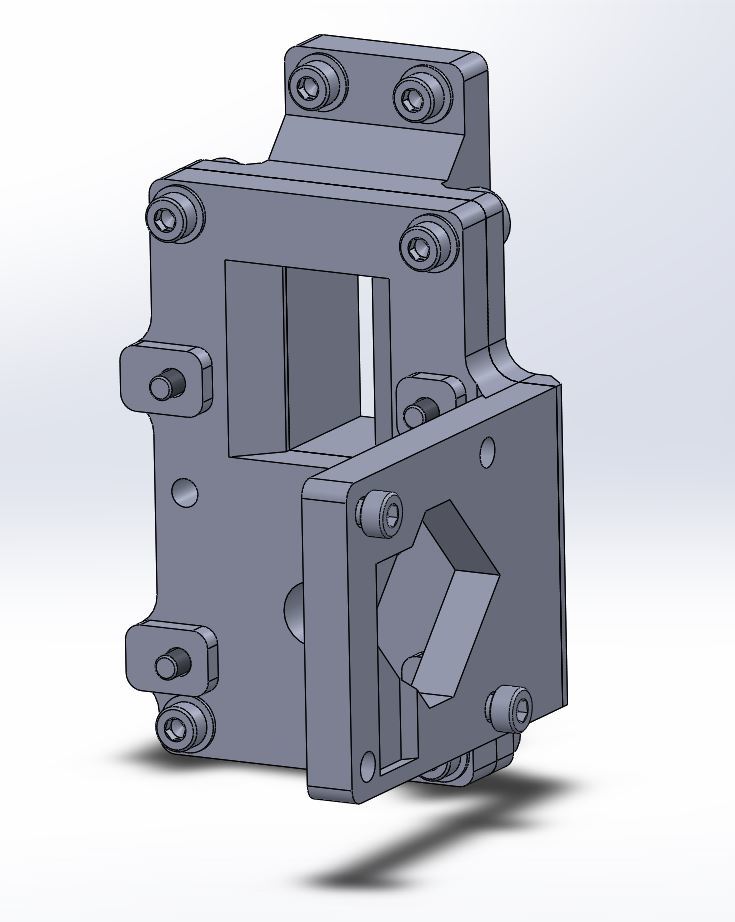
Hemera mount for a Sidewinder X1 - there's a specific assembly order. Uses Pem inserts into the plastic in 8 locations (see *pems pic): - PemLabel00 is from a batch I bought years back. - Use a 4mm drill to clean out where the Pem goes, about 1-2mm deep. - Use a straight soldering iron to *gently* sink the Pem into the plastic until it's flush. - Use a long 3mm screw to make sure the Pem is straight. Use the soldering iron to adjust things. - Clean out the plastic from the path for the screw. 00, 01, 02: Using M3-12mm socket head screws with washers (double on the bottom screw), attach the bottom section to the carriage. motors: Note the surfaces that will mate to the Hemera. 03, 04: Mount the Hemera per the instructions. 05, 06: Mount the top assembly to the base. 07: Mount the PCB to the top. NOTE I've noticed that the heater connector on the PCB gets badly munched when you're not careful doing the disconnect. Found that it's best to pull the PCB straight away from the heater in order to minimize internal mangling of the connector. Note that if you're using the original PCB it'll be very close to the bed, and the ribbon cable will be angled down to the point that it rubs against the drive belt when the carriage is near the right side of the bed.
With this file you will be able to print Sidewinder X1 V4 Hemera Mount with your 3D printer. Click on the button and save the file on your computer to work, edit or customize your design. You can also find more 3D designs for printers on Sidewinder X1 V4 Hemera Mount.