Sidewinder X1 Y-Linear Mount (non-invasive)
thingiverse
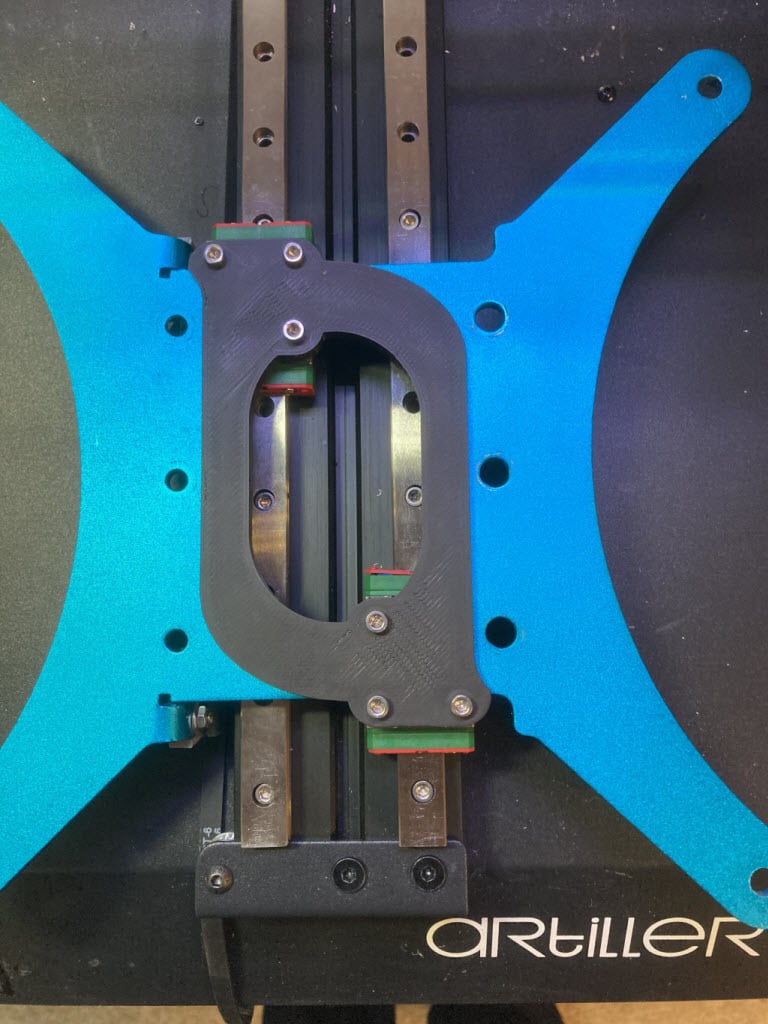
Simple, non-invasive Y linear solution - no drilling necessary. You can go back on the wheels at any time. Requirements: - 2 linear guides MGN12H - 450 mm (left) and 400 mm (right) - A lot of screws M3 x 8 (for linear guides and carriage mount) - 2 screws M3 x 12 (for belt tensioner) - 1 screw M3 x 24 (for end stop leveler) Printing recommendation... Carriage-Mount & Belt-Tensioner: - Filament Extrudr GreenTEC Pro (stable > 150°C, due to close to heat bed) - 0.2 mm Layer - Infill 60-80% Endstop-Leveler: - PLA (I used PLA+) Mount: - Remove V-Slot wheels and belt - Mount Belt-Tensioner to the carriage (Inside, not outside as in the picture!!!) - Place and fix the left linear guide - Place right linear guide (not fix) - Place the carriage on the llinear guides - Place and fix the Carriage-Mount - Move the carriage and fix the right linear guide step by step (watch for a good slide) - Mount the belt - Mount the Endstop-Leveler - Important: After mount you have to adjust the Z-Endstop (use a slot-nut)!!! The bed will be a few mm higher than before, can be more or less - depending on used bed springing! Btw: - I'm still searching for a better Belt-Tensioner solution...
With this file you will be able to print Sidewinder X1 Y-Linear Mount (non-invasive) with your 3D printer. Click on the button and save the file on your computer to work, edit or customize your design. You can also find more 3D designs for printers on Sidewinder X1 Y-Linear Mount (non-invasive).