Sieg SC4 Front Panel
thingiverse
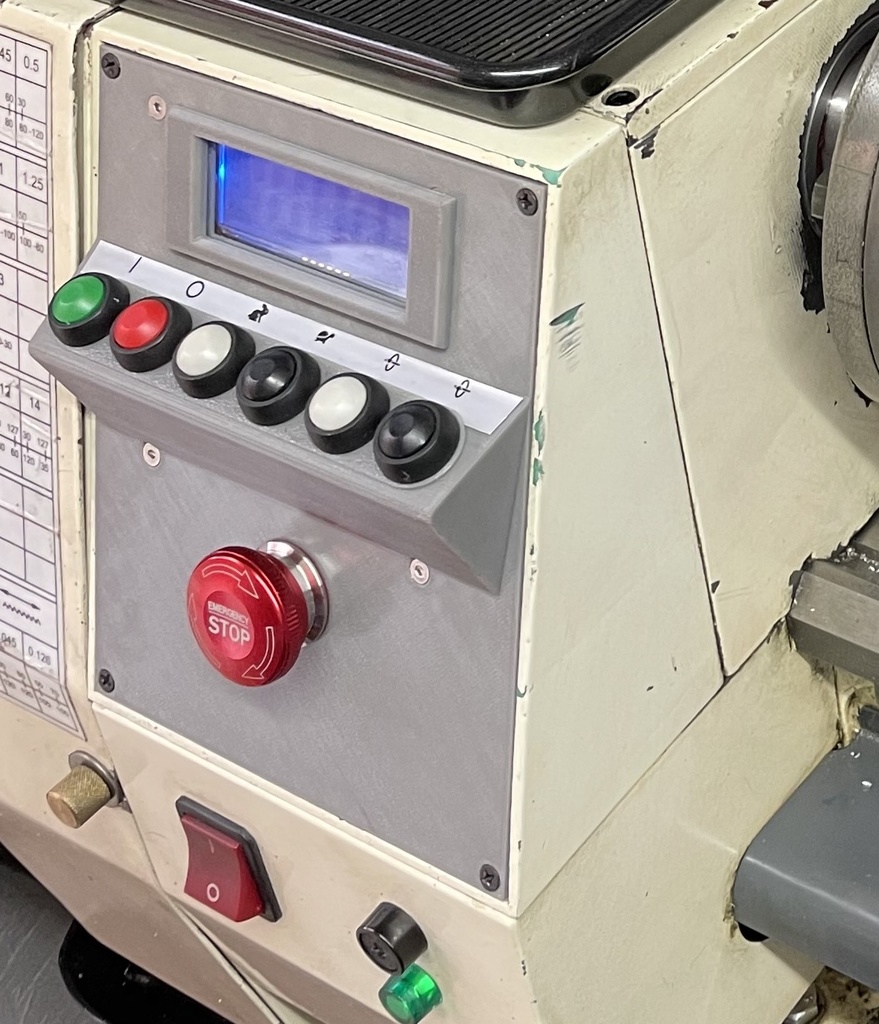
New front panel for the Sieg SC4 bench lathe, that uses physical buttons rather than the membrane keys it has as stock. This modification requires the removal of the selector mechanism that allows the spindle to be stopped whilst the lead screw is still powered. This is for the optional milling attachment that can be fitted to this lathe; I don't have one nor need one - so I removed it. In doing so it leaves a hole from the front electrical box to the interior of the headstock - the plug STL is fill this opening to prevent any dirt or oil from getting into the front. The front paned has three parts - the main panel, a spacer for the buttons and a bezel. It should be fairly obvious what and where these parts go, but check the post printing for the assembly order. The buttons used are these: https://www.amazon.co.uk/gp/product/B083K2821B/ref=ppx_yo_dt_b_asin_title_o01_s00?ie=UTF8&psc=1 And the emergency stop is this one: https://www.amazon.co.uk/gp/product/B094FBG1MB/ref=ppx_yo_dt_b_asin_title_o02_s00?ie=UTF8&psc=1 Please be aware that if you do this modification, you will be dealing with MAINS VOLTAGE when wiring up the emergency stop - YOU DO SO AT YOUR OWN RISK. Equally, removing the selector fork requires modifications to the lathe and the input shaft to prevent the gear from moving. The final file is an SVG of the button legends I used. Print out on an oil resistant label.
With this file you will be able to print Sieg SC4 Front Panel with your 3D printer. Click on the button and save the file on your computer to work, edit or customize your design. You can also find more 3D designs for printers on Sieg SC4 Front Panel.