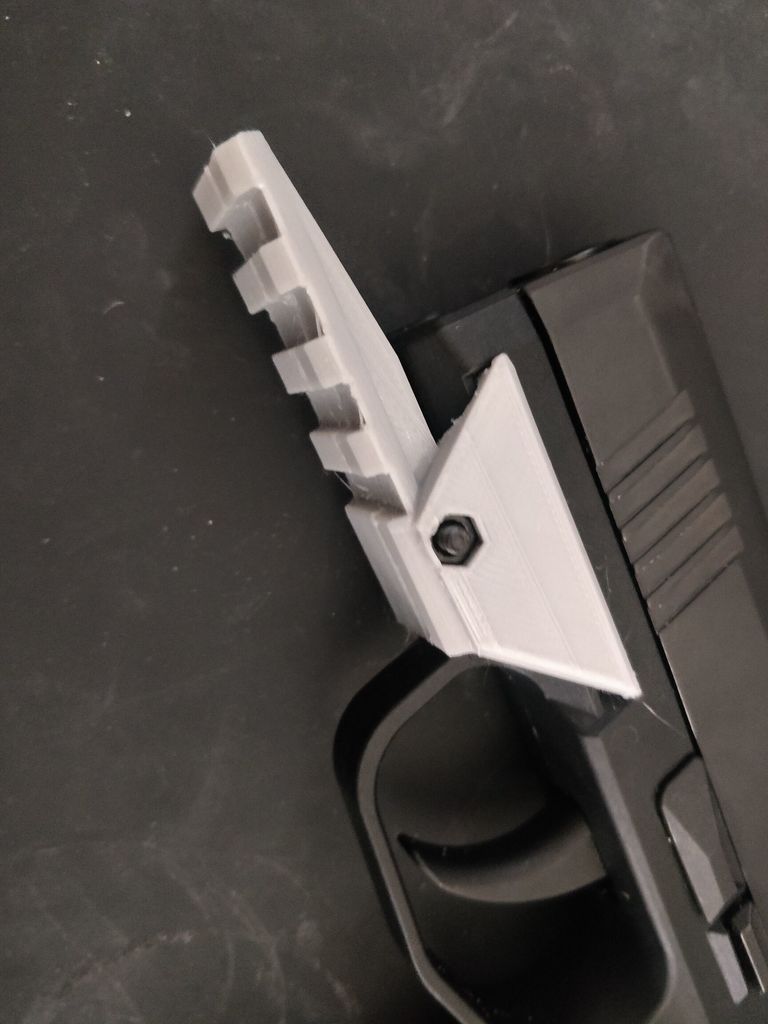
SIG Sauer P365 Rail to Picatinny Rail converter
thingiverse
Wanted to mount a Picatinny-based laser on my P365 so I made this :) Requires a M3x30 bolt and either a M3x8x5mm threaded insert or a M3 hex nut (may have to melt them into the plastic to get a tight fit. In your slicer (I used Ultimaker Cura) rotate the P365 rail is parallel with the build plate. The edge that touches the other side piece should be flat against the build plate. See assets for a screenshot. - Printed with these settings: - 90% infill, gyroid pattern (I want it sturdy) - 2 wall count (could probably use 1, again, want this durable) - Layer height 0.12mm - Support 50% density, 35% overhand angle. - Raft (I just find it easier to remove supports while using a raft) - ABS (Could easily use PLA, but was concerned by gun/muzzle/outside heat so opted for ABS instead) Prints in around 5 hours, 6 minutes. 15g/5.71m of ABS.
With this file you will be able to print SIG Sauer P365 Rail to Picatinny Rail converter with your 3D printer. Click on the button and save the file on your computer to work, edit or customize your design. You can also find more 3D designs for printers on SIG Sauer P365 Rail to Picatinny Rail converter.