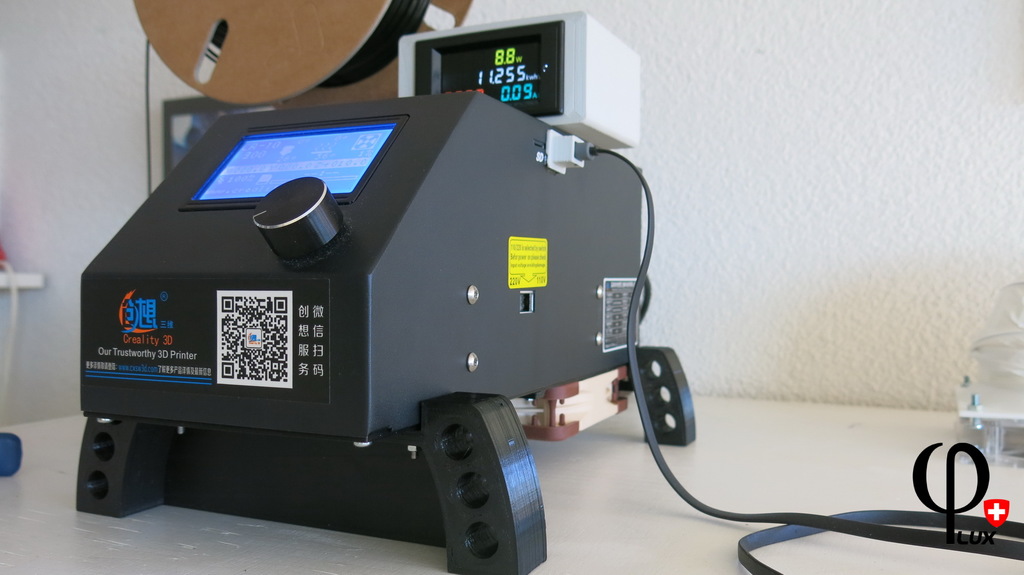
Silent CR-10 control box with one 120mm fan
thingiverse
Another cooling solution with one big fan in the bottom. It's designed for my needs, featuring two options for printing. Most designs I saw are equipped with two 120mm fans, which I believe is overkill and produces double the noise of a single fan. Probably most people have already replaced the smaller fans next to the mainboard with more silent alternatives. Keeping them in operation is beneficial because their noise is minimal. The problem lies in the loud fan within the PSU. Replacing it with another 60mm fan would be pointless. Here are my initial considerations: • I didn't want to cut or drill into the enclosure. This design requires only removing the bottom and replacing it with a printed one. • I've chosen to leave the two smaller fans operating, as they produce minimal noise. With the new big fan in place, it's likely unnecessary to keep them running. • The bottom side of the PSU remains intact, serving as part of the heatsink and EMI shield. • I've also decided not to remove the power supply fan, as it is temperature-controlled and won't turn on due to improved cooling. However, you can remove the grid in the PSU-bottom for enhanced airflow. Regarding my design: • It's been designed with print-friendliness in mind, allowing you to print the bottom in one or two parts as desired. • The thin wall between the front legs should separate suction airflow from warmer exhaust air behind it. • The speed of the Noctua fan operates at a low-noise mode. If you remove the other two smaller fans, you can try running the Noctua fan at full speed. I haven't compared temperatures before and after the modification, but I've noticed a significant improvement in airflow. You're free to conduct your own measurements and share your experience here. Mounting: I purchased a Noctua NF-S12A FLX Fan and used the enclosed 4-pin adapter cable to connect it to the mainboard's 12V power source. Later, you can plug in the fan cable as needed. Mount the fan using rubber mounts on the rear bottom part, with airflow directed towards the outside. The cable should be routed through a recess to the inner side. Next, plug in the fan cable and attach the rear bottom part and rear foot, requiring some longer M3 screws. Mount the front foot onto the bottom part and assemble the entire unit. In the middle, connect both parts using two small screws. After several hours of printing, the noisy PSU fan remained off, and my system is now pleasantly silent. A short video showcasing this modification can be found here: https://youtu.be/mYvFE_qiJO0
With this file you will be able to print Silent CR-10 control box with one 120mm fan with your 3D printer. Click on the button and save the file on your computer to work, edit or customize your design. You can also find more 3D designs for printers on Silent CR-10 control box with one 120mm fan.
