Simple Anti-Z-Wobble Lead Nut
thingiverse
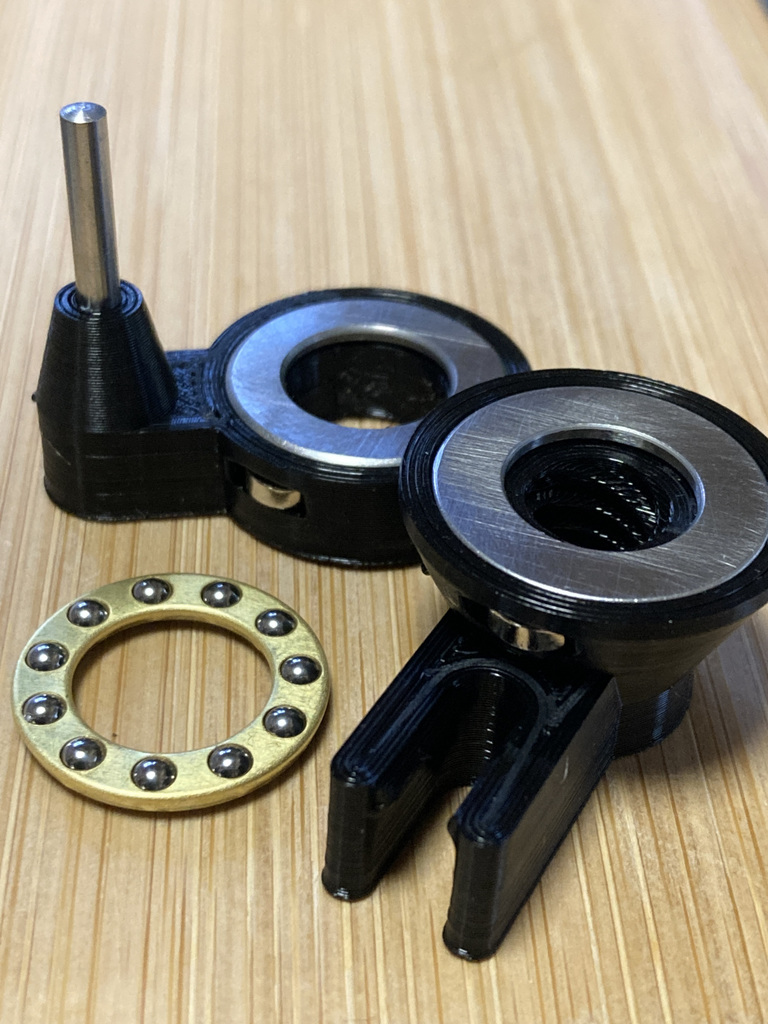
This is a flat ball bearing based Anti-Z-Wobble lead nut. Which is simple, and prevents or reduces wobble on printing very well. And easy to make!  ## BOM * F12-21M thrust ball bearing : 1 pc * 3mm x 30mm (D x L) metal rod : 1 pc * 6.35mm x 2mm or 6mm x 3mm (D x H) magnet : 2 pcs * M3 Nut : 4 pcs note: A thrust ball bearing contains : 1x Ball Retainer and 2x Ball Races.  ## Making flat ball bearing (also named free ball bearing) A flat ball bearing can move freely within a movable range on a plane. In this project, to make a flat ball bearing, modify a thrust ball bearing. A thrust bearing only rotates around the center axis because it has two guide grooved ball races. To make a flat ball bearing, flip the ball races over, the flat side contact with the balls. That's all.  ## Magnet insert There are two magnet inserts. The inserted magnets help keep the bearing. It also works without magnets. In this case, carefully install to the 3D printer because M3 nuts easily fall off.  ## Printing and Material Requires infill 100% in printing. PET (including PETG), PA and POM are low friction coefficient materials. For this model, PETG is strongly recommended because it has high printing accuracy by low shrinkage and is extremely wear-resistant. PA is also recommended but scaling is needed due to high shrinkage and needs careful printing accuracy. POM is not recommended due to it being difficult to print and is too expensive than PETG. ABS and PLA are not recommended due to the highly friction coefficient. ## Install 1. Insert the steel rod into the printed upper body. If you have difficulty inserting the rod, drilling 3mm first. 2. Insert the magnets into the printed upper and lower body. If the fitting is so tight, trim the body. 3. Insert the M3 nuts if you needed. 4. Place the ball races and the ball retainer. 5. Replace an old lead nut on the 3D printer to this one. note: Be careful M3 screw length below.  ## Can I use Z hop? Yes, working well. No problems.
With this file you will be able to print Simple Anti-Z-Wobble Lead Nut with your 3D printer. Click on the button and save the file on your computer to work, edit or customize your design. You can also find more 3D designs for printers on Simple Anti-Z-Wobble Lead Nut.