Simple cross cut sled for Harbor Freight table saw
thingiverse
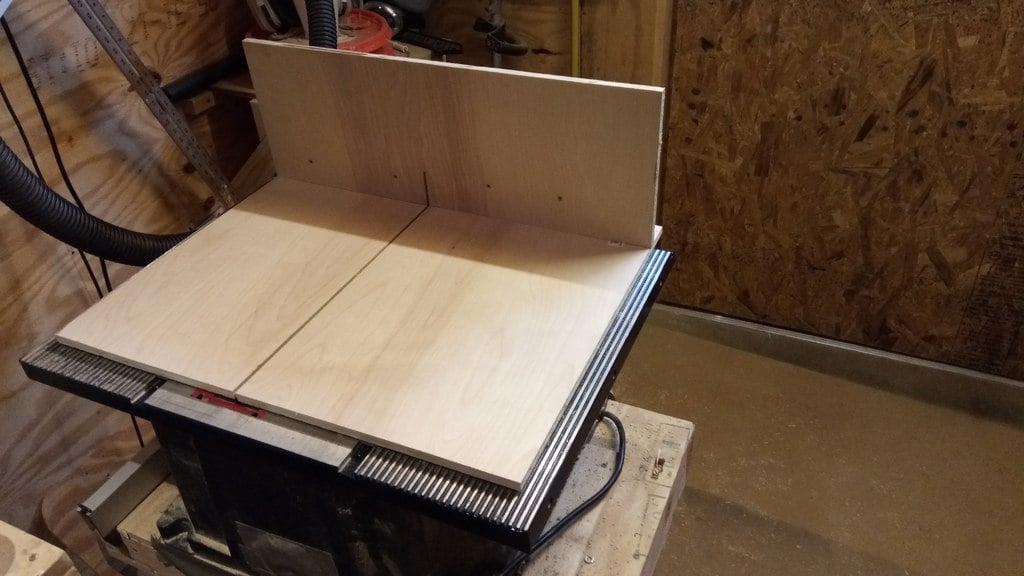
I knew I needed a cross-cut sled, but until I built this one, I didn't realize just how great it is. I can now make straight, perfectly square cuts with a precision I could never achieve before (my woodworking skills are crude at best). I saw some designs online using wood rails, but it seemed like a lot of time was invested into making precise rails and I wasn't sure I had the skills to obtain a good result (did I mention my woodworking skills?). I figured that making precise parts is a perfect job for a 3D printer. My sled uses two pieces of 2-ft wide birch plywood, one for the base (length should be about the length of the table saw table and an 8-9 inch one for the fence. The fence is supported by a piece of 2x4. If you think you'll need cuts taller than 3.5 inches, you could go to a 2x6 instead. The sled is sized for my needs and my Harbor Freight table saw, but easily adapted to other makes/models. *I include the OpenScad file for easy customization* . The rails are 200mm long. I printed 4 total to achieve 400mm rails. I rotated the rails 45 degrees so they would fit easier on my printer bed. ##Additional parts/tools needed - 2 ft. x 2 ft x 1/2 inch birch plywood from your local lumber supplier - Small brass wood screws ( about 1/2 inch) - Wood glue - Table saw (duh!) ##Assembly: Before doing anything, I suggest printing a short length of rail to ensure if slides freely in the table saw slots. If not, you can make small adjustments in the OpenSCAD file, or scale in your slicer. The tricky part is getting everything to line up. Also, to achieve a perfect 90 degree angle, you want to line up the fence using a reference cut. Using the right order to build this ensures that everything lines up properly: 1. Cut your wood. A 2x2 piece of birch plywood should be enough for the fence and base of the sled, or use a bigger piece to achieve your desired dimensions. Cut a piece for the base and a piece for the fence. Also cut a length of 2x4 (or 2x6) approximately the same width as the sled. 2. Place the rails on the table saw bed. Carefully line them up with the back of the saw to get a longer working range. Squirt some wood glue on the rails. The glue is only meant to help keep everything together and lined up during assembly. 3. Very carefully place the sled base on the rails, making sure everything stays aligned and that the base is square and centered with the table saw bed, The base should be aligned with the back of the saw and the rails.. Place some weight on the base and give it a good hour or so to dry. 4. Once the glue has dried, carefully flip the base over and drive some screws to firmly attach the rails. You may want to drill pilot holes first to make sure the screws are centered and won't end up moving the rails when you drive them. 5. Flip the sled over and place it on the slots. Make sure it slides freely on the slots. If not, try cleaning the slots and spraying some silicone lube. If all fails, you may want to sand down the rails some (don't overdo it or you'll end up with too much wobble). 6. Raise the blade and make a cut to about 3/4 of the length of the sled base to use as a reference for squareness when attaching the fence. 7. Squirt some wood glue on the piece of 2x4 (or 2x6) and place it on the base. Use the reference cut you just made to check for squareness, then clamp (and check for squareness again, tapping into position as necessary). Let the glue dry. Drive pilot holes through the back, countersink, then drive some long construction screws through to attach the stud firmly to the base. 8. Use wood glue to attach the fence part of the sled to the support stud. Clamp, then drive some screws (again, countersink to make sure everything is flush). 9. Place the sled on the table saw, raise the blade as high as you are likely to use (but make sure you don't cut through the full width of the support stud), and finish the cut through the full length of the sled.
With this file you will be able to print Simple cross cut sled for Harbor Freight table saw with your 3D printer. Click on the button and save the file on your computer to work, edit or customize your design. You can also find more 3D designs for printers on Simple cross cut sled for Harbor Freight table saw.