Simple Delta 3D Printer Enclosure
thingiverse
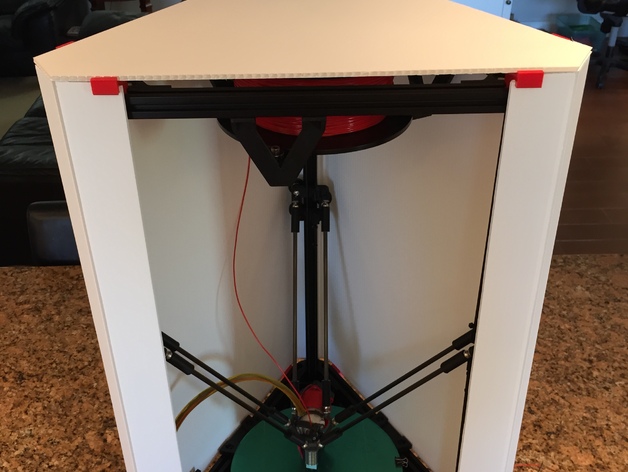
Simple Delta 3D Printer Enclosure This design uses common components from Home Depot or similar. Notches are cut out in the plastic and acrylic sheet to secure the sheeting in place. A roll of 2" nylon tape can be used to seal up the enclosure. A Dremel was used to cut notches in the acrylic sheet. Each sheet flexes into place and is held together by notches and tape. Use a box cutter or similar and cut through only one side of each corrugated chamber. The sheet easily bends to form the enclosure. Simple & inexpensive solution! Note: this design is intended for 2020 extrusion. BOM Twinwall Plastic Sheet 72" x 36" (Home Depot 527147) Optix Acrylic Sheet 20" x 36" (Home Depot 202089) Top Front Mount (x2) Top Mount (x4) Bottom Front Mount (x2) Bottom Mount (x4) M5x16 SHCS (x8) M5x20 SHCS (x4) T Nut (x12) or Post Assembly Spring Nut (x12) Future improvements include extending the front panel by 20mm so a notch is formed similar to the sides.
With this file you will be able to print Simple Delta 3D Printer Enclosure with your 3D printer. Click on the button and save the file on your computer to work, edit or customize your design. You can also find more 3D designs for printers on Simple Delta 3D Printer Enclosure.