Simple Door Lock - 3D-Printing and Arduino Project
thingiverse
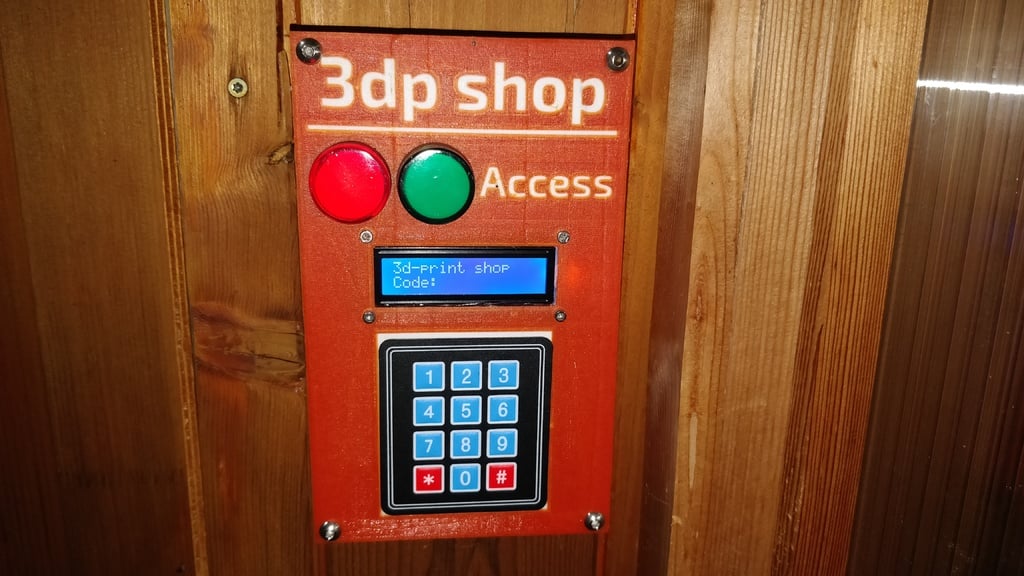
#Smart Door Lock - A Cutting-Edge 3D Printing and Arduino Project This door lock is a sophisticated solution for securing the entrance to the 3D printing workshop (a common issue seen in many shops). The previous electric lock installation failed due to controller issues. The project consists of two primary components: the outdoor **door terminal** and the indoor **electronics housing**. I employed an Arduino Uno as the control unit, but other boards can also be used. Please watch the accompanying video for additional details on this innovative project. **Important Note** For now, I only share the dual-color outer terminal cover design. The multi-colored model for single-extruder machines is still under development. ###BOM These are the components I utilized: **Electronics** - 1x Arduino Uno - 1x LCD 1602 with I2C adapter - 1x 1A fuse with DIN-rail holder - 1x door lock 12v - 1x PSU 12V 10A (to be mounted externally) - 1x Indicator Red 12V - 1x Indicator Green 12V - 2x 5V Relay Module **Printed Parts** - Electronics housing base - Electronics housing cover - Door terminal base - Door terminal cover **Miscellaneous** - Pinheads and sockets or DuPont connectors - 0.14 and 0.25mm wires - Ferrules for screwed wire connections ###Printed Components The printed components in this project are the outside terminal and the inner housing. The DIN rail and holders for the inner enclosure are not included. Here are links to the mentioned parts: - DIN rail: print one of the many available designs - Arduino Holder:https://www.thingiverse.com/thing:500504 - Relay Holder: https://www.thingiverse.com/thing:3001457 The inner housing can be printed in PLA, while the **outer enclosure** requires printing with a more durable material like PETG or ABS to avoid bending or melting. ###Assembly Assemble the project carefully, as it may take longer than expected. 1. Print all parts and prepare everything 2. Connect the 5V components according to the schematics (blue wires). Use DuPont connectors or solder the wires to pinheads and sockets. 3. Test the system. Don't forget to upload the firmware (see below). 4. If everything works fine, proceed with the 12V part (black in the schematics). Connect the Arduino's power supply using a PSU and test it out. 5. Inspect your circuit for safety and make any necessary adjustments. Then, supply 12V using a PSU and test it out again. 6. Once it's working correctly, remove all power and start installing it into the cases. You may need to disassemble some parts. 7. Apply silicone to protect the LCD screen from water. If you encounter any issues or have questions, please comment below.
With this file you will be able to print Simple Door Lock - 3D-Printing and Arduino Project with your 3D printer. Click on the button and save the file on your computer to work, edit or customize your design. You can also find more 3D designs for printers on Simple Door Lock - 3D-Printing and Arduino Project.