Simple Ender 3 Auto Bed Level
thingiverse
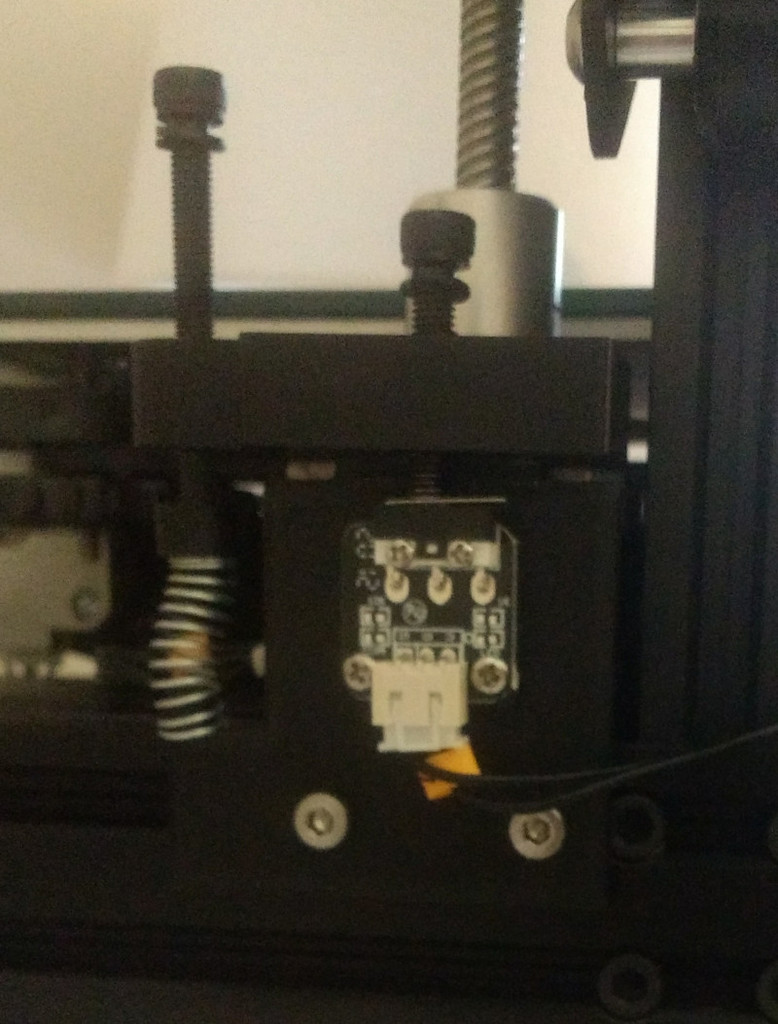
This is an auto bed leveling system I designed for my Creality Ender 3 V2 I was inspired to make this by this Teaching Tech video: https://www.youtube.com/watch?v=hs6IVfNrf5k It also contains great information on how to set up the firmware to make this mod work. Theory of operation: When the nozzle contacts the bed, the weight carried by the Z axis motor will be reduced lifting it, which will cause the limit switch to be released. A counter balance spring is used to reduce the pressure of the nozzle to bed contact. Two adjustment screws allow the counter balance and switch activation to be tuned. Firmware changes are required! Parts Needed: 5x46mm cap screw (1) 5x24mm cap screw (1) 23/64" x 1-3/8" extension spring (1) After printing the parts: The side plate to motor mount fitment may need sanded/filed as the tolerances are tight to prevent motor rotational movement. These parts must slide freely to allow switch to be actuated properly. It is a good idea to apply some silicon grease to this slide. The factory harness for the Z-axis limit switch is wired for normally closed, it needs to be changed to normally open. This is accomplished by removing the contact from the right side of the connector (when looking at it as it would be plugged into the switch) and inserting into the middle. (from "V" to "G") I used a small screw driver to depress the locking tab and pull it out of the factory connector and then insert it into the new location. Assembly: Threaded the cap screws into the top of the motor mount. The short one will go above the switch. I got my screws as extra parts left from assembling the 3d printer. Then remove the factory Z-axis limit switch and motor mount. Install the new motor mount with the factory screws. Remove the limit switch from the factory mount and install it onto the new side plate with the factory screws. Install the side plate onto the bottom rail with the t-bolts that come from the original mount. Place the spring cap onto the spring and depress it to install it under the long screw. The spring I used came from this pack: https://www.harborfreight.com/200-piece-assorted-spring-set-67562.html?utm_source=go&utm_medium=social&utm_campaign=shortener&cid=go_social Update the firmware to use the nozzle as a probe. See Teaching Tech video. Tuning: Started with the spring tightened down to reduce the weight of the nozzle. You can check this by lifting up on it slightly. The easiest way to tune the screws is while the printer is leveling the bed. The switch action needs to be consistent to get the bed leveled accurately. Enjoy! (Not affiliated with or endorsed by Teaching Tech)
With this file you will be able to print Simple Ender 3 Auto Bed Level with your 3D printer. Click on the button and save the file on your computer to work, edit or customize your design. You can also find more 3D designs for printers on Simple Ender 3 Auto Bed Level.