Simple Ender 3 mod for 3-point tramming
thingiverse
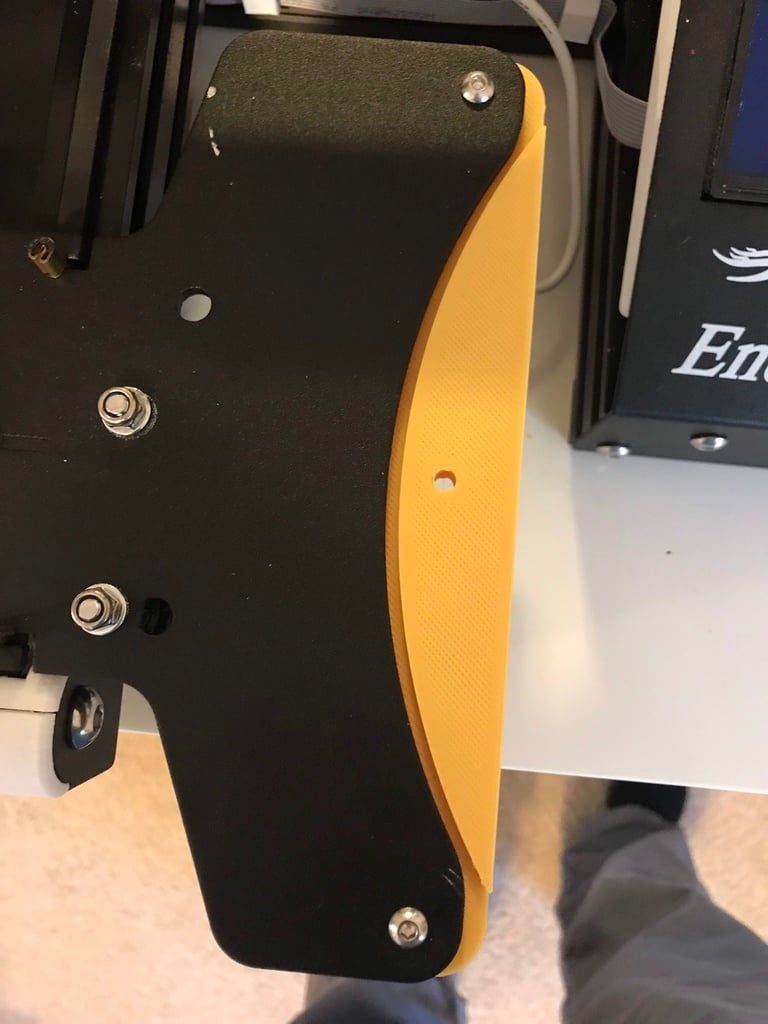
This converts the Ender 3 bed mount from four points to three, which makes tramming much less frustrating, more accurate, and eliminates any risk of warping the bed. Basic kinematics: three points are guaranteed to be in one plane, but it's hard to get four points in a plane. After removing the existing leveling wheels/springs/screws, attach this plate to the carriage as shown using some M4-0.7x16mm bolts and nuts on the bottom. I've left plenty of wiggle room, so even if your printer isn't well calibrated you should have no trouble printing this thing. You'll need to drill an extra hole in your bed. You can do this with the heater power and thermistor cables still attached (with printer power disconnected, of course). Be very careful not to drill through the heater traces on the bottom of the bed. If you look closely you'll see that there is a section with no traces between the existing holes. To ensure the hole you drill aligns, first attach the printed part temporarily with M4 nuts and bolts. Then use the printed part to align your drill with a 4mm bit. Make just a light mark with your drill, take off the part and ensure you aren't going to drill through a trace. Then drill all the way through the bed (use a scrap of wood or aluminum as backing) being sure to keep your drill square to the surface. After drilling through, you'll need to countersink/chamfer the hole on top with a 90 degree countersinking bit. Test with one of the original leveling bolts to ensure the head will remain below the surface of the bed. Then just reattach three of the leveling wheels with one left over. Now, tramming ("leveling") is a breeze: 1. Crank all three knobs fairly tight to ensure you've room to move the head. 2. Auto home the head to get to 0 on all three axes. 3. Disable the steppers. 4. Move the hot end and table (X and Y) until the hot end is roughly over the left rear knob (leave Z at zero). 5. Use a piece of paper or shim stock and adjust the left rear until it's just touching. 6. Now move the table in Y until the hot end is over the left front knob. 7. Now adjust the pitch of the table using the left front knob until the paper again just touches. 8. Now move the hot end to the right in X until it's in line with the right knob (you can move the table, too, but it's not necessary). 9. Adjust the roll of the table with the final knob, again until the paper just touches. 10. Double check all three locations until you just feel a slight resistance with the paper (printer paper is just under 0.1 mm in thickness). With about a 3" scrap of paper you want enough tension on the paper that you feel the pressure, but you should still be able to "push" the scrap under the head. Unless things get knocked around for some reason, it's unlikely you'll have to re-tram any time soon. If you do, you should normally only have to adjust the front left (pitch) and right (roll) knobs. Yaw is permanently taken care of by the bolted together aluminum extrusions.
With this file you will be able to print Simple Ender 3 mod for 3-point tramming with your 3D printer. Click on the button and save the file on your computer to work, edit or customize your design. You can also find more 3D designs for printers on Simple Ender 3 mod for 3-point tramming.