Simple Robo R2 E3D Adapter
thingiverse
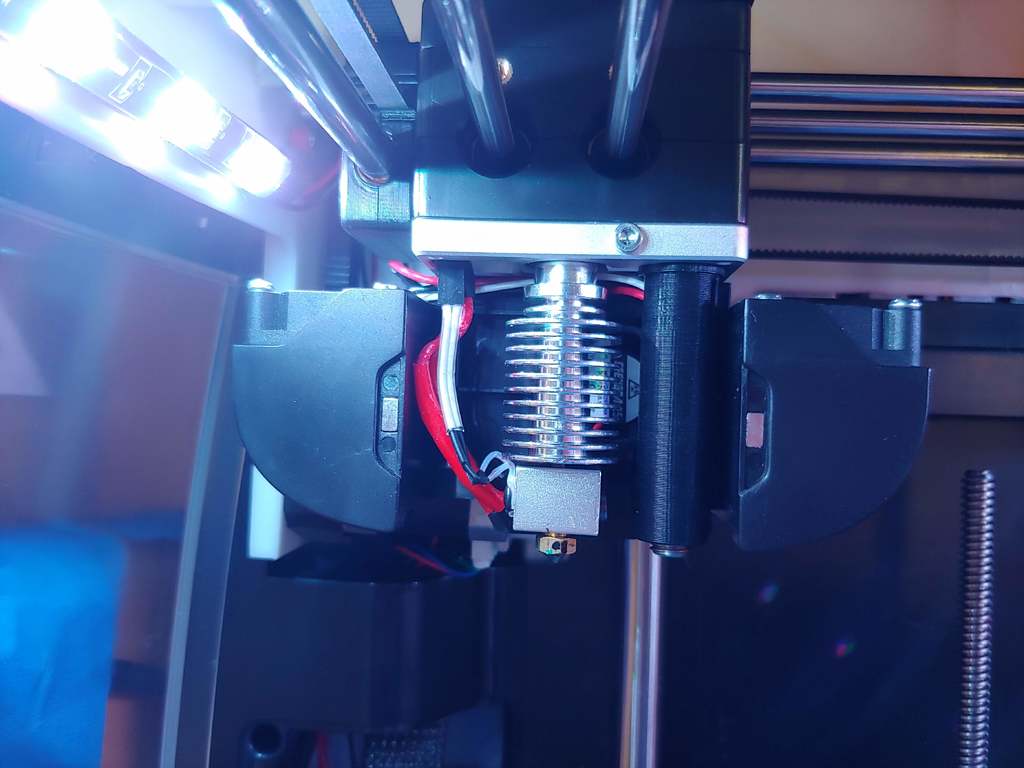
This simple mod lets an E3D V6 fit into a Robo R2 3d printer. To do this, you'll need M3 screws that are 6mm longer than the originals. This part goes between the stock fan shroud and the carriage of your printer. Here's how to install it: 1) Remove the fan shroud by taking out the two long screws on the bottom. 2) Find or buy M3 screws that are at least 6mm longer than the ones you're replacing. 3) Swap out the short screws for the new ones, then insert the printed part between the fan shroud and the carriage. One more thing to check: make sure your first layer print height is set correctly. This mod might affect it slightly.
With this file you will be able to print Simple Robo R2 E3D Adapter with your 3D printer. Click on the button and save the file on your computer to work, edit or customize your design. You can also find more 3D designs for printers on Simple Robo R2 E3D Adapter.